Introduction
Are you looking to make a bold statement this Halloween with your nails but can’t seem to find the perfect design that combines spooky and stylish? Black Halloween nails are the go-to trend that never goes out of style. Whether you’re attending a Halloween party or just getting into the spooky spirit, black nails can add a touch of sophistication while embracing the eerie essence of the season. From minimalist chic to intricate gothic patterns, we’ve compiled a list of 20 black Halloween nails designs that will give your nails the ultimate spooky flair.
Table of Contents
Cute Black Halloween Nails Ideas
1. Wicked Witch Tips
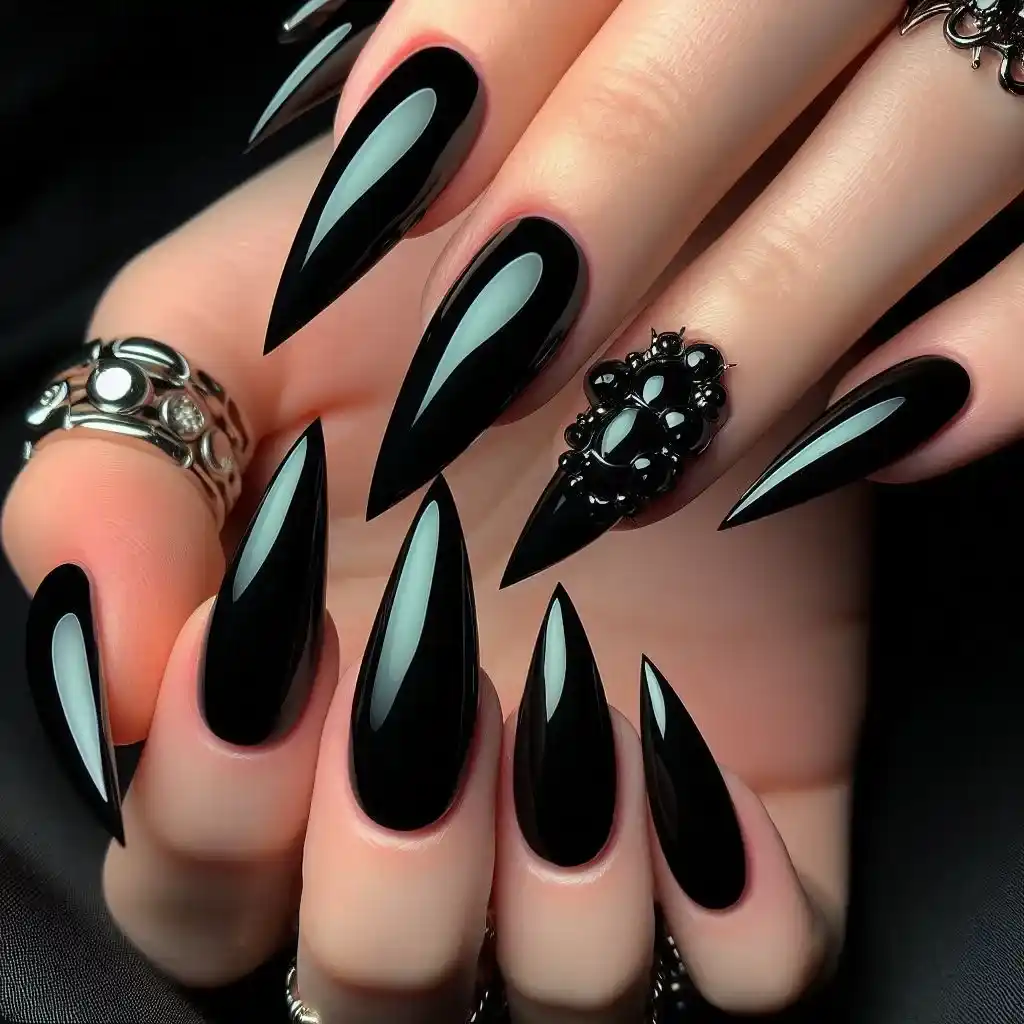
Inspired by the classic image of a witch’s long, black nails, this design focuses on sharp tips with a high-gloss black finish. It’s simple yet striking, perfect for anyone channeling their inner wickedness this Halloween.
To make design:
- Start by trimming your nails into a pointy shape.
- Apply a clear base coat to protect your nails.
- Once the base is dry, paint all your nails with a shiny black nail polish.
- Let the polish dry fully, then add a second layer for extra gloss.
- Finish with a top coat to seal the look.
2. Spider Web Glam
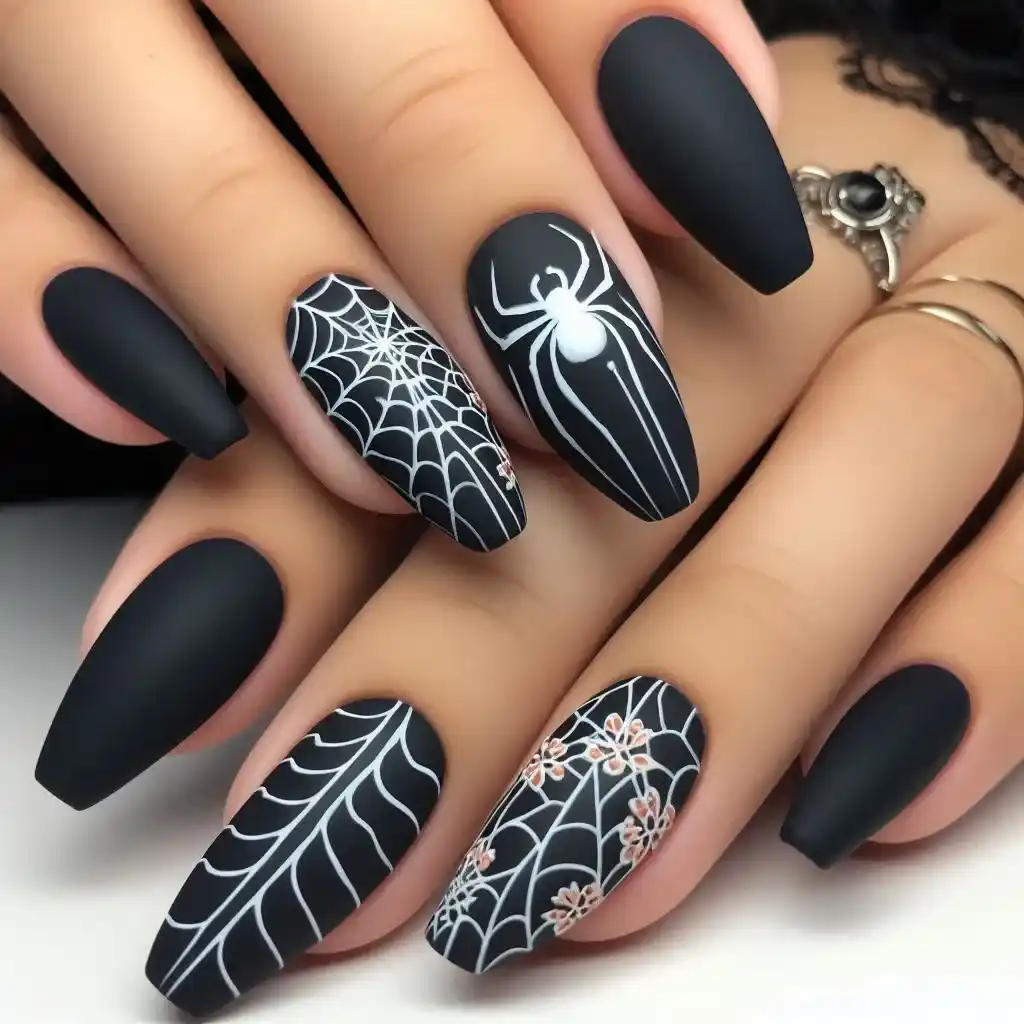
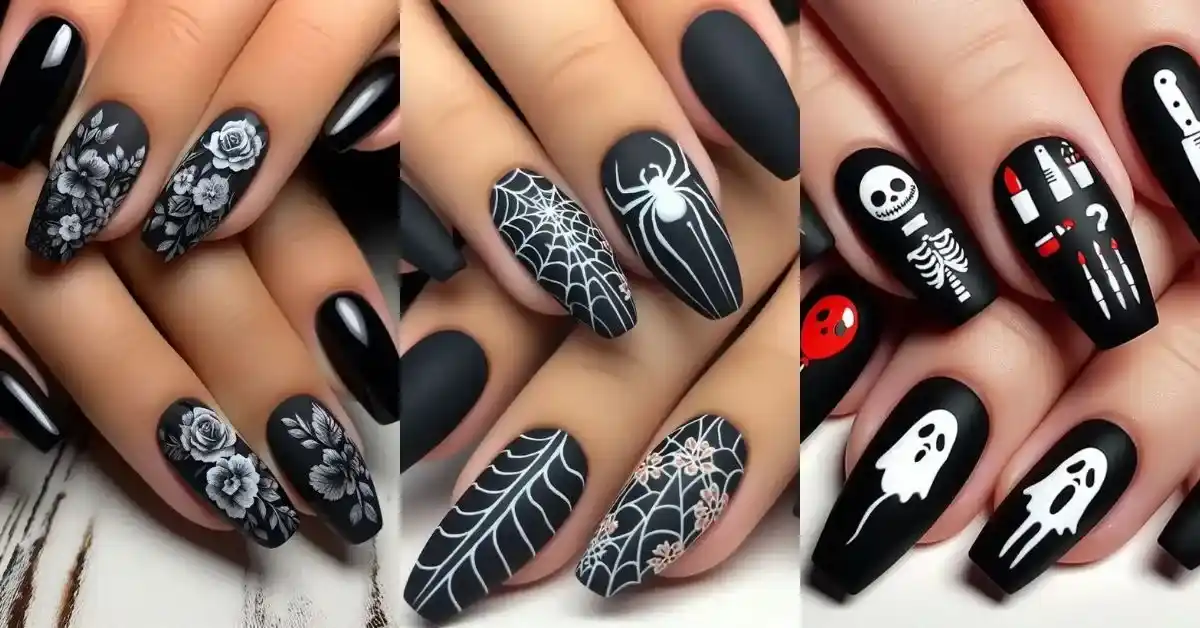
Delicate white spider webs drawn over a matte black base give this design a perfect balance between eerie and elegant. It’s an ideal choice for those who want a spooky design without going overboard.
To make design:
- File your nails into your preferred shape.
- Apply a matte black nail polish as the base.
- Use a fine nail art brush and white nail polish to draw thin spider webs on one or two nails.
- Let the webs dry completely.
- Seal with a top coat to protect the design.
3. Midnight Mystique
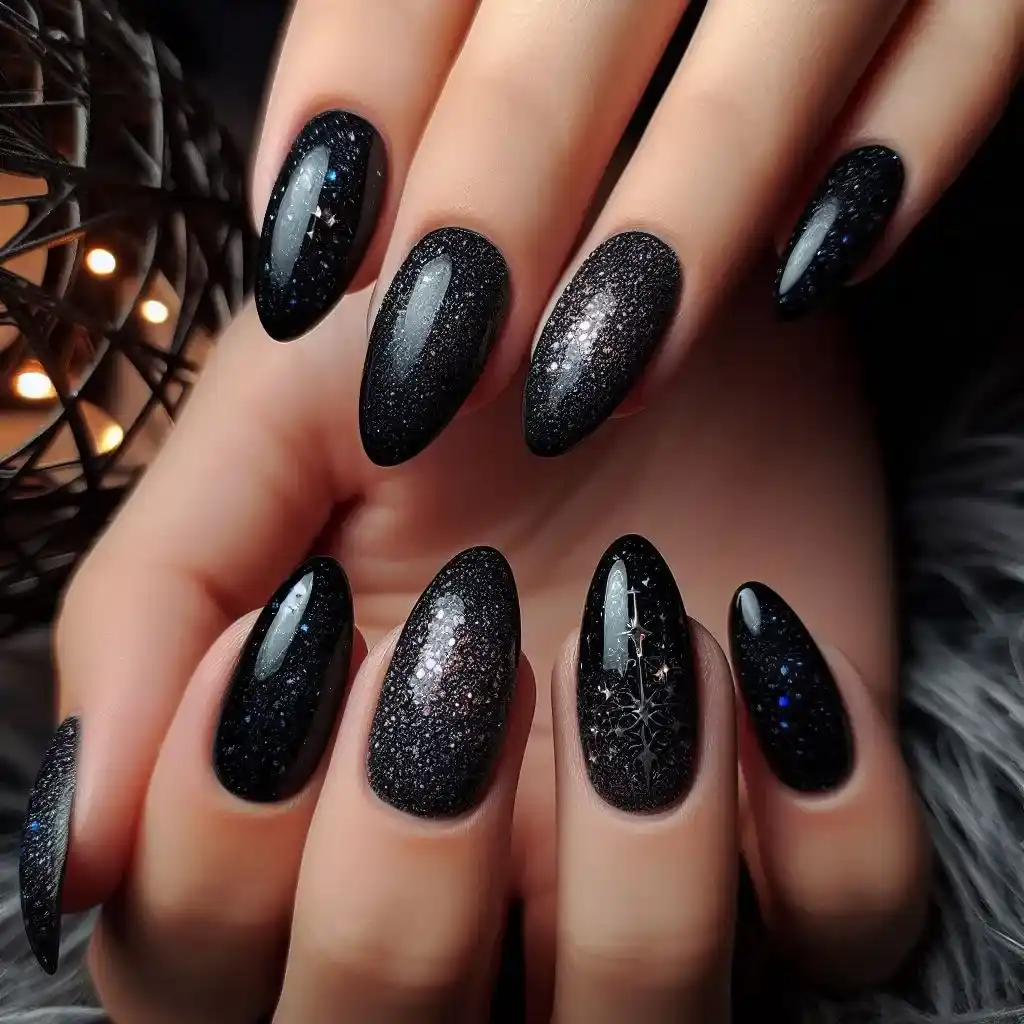
This design uses a deep black polish combined with glittery accents to create a mystical night sky effect. It’s perfect for those who want a little shimmer while keeping their nails on the dark side.
To make design:
- Trim and shape your nails as desired.
- Apply a base coat for protection.
- Paint your nails with a dark black polish.
- While the polish is still wet, lightly sprinkle glitter on the tips.
- Once dry, add a top coat to lock in the glitter.
4. Black Cat Claws
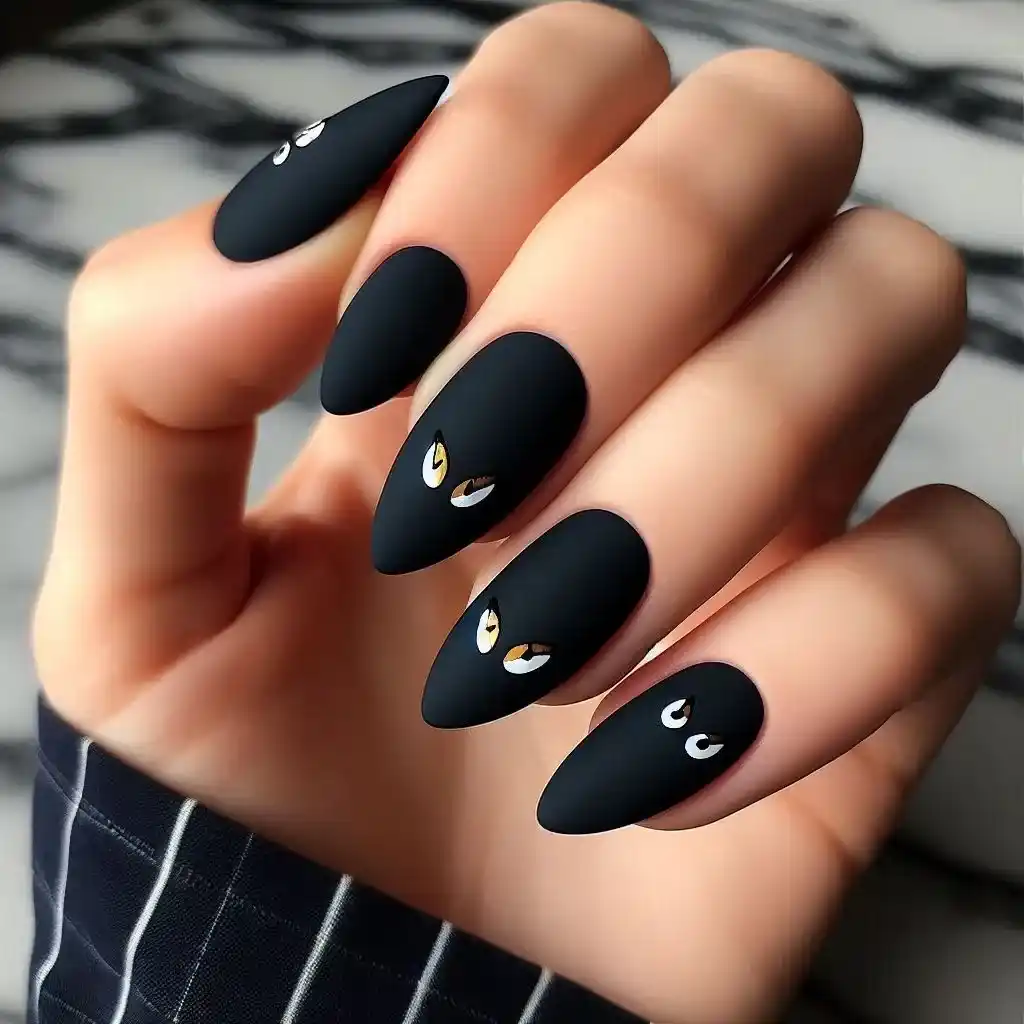
For feline lovers, this design features sharp, black almond-shaped nails adorned with minimalistic cat eye details in white or gold. It’s a playful take on Halloween while still keeping it sleek and mysterious.
To make design:
- File your nails into an almond shape.
- Apply a clear base coat.
- Paint your nails with glossy black polish.
- Use a fine brush and white or gold polish to draw tiny cat eyes on one nail.
- Finish with a top coat for extra shine.
5. Graveyard Shadows
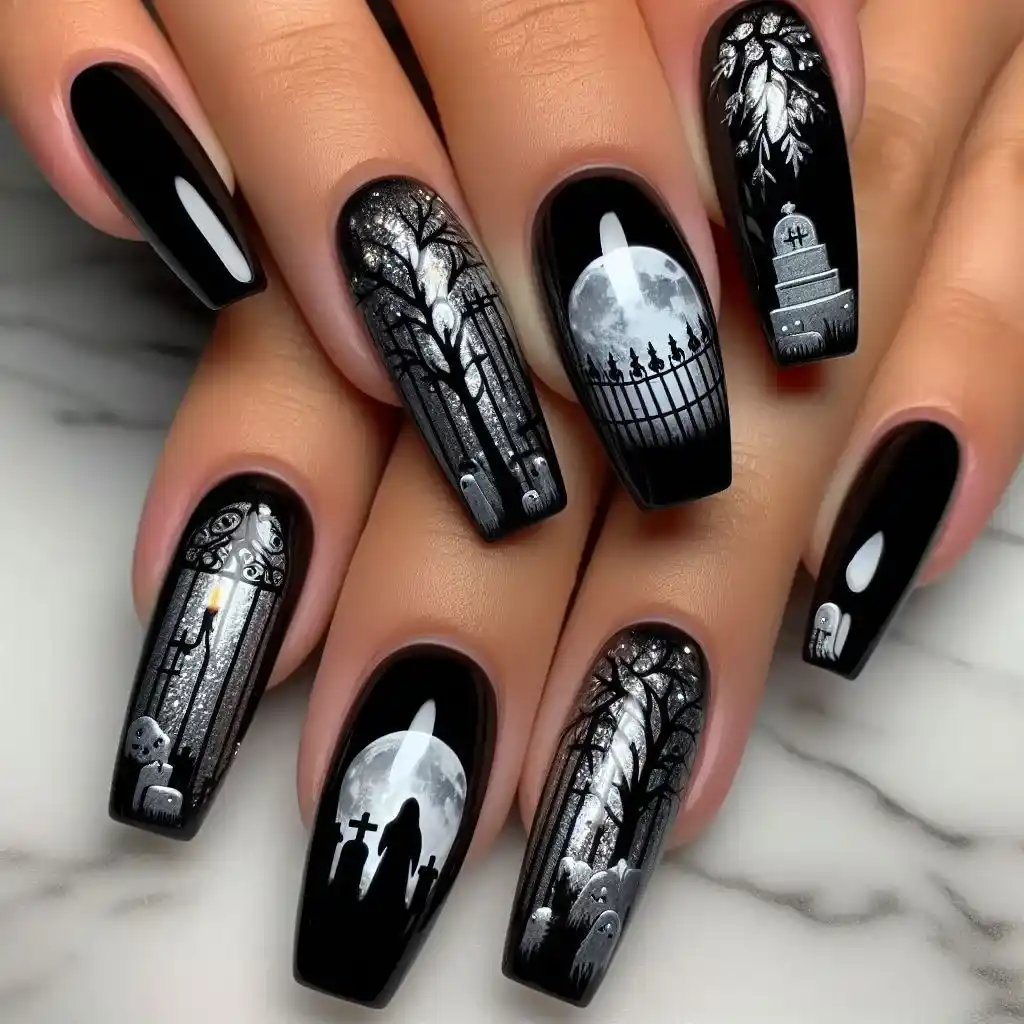
This design brings the haunting vibes of a graveyard to your nails. With tiny gravestones, eerie trees, and a full moon painted in silver over a black background, it’s perfect for Halloween enthusiasts.
To make design:
- Shape your nails into a square or oval shape.
- Paint your nails with black nail polish and let them dry.
- Use a fine brush to draw gravestones and trees with silver or white nail polish.
- Add a small moon at the corner for extra detail.
- Finish with a clear top coat to seal the design.
6. Vampire Vibes
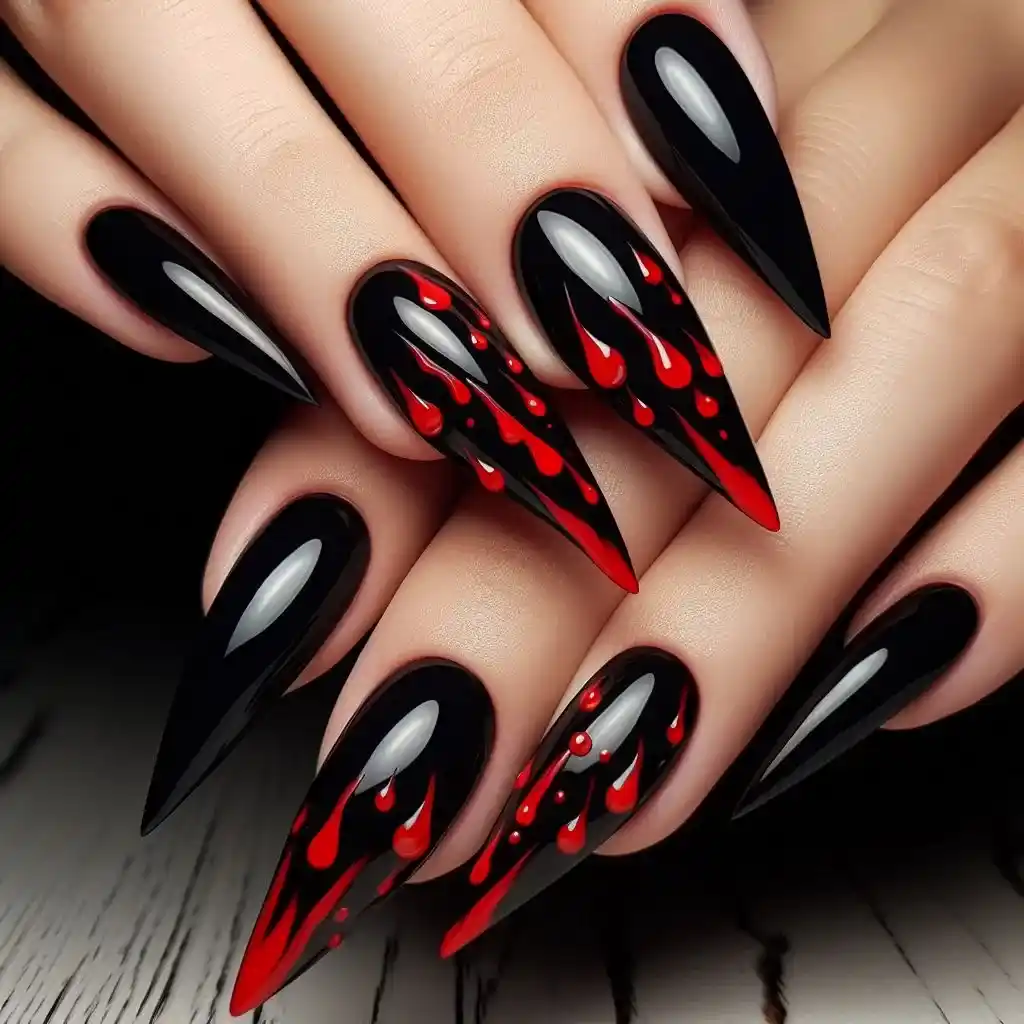
Inspired by gothic vampire aesthetics, this design includes sharp black nails with a subtle red drip effect at the tips, mimicking blood. It’s edgy, fierce, and perfect for anyone aiming to embrace their dark side.
To make design:
- Trim and shape your nails into a pointed or stiletto shape.
- Paint all your nails with black polish.
- After drying, use red polish to create small drips at the tips of your nails.
- Let the design dry, then apply a glossy top coat to complete the look.
7. Haunted Mansion Elegance
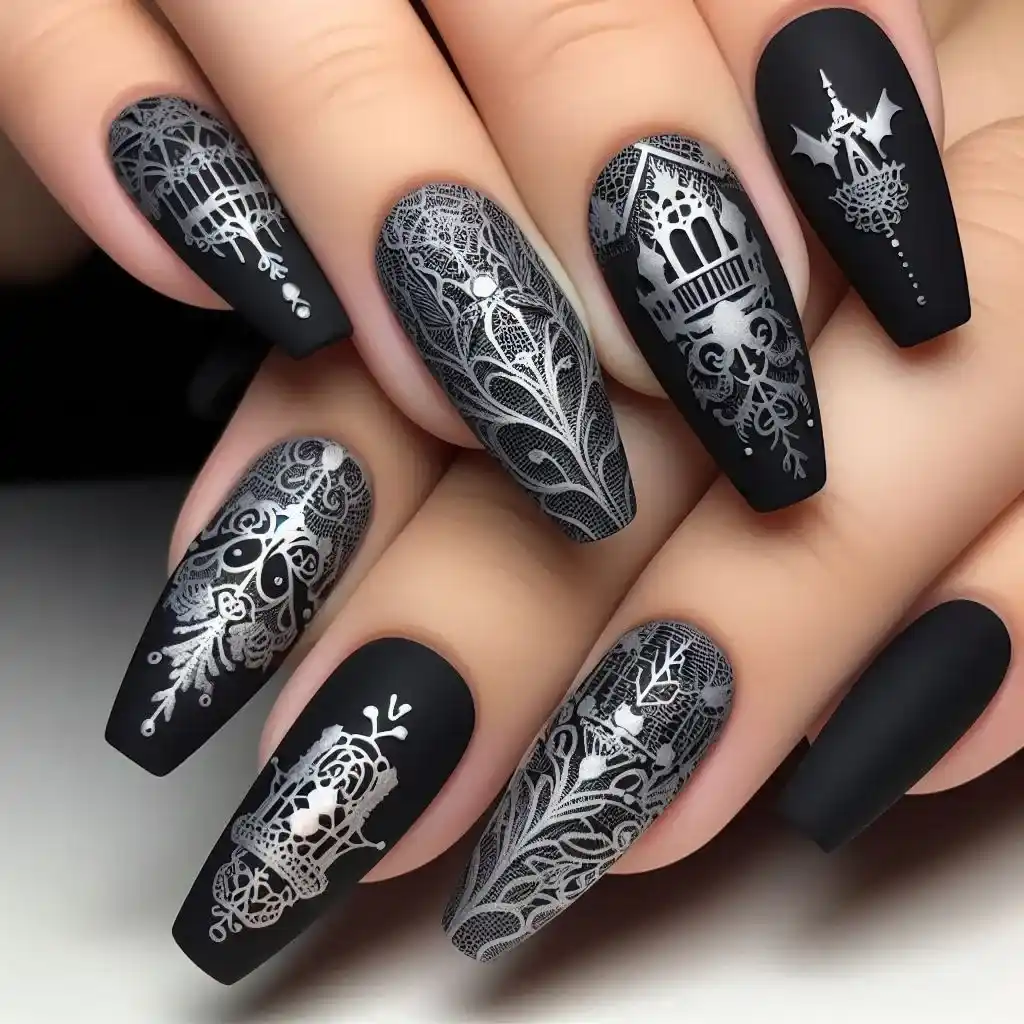
Featuring intricate lace-like patterns in silver or white over a matte black base, this design offers a haunted mansion vibe with an added layer of sophistication. It’s perfect for those seeking a vintage, gothic touch.
To make design:
- Start by filing your nails into your preferred shape.
- Apply a matte black polish as the base.
- Use a thin nail art brush to draw intricate lace or swirl patterns with silver or white polish.
- Let it dry completely.
- Finish with a matte top coat to preserve the elegance.
8. Gothic Glam
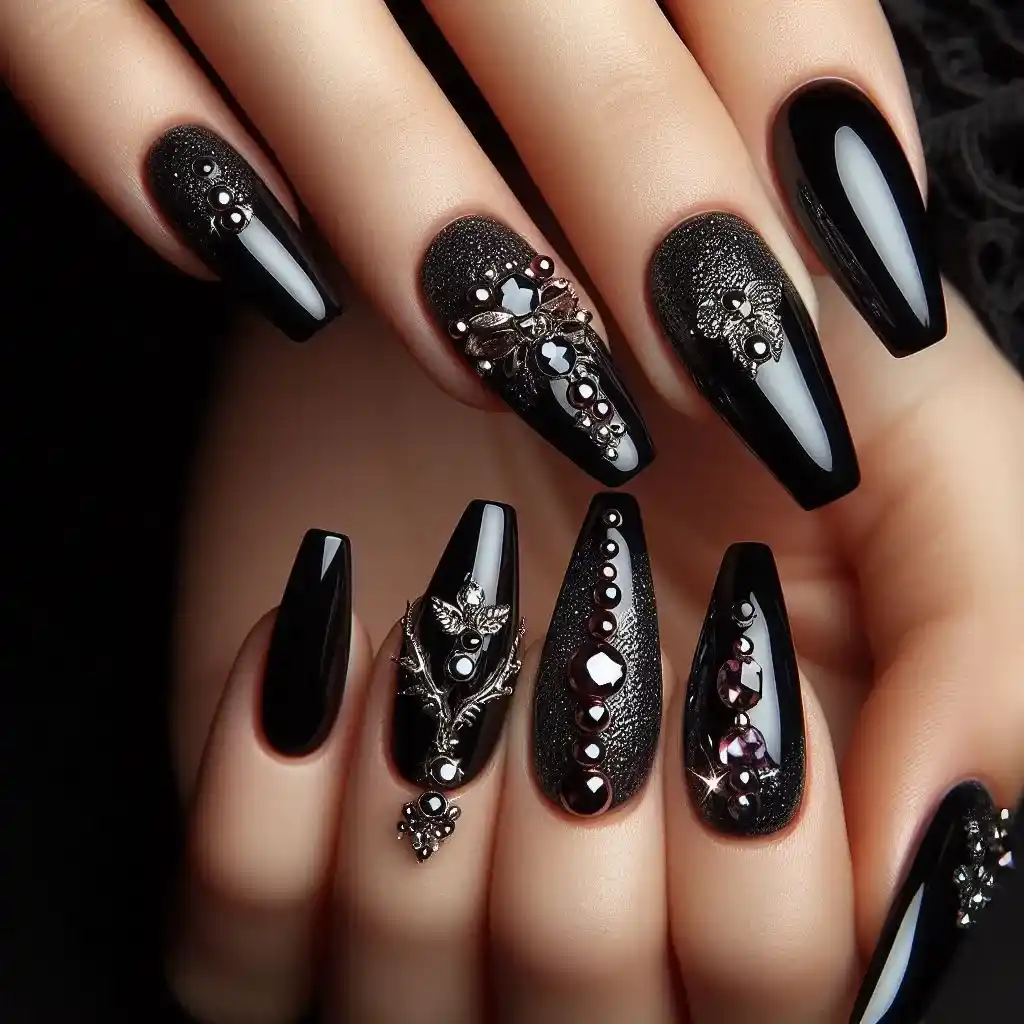
A blend of black and dark burgundy with metallic accents, this design offers a gothic vibe with a touch of glam. Whether it’s studded details or minimal jewels, it’s perfect for making a bold Halloween statement.
To make design:
- Shape your nails into a square or coffin shape.
- Apply a dark black polish as the base color.
- Use a fine brush to add metallic studs or tiny jewels near the cuticle area.
- Let the jewels set, then seal with a top coat for durability.
9. Skeleton Fingers
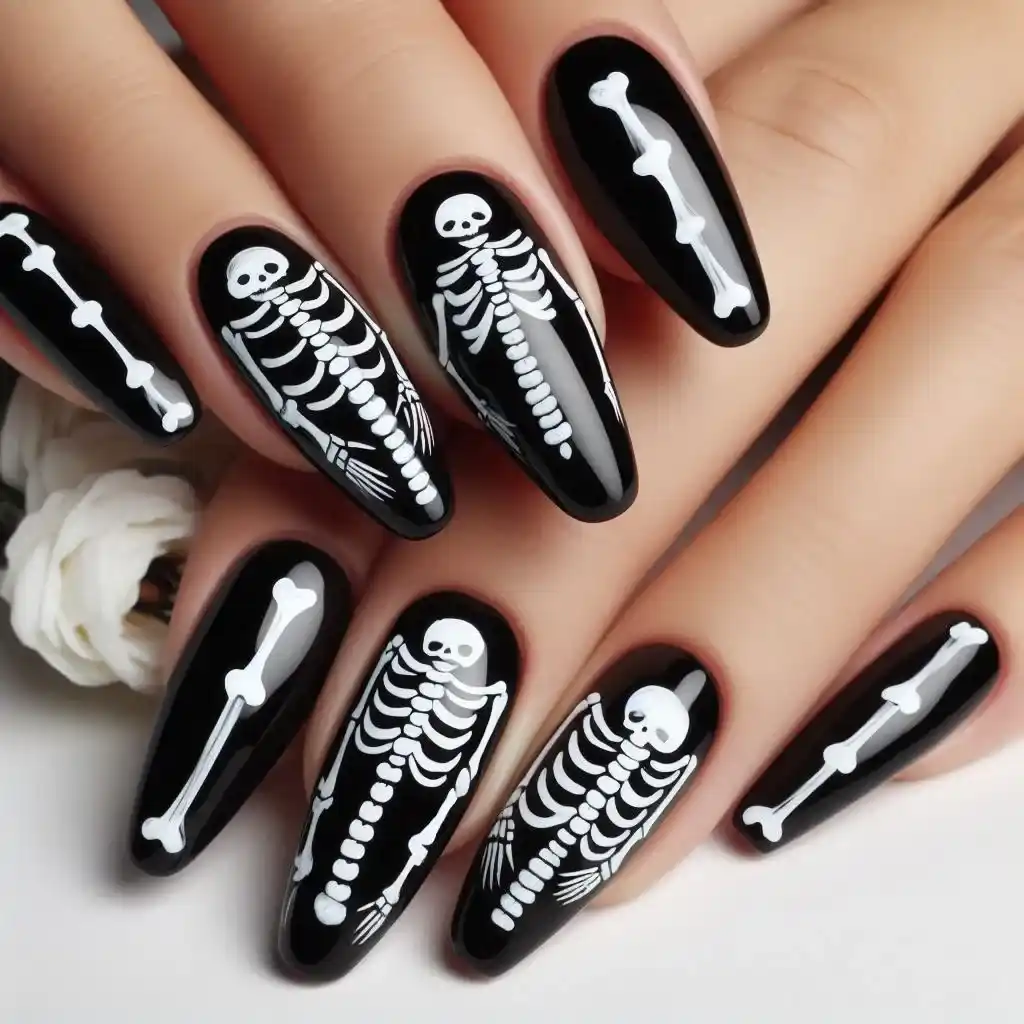
This design features realistic skeleton bone patterns on each finger over a glossy black base. It’s detailed, spooky, and perfect for those who want their nails to be the talk of the night.
To make design:
- Shape and buff your nails to smooth them out.
- Apply a base coat, then a glossy black polish.
- Use white nail polish and a fine brush to carefully draw bones on each nail.
- Let the bones dry, then apply a clear top coat to protect the design.
10. Black Magic
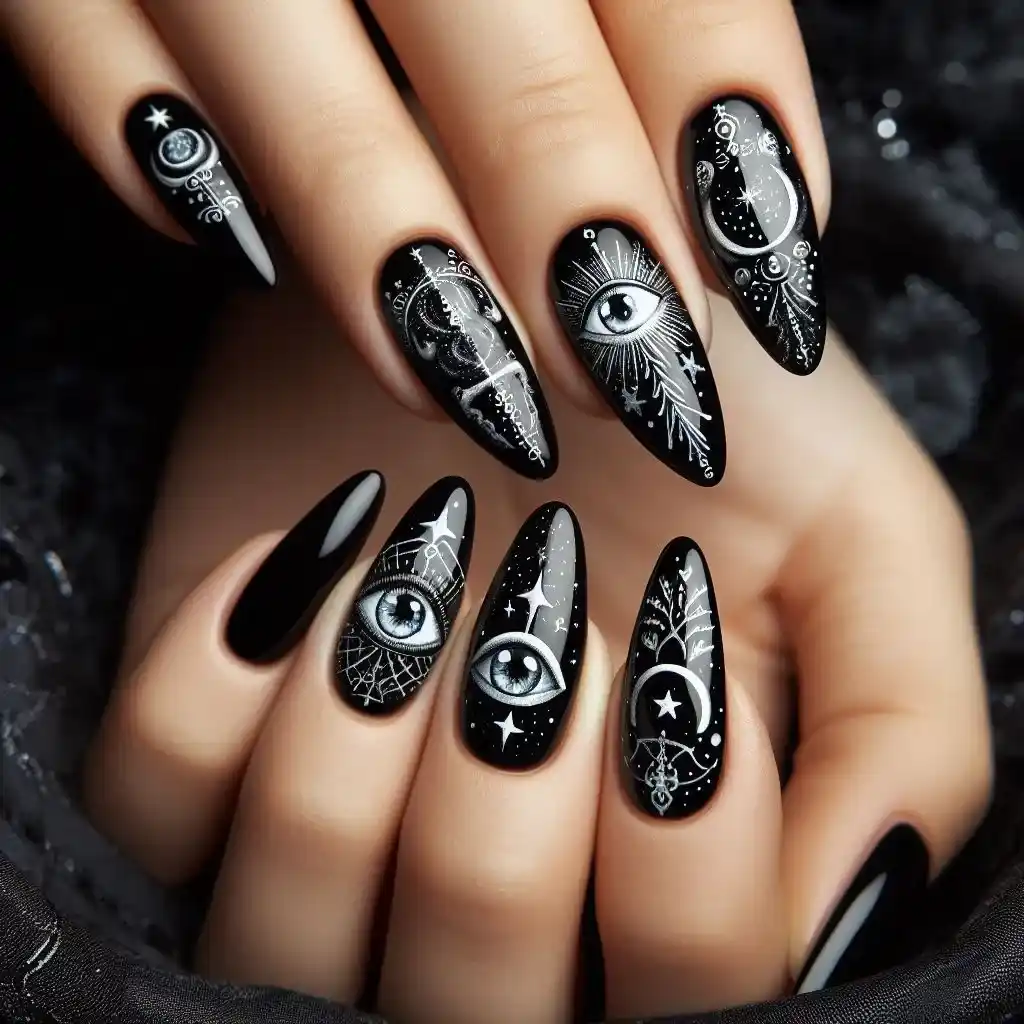
Channel your inner witch with this design that features black nails adorned with mystical symbols like moons, stars, and eyes. The design gives off major witchy vibes and is perfect for any Halloween occasion.
To make design:
- Shape your nails to your desired length.
- Apply a base coat followed by black nail polish.
- Use a fine brush to draw stars, moons, and mystical symbols with silver or gold polish.
- Once dry, seal the design with a top coat.
11. Bloody Black Ombre
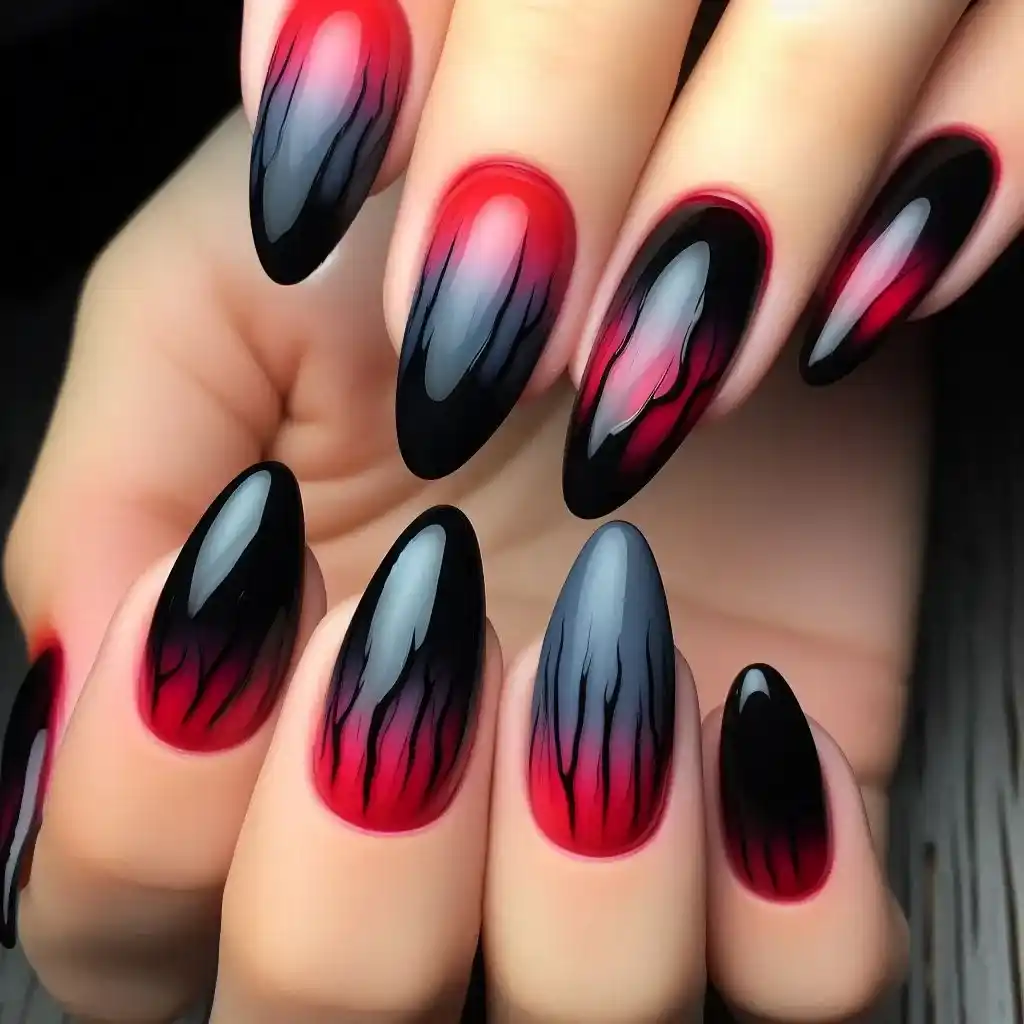
A creepy yet trendy design that transitions from a glossy black at the base to a blood-red tip. The ombre effect creates a hauntingly beautiful aesthetic perfect for a vampire-inspired look.
To make design:
- Start by trimming your nails to a rounded or stiletto shape.
- Paint your nails black from the base to halfway up.
- Use a makeup sponge to dab red nail polish onto the tips and blend with the black.
- Once it dries, finish with a top coat for a smooth finish.
12. Coffin Shape Couture
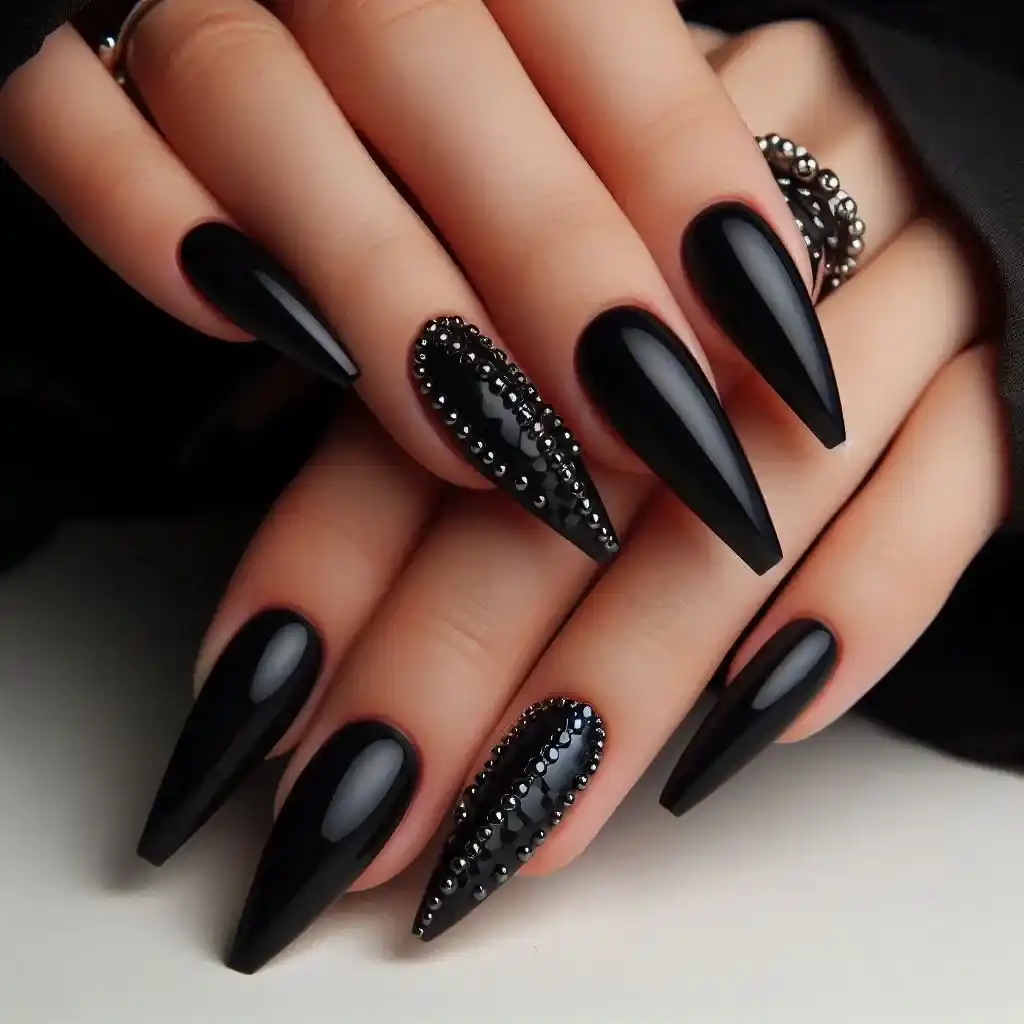
Coffin-shaped nails are a popular trend, and when paired with a jet-black polish and minimal silver accents, they become the ultimate Halloween statement. This design exudes both style and spookiness.
To make design:
- File your nails into a coffin shape.
- Apply a clear base coat to protect your nails.
- Paint your nails black, allowing the polish to dry.
- Add small silver studs at the base of one or two nails for decoration.
- Finish with a top coat to add shine and protect the studs.
13. Bat Silhouette
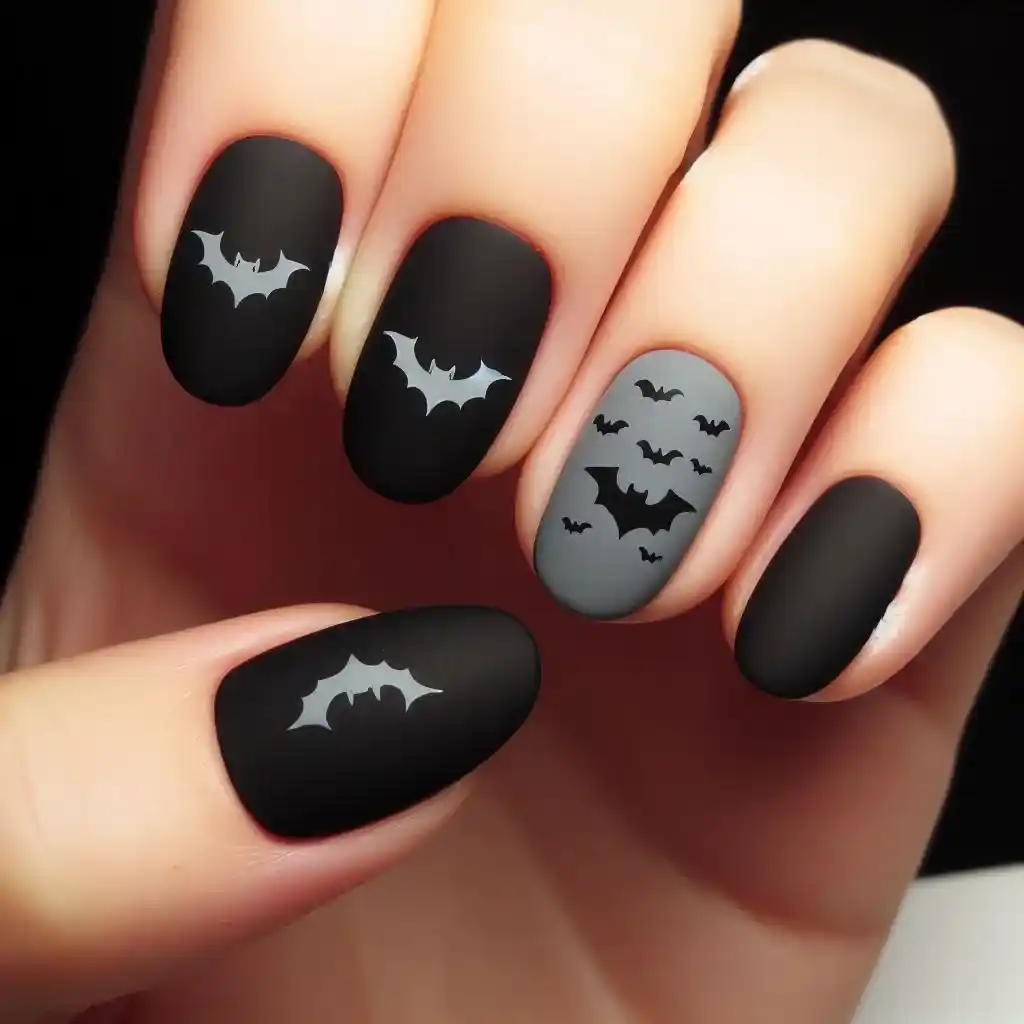
Black matte nails with tiny bat silhouettes in contrasting colors like grey or white create a minimalist but spooky effect. It’s a simple design that captures the Halloween spirit without being over-the-top.
To make design:
- Trim your nails and file them into a rounded shape.
- Apply a black matte polish as the base.
- Use a fine brush to paint small bat shapes on the nails with grey or white polish.
- Let the bats dry, then apply a matte top coat to keep the design looking smooth.
14. Moonlit Night
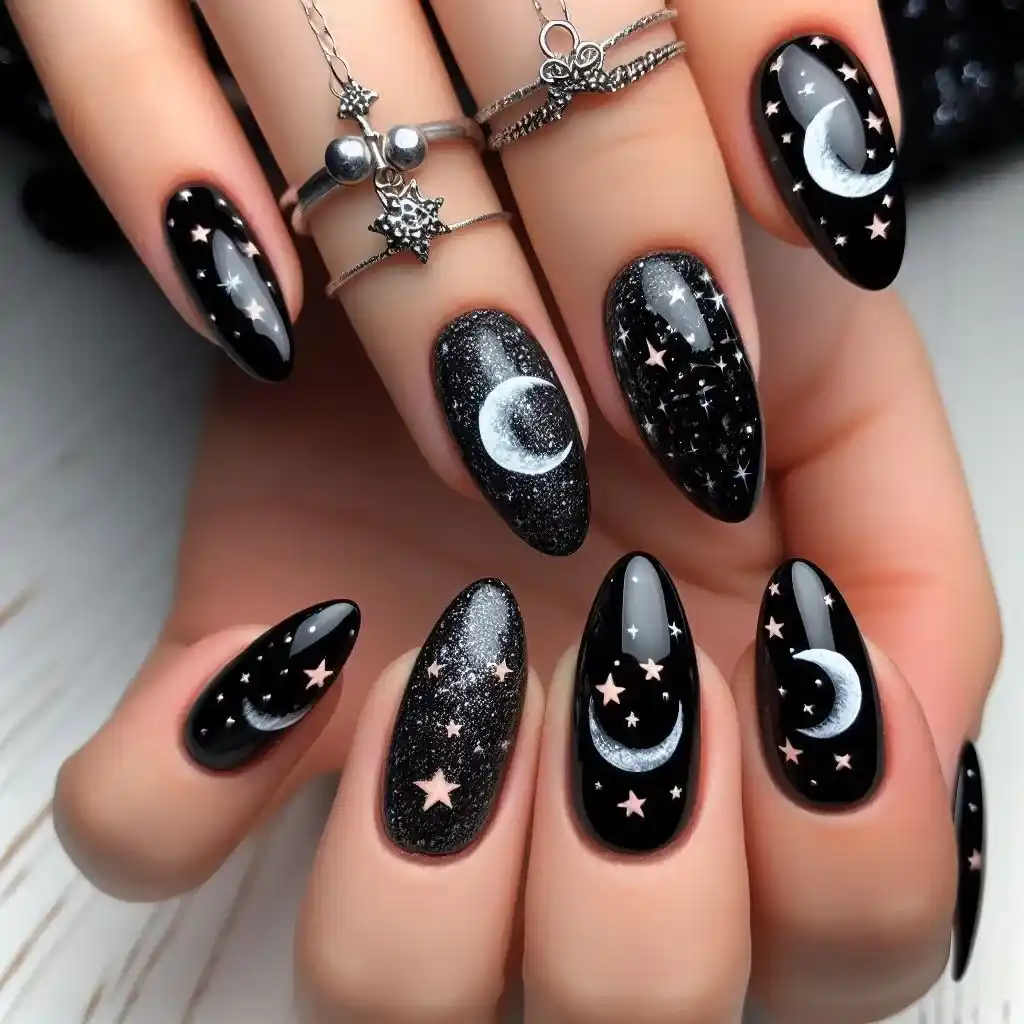
Inspired by the magic of Halloween nights, this design features a black background with crescent moons and stars, giving it a mystical, celestial look. It’s perfect for anyone who loves the spooky beauty of the night sky.
To make design:
- Shape your nails into a square or oval shape.
- Apply a black nail polish as the base and let it dry.
- Using silver polish and a fine brush, paint crescent moons and stars on a few nails.
- After the design dries, apply a top coat to protect the artwork.
15. Spider Queen
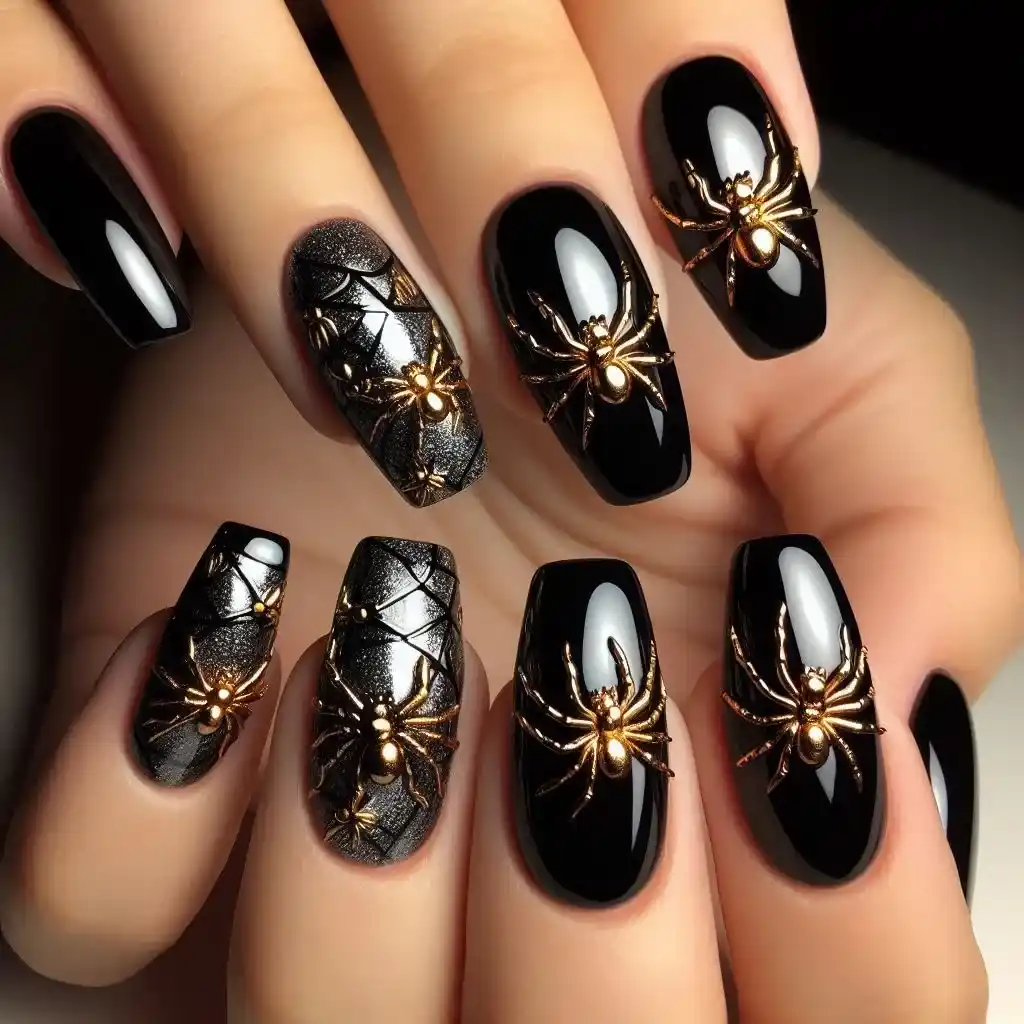
A glossy black base is elevated with tiny spider designs in metallic silver or gold. The intricate detailing makes this design both elegant and eerie, perfect for those who want their nails to stand out.
To make design:
- File your nails into a sharp or almond shape.
- Paint your nails with glossy black polish.
- Use a silver or gold nail polish to create tiny spiders on one or two nails.
- Let it dry, then finish with a top coat to give the design a polished look.
16. Dark Floral
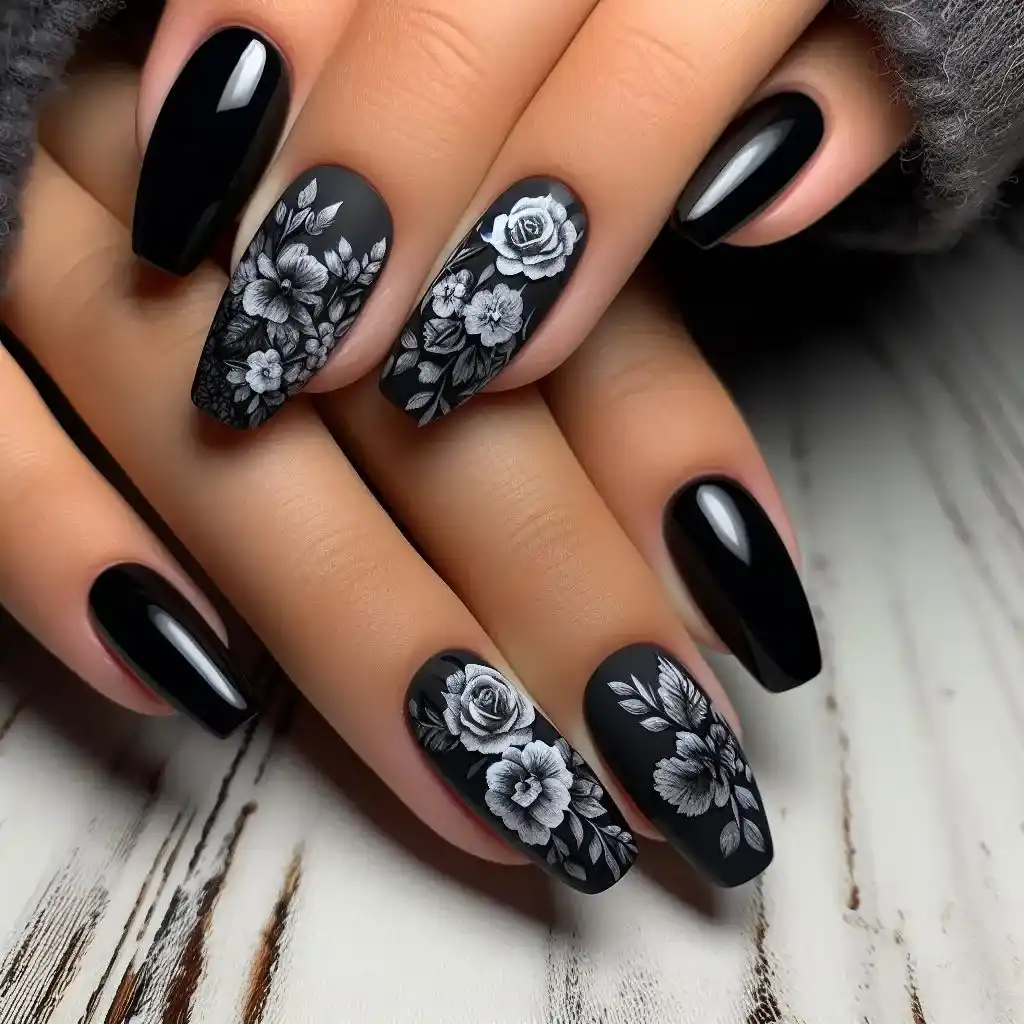
For a softer approach to black Halloween nails, dark floral patterns in grey or white over a black background create a romantic yet gothic vibe. It’s ideal for those who want a more subtle design for the season.
To make design:
- Shape your nails into an oval or square form.
- Apply black polish as the base and let it dry.
- Use a fine brush to paint dark floral designs with grey or white nail polish.
- Once dry, add a top coat to seal the design.
17. Stitched Up
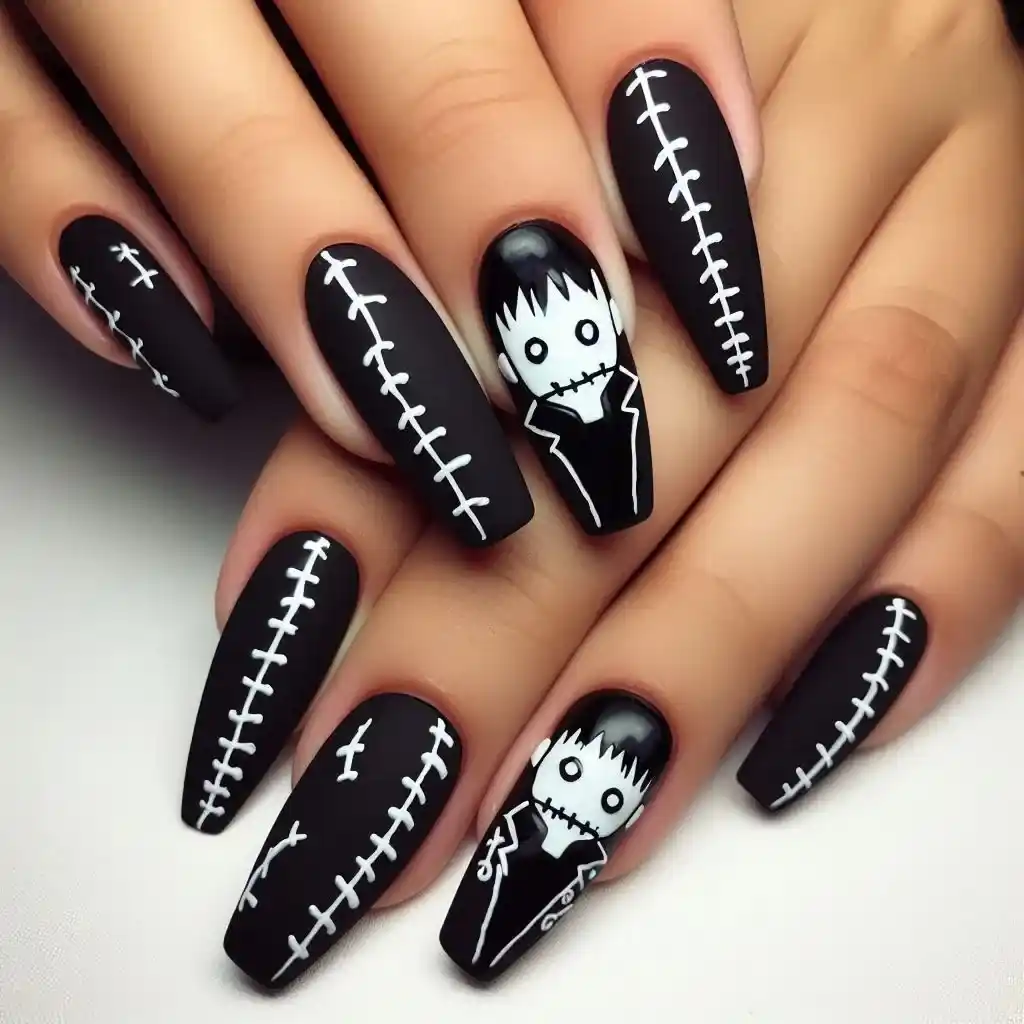
Inspired by Frankenstein’s monster, this design features black nails with white stitch-like patterns, giving it a fun and spooky touch. It’s perfect for adding a playful vibe to your Halloween look.
To make design:
- Shape your nails into a square or round shape.
- Apply black nail polish as the base.
- Use a thin brush to draw small white stitch patterns across each nail.
- Let the polish dry completely before adding a top coat to finish the look.
18. Mummy Wraps
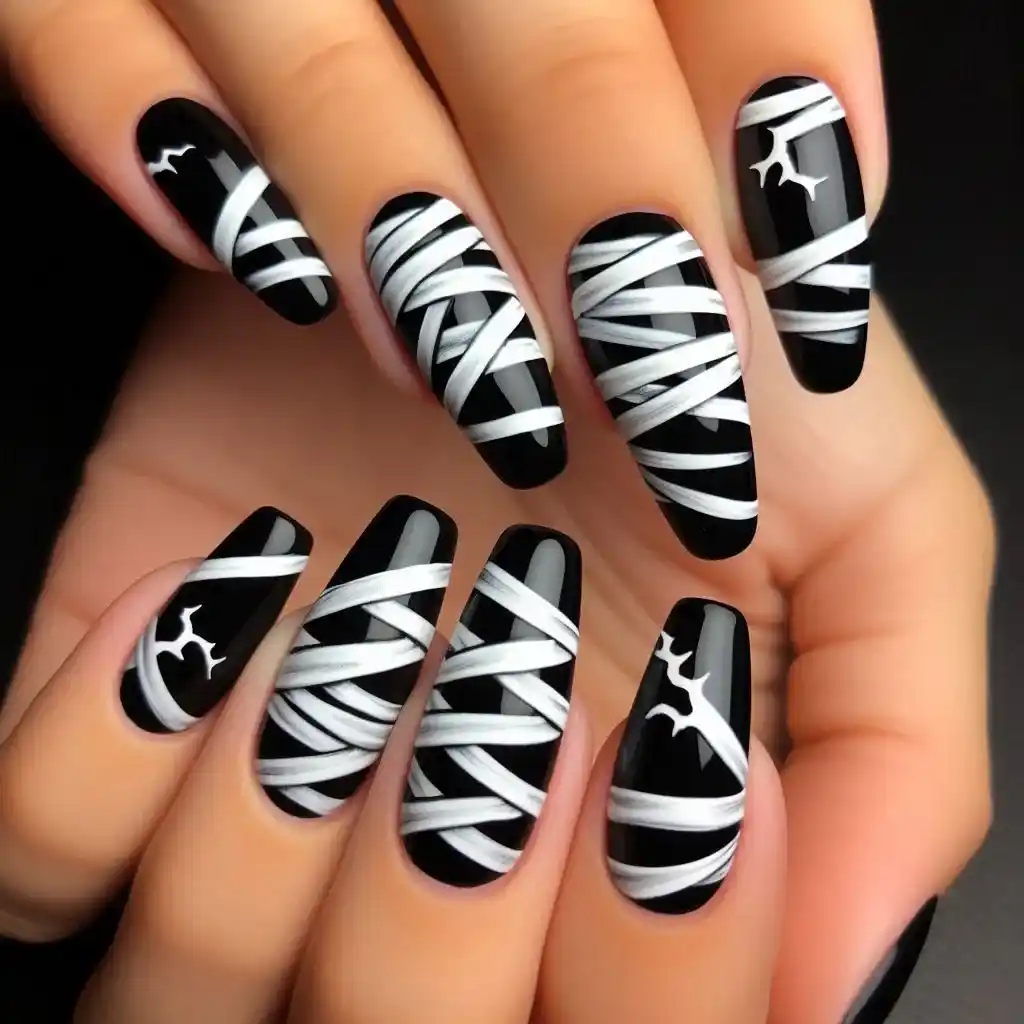
A unique design that uses black and white stripes to mimic a mummy’s wraps. It’s a fun and creative way to bring classic Halloween characters to your nails.
To make design:
- Trim your nails into a square shape.
- Apply a black polish as the base color and let it dry.
- Use white nail polish to paint thin, uneven stripes across each nail to resemble mummy wraps.
- Let the polish dry, then apply a clear top coat.
19. Horror Movie Mani
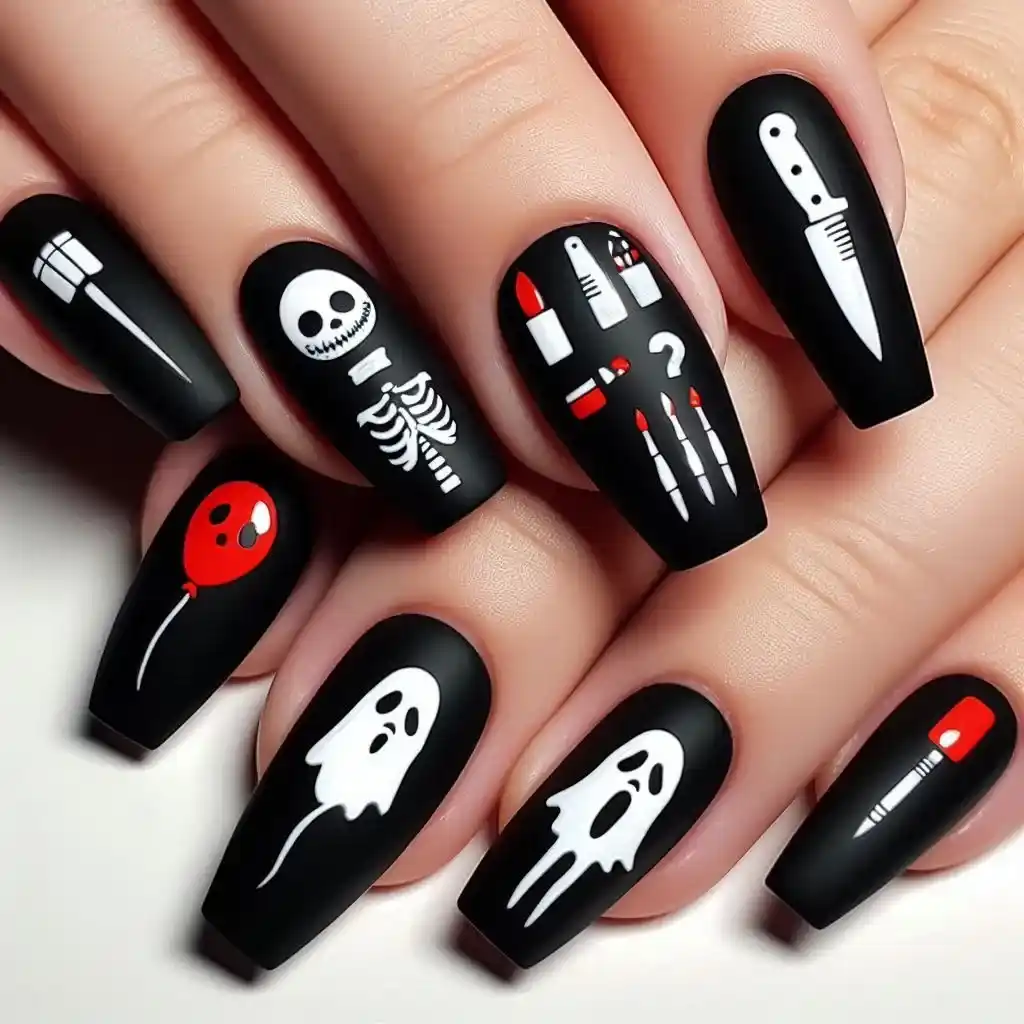
This design is for true horror fans, featuring tiny iconic symbols from popular horror movies like knives, masks, and ghosts, all painted over a black base. It’s perfect for showing off your love for the genre.
To make design:
- File your nails into any shape you prefer.
- Apply a black polish as the base color.
- Use a fine brush to paint small horror icons like knives or masks with white or red polish.
- Let the icons dry, then apply a top coat for protection.
20. Black Flame
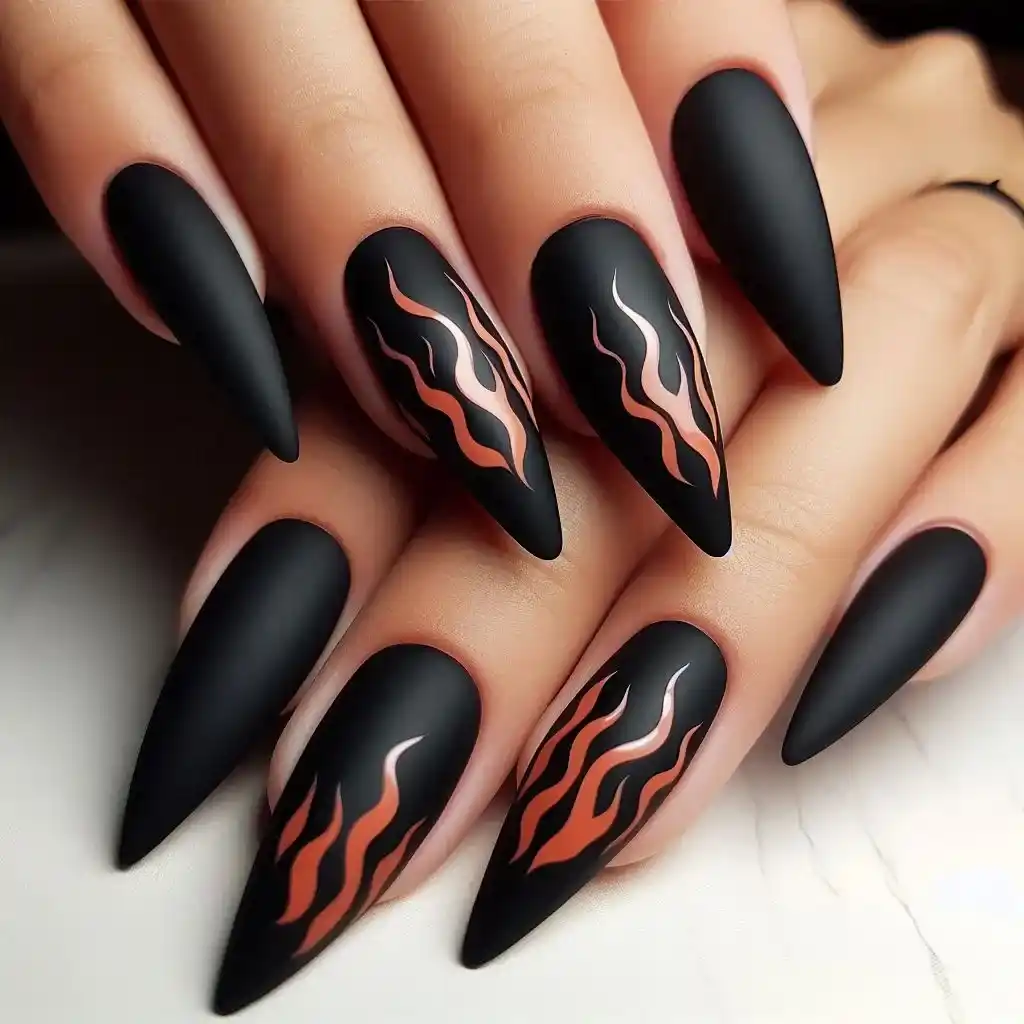
A fiery black flame design created with a mix of glossy and matte textures brings a dramatic, edgy look to your nails. It’s ideal for those who want their nails to scream ‘fierce’ this Halloween.
To make design:
- Shape your nails into a stiletto or almond shape.
- Paint your nails with a matte black polish.
- Use a fine brush to draw flames near the tips with glossy black polish to create a contrast.
- Once the flames dry, apply a clear top coat for extra shine.
21. Ghostly Glam
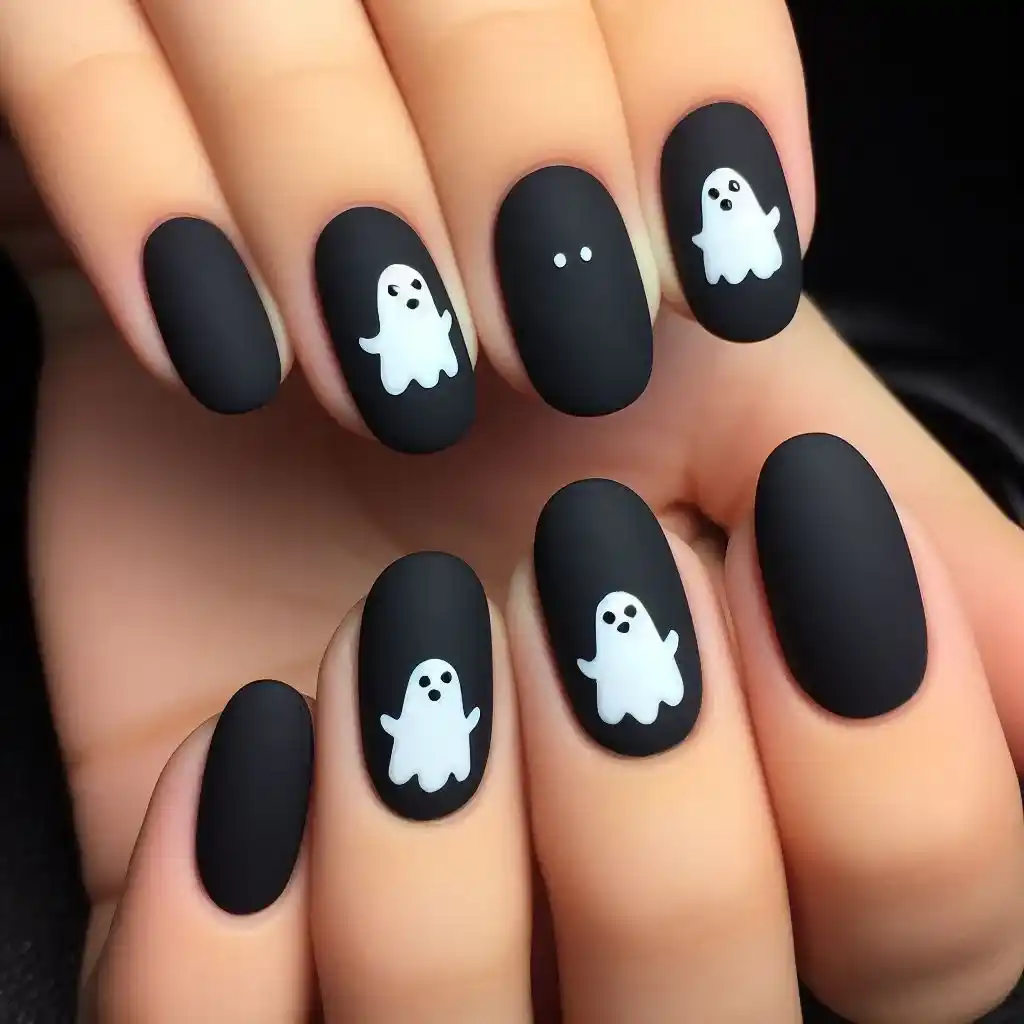
This design features matte black nails with cute ghost shapes painted in white. The ghosts are simple and playful, with tiny eyes and rounded edges, giving the nails a fun Halloween vibe without being too scary.
To make design:
- Begin by trimming and shaping your nails.
- Apply a layer of matte black polish to all nails.
- Use white nail polish and a thin brush to paint small ghost shapes, giving them round bodies and tiny eyes.
- Let the ghosts dry completely before adding a matte top coat to seal the design.
22. Crescent Moon Shadows
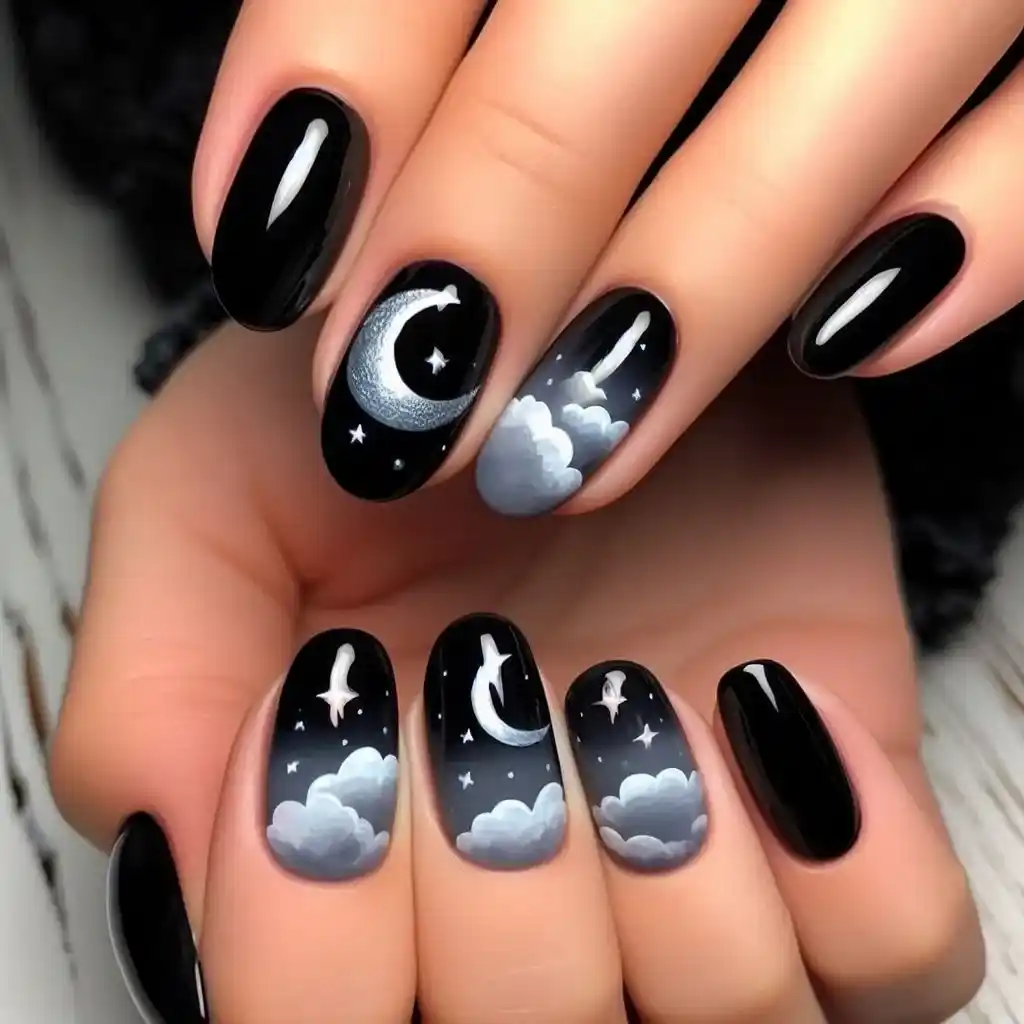
Inspired by the night sky, this design has glossy black nails with a crescent moon and shadowy clouds on a couple of accent nails. The soft, dark colors blend perfectly, creating an ethereal, spooky effect.
To make design:
- File your nails to your preferred shape and length.
- Paint all your nails with a glossy black polish.
- Use silver polish and a fine brush to create small crescent moons on one or two nails.
- Add grey clouds below the moon using light strokes, and finish with a clear top coat to add shine.
23. Glittery Cobwebs
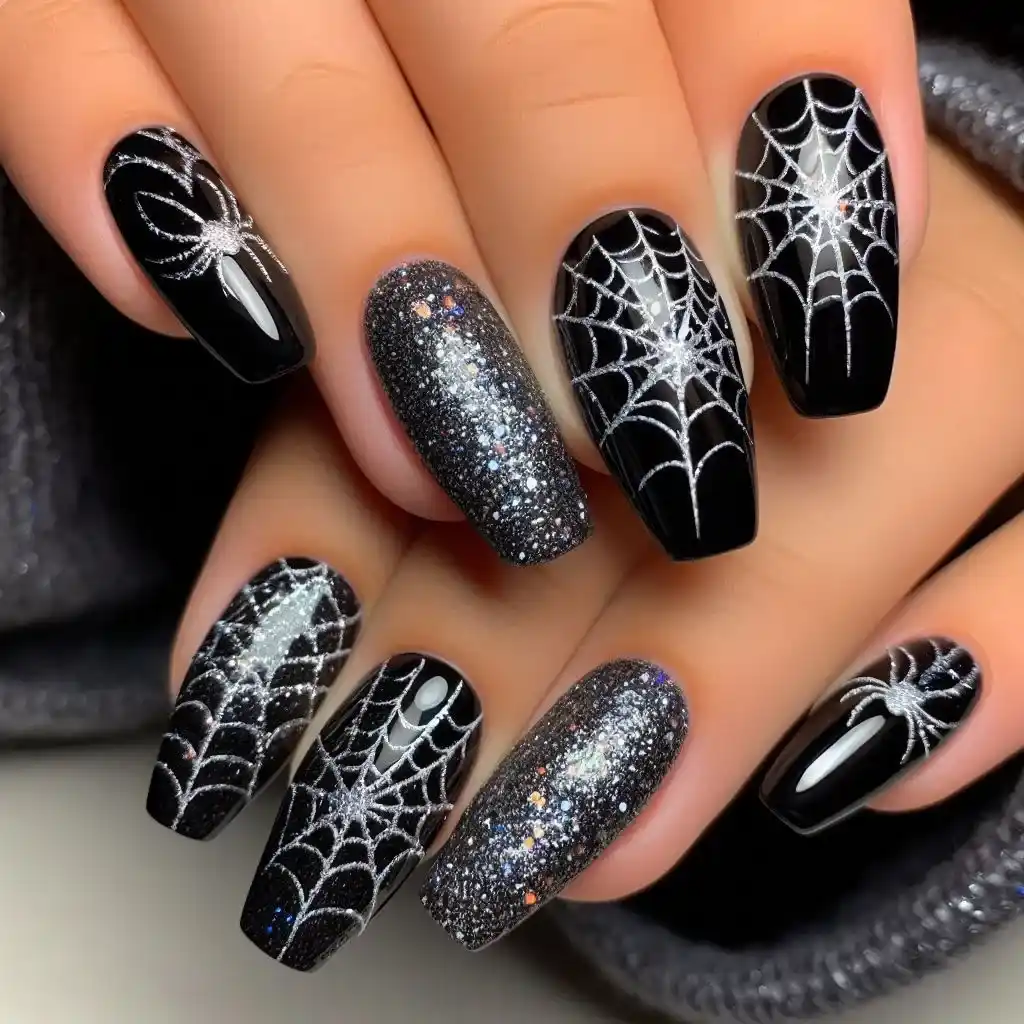
For a sparkly take on spooky nails, this design uses black nails with silver glitter cobwebs on a few accent nails. The glitter adds a glamorous touch to the creepy cobwebs, making the design stand out.
To make design:
- Shape your nails and apply a base coat for protection.
- Paint your nails black and allow them to dry.
- Use a thin brush and silver glitter polish to draw cobweb patterns on one or two nails.
- Let the glitter set, then finish with a glossy top coat to lock in the sparkle.
24. Poison Apple Drip
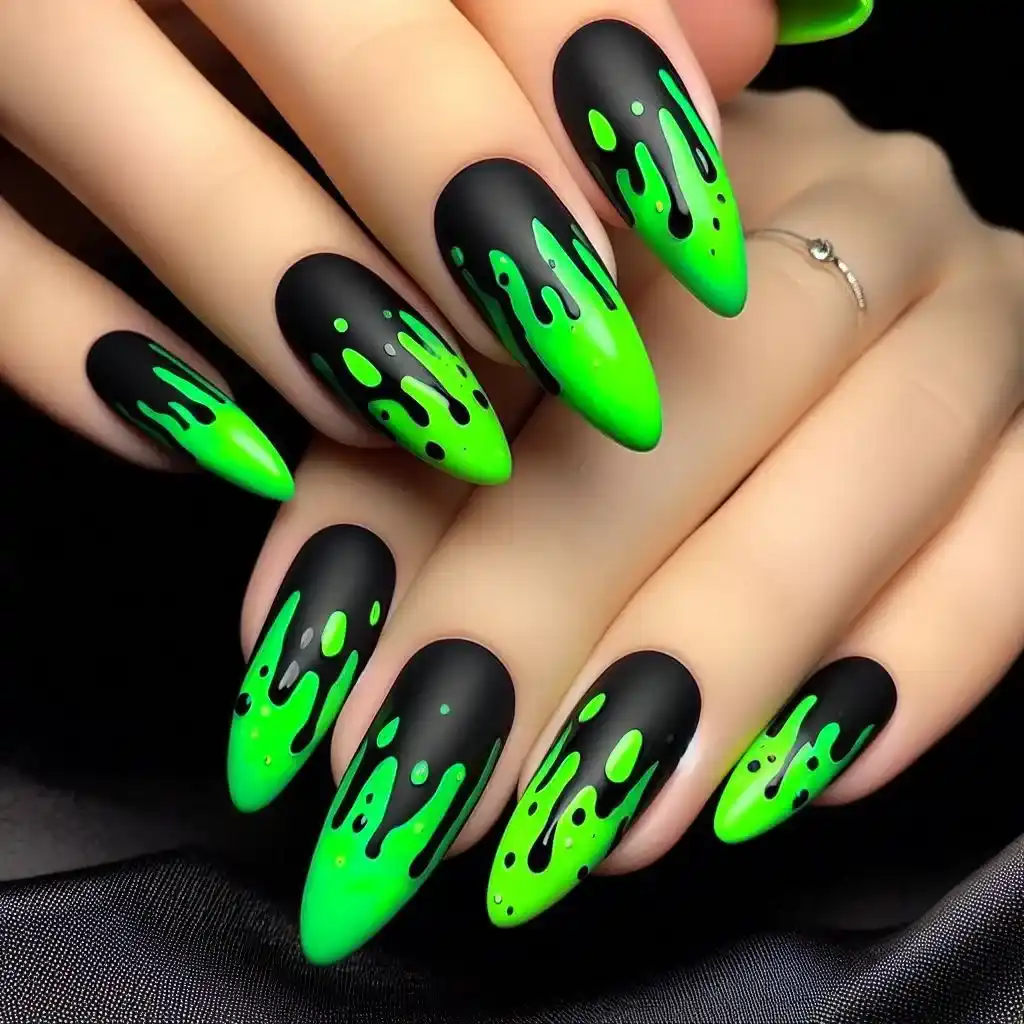
A unique twist on Halloween nails, this design features black nails with bright green drips, mimicking a poison apple effect. The green against the black creates a vivid, eerie look perfect for Halloween.
To make design:
- Trim and file your nails into a rounded or square shape.
- Paint your nails with black polish and wait for it to dry.
- Use bright green polish and a small brush to paint dripping effects from the top of the nails, resembling poison drips.
- Once dry, apply a shiny top coat to make the drips stand out.
25. Voodoo Doll Stitches
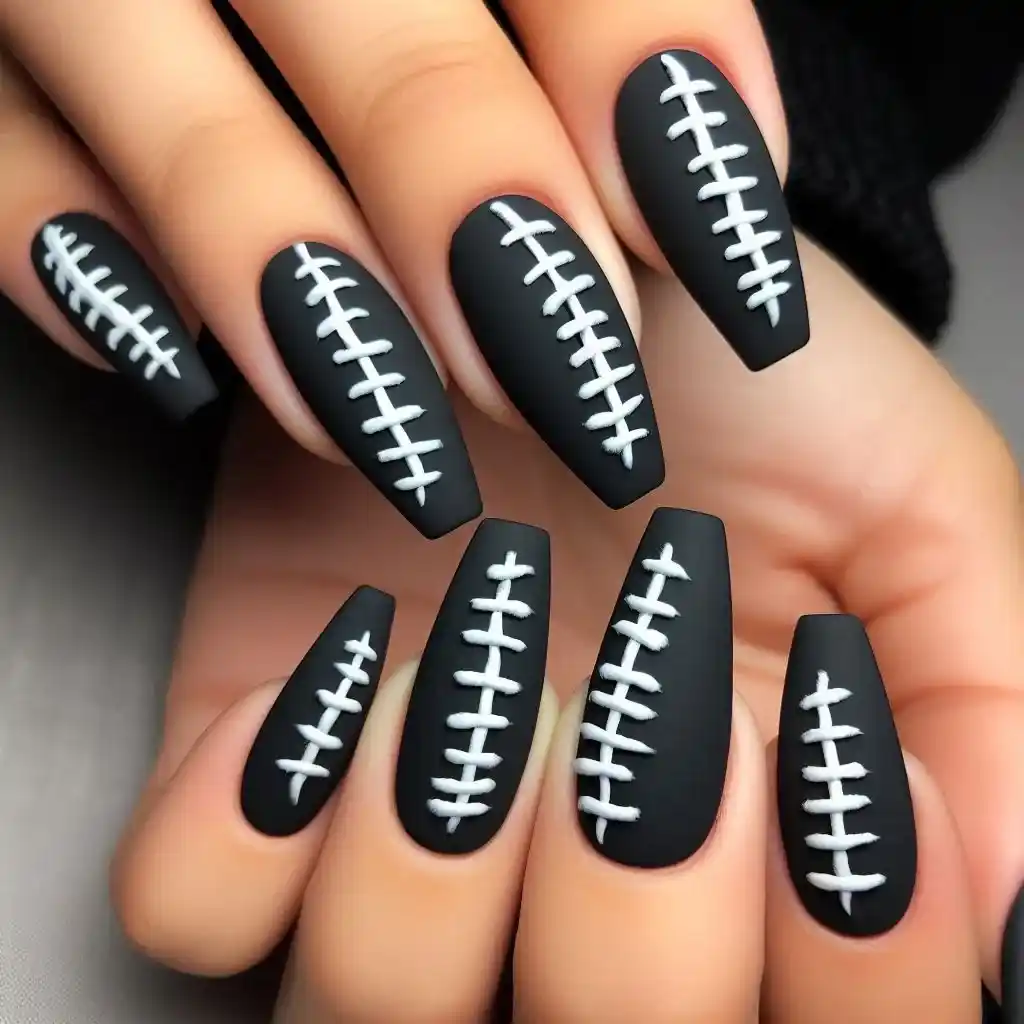
This design draws inspiration from voodoo dolls, featuring matte black nails with bold white stitch patterns. The stitches are large and jagged, creating a creepy yet creative look that’s perfect for a spooky manicure.
To make design:
- Shape your nails into any form you like.
- Apply matte black nail polish and let it dry fully.
- Use white nail polish and a thin brush to draw large, jagged stitches across each nail, making the design resemble voodoo doll stitching.
- Once dry, apply a matte top coat to finish the look.
Conclusion
Black Halloween nails are the perfect way to embrace the spooky spirit while keeping your look stylish and sophisticated. Whether you prefer minimalist designs or intricate patterns, there’s a black nail design for everyone this Halloween. From the classic Wicked Witch Tips to the edgy Black Flame, each design offers a unique way to express your Halloween creativity. So, grab your nail polish and tools, and get ready to transform your nails into a masterpiece that will be the talk of the night. Embrace the dark side with these fun, easy-to-create black Halloween nail designs!
