


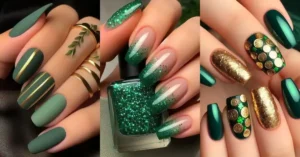

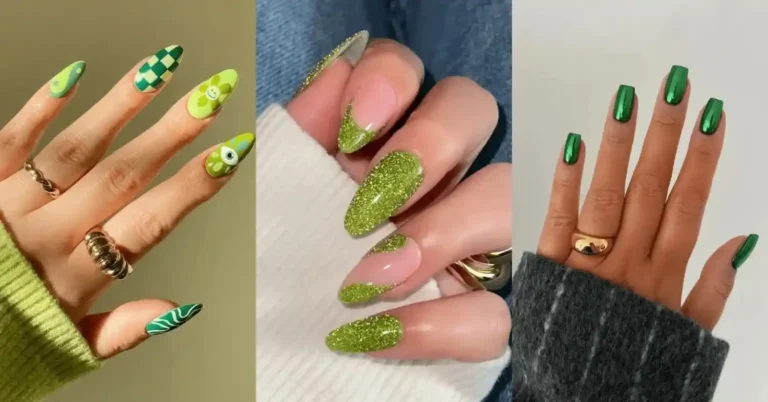
Introduction
Do you ever feel overwhelmed by the endless choices when it comes to Halloween nail designs? With so many spooky, stylish, and creative options out there, it’s easy to feel lost. Whether you’re planning the perfect Halloween costume or simply want to get into the spooky spirit, your nails can be the finishing touch that pulls everything together. But how do you choose the right design that captures the essence of Halloween without being too over-the-top? Fear not! We’ve compiled 30 Halloween nails ideas that are perfect for almond-shaped nails, blending style and spookiness effortlessly. Let’s dive into these fang-tastic designs!
Table of Contents
30 Best and Simple Halloween Nails Ideas
1. Wicked Webs
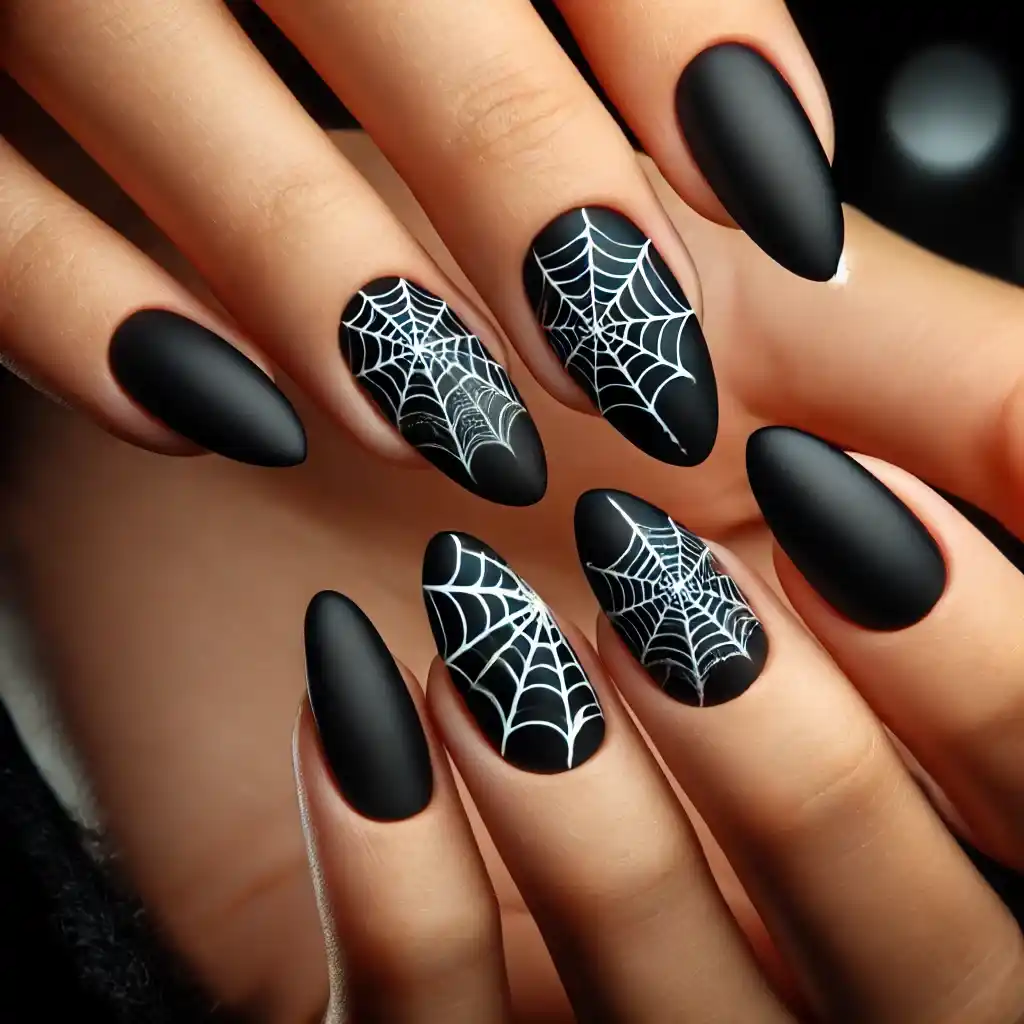
Embrace the spooky season with delicate spider webs painted across a matte black base. The intricate white webs add just the right amount of eerie charm without overwhelming the design.
Steps to create nail design:
- Paint your nails with black nail polish and let them dry completely.
- Use a thin nail art brush to draw spider webs with white nail polish, starting from one corner and stretching out in lines.
- Connect the lines with small curves to form the web.
- Let it dry and finish with a shiny top coat to seal the design.
2. Pumpkin Patch
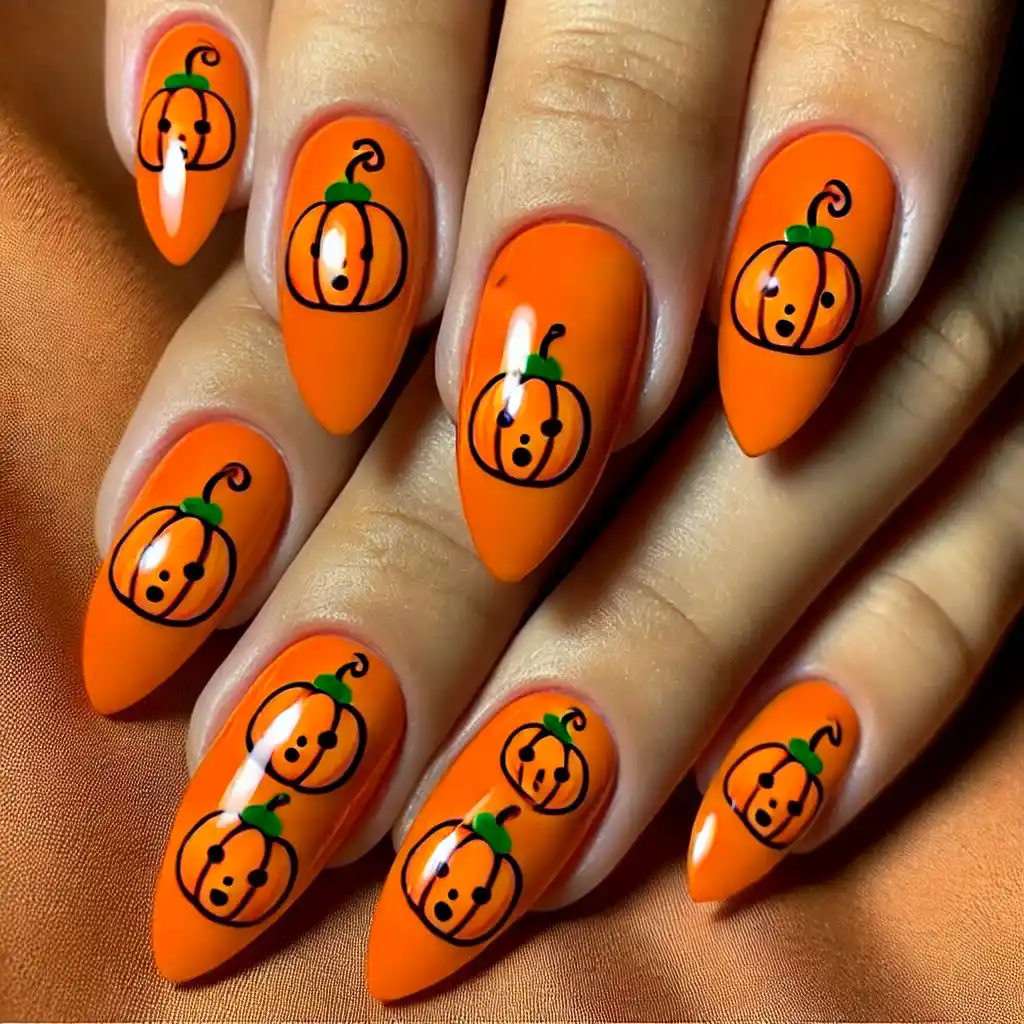
Show off your Halloween spirit with cute mini pumpkins painted on a warm, burnt orange background. This design is perfect for those who want to keep it festive yet subtle.
Steps to create nail design:
- Begin by painting all your nails with a bright orange polish and let it dry.
- With a thin brush or toothpick, draw little green stems at the base of each nail.
- Using black polish, draw small eyes and a mouth to make the pumpkin faces.
- Add a top coat once everything is dry to protect your design.
3. Ghoulish Gradient
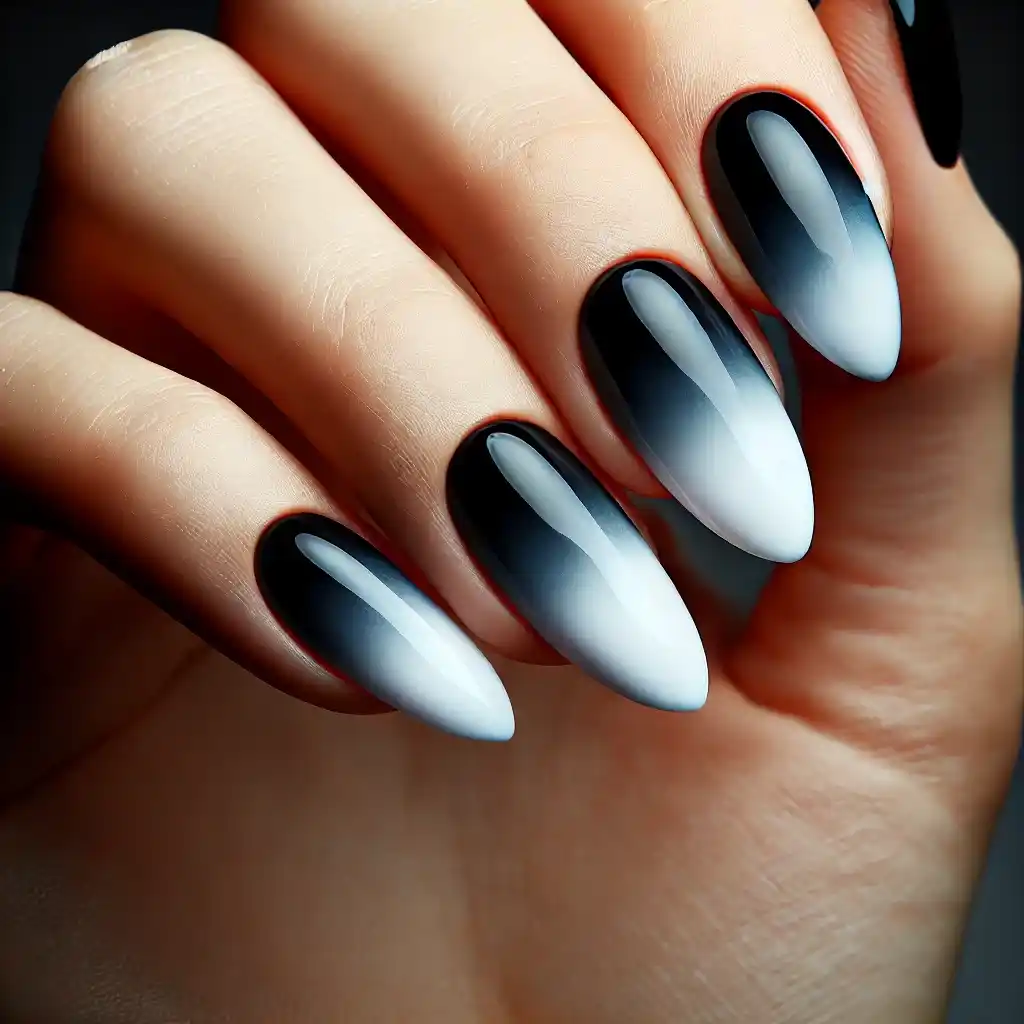
Create a hauntingly beautiful gradient effect using shades of black, gray, and white. This design mimics the look of a foggy, ghost-filled night—perfect for a mysterious vibe.
Steps to create nail design:
- Start with a white or light gray base on your nails and let it dry.
- Take a makeup sponge and apply black polish to the tip.
- Dab the sponge on your nails, starting at the top and moving downward to create a fading effect.
- Repeat the sponging for a darker effect, then add a clear top coat.
4. Vampire Vibes
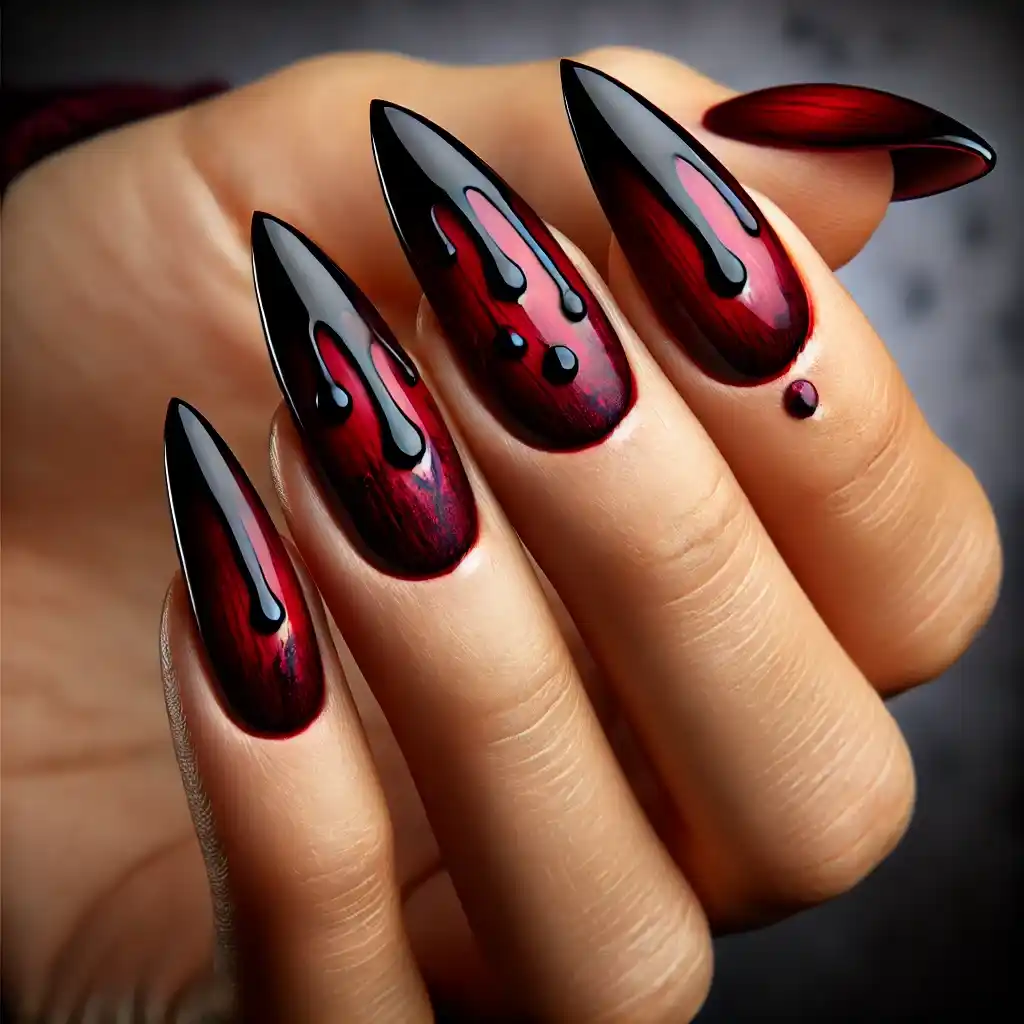
Go for a classic Halloween look with deep crimson nails tipped with blood-like drips. This design is both elegant and edgy, ideal for anyone channeling their inner vampire.
Steps to create nail design:
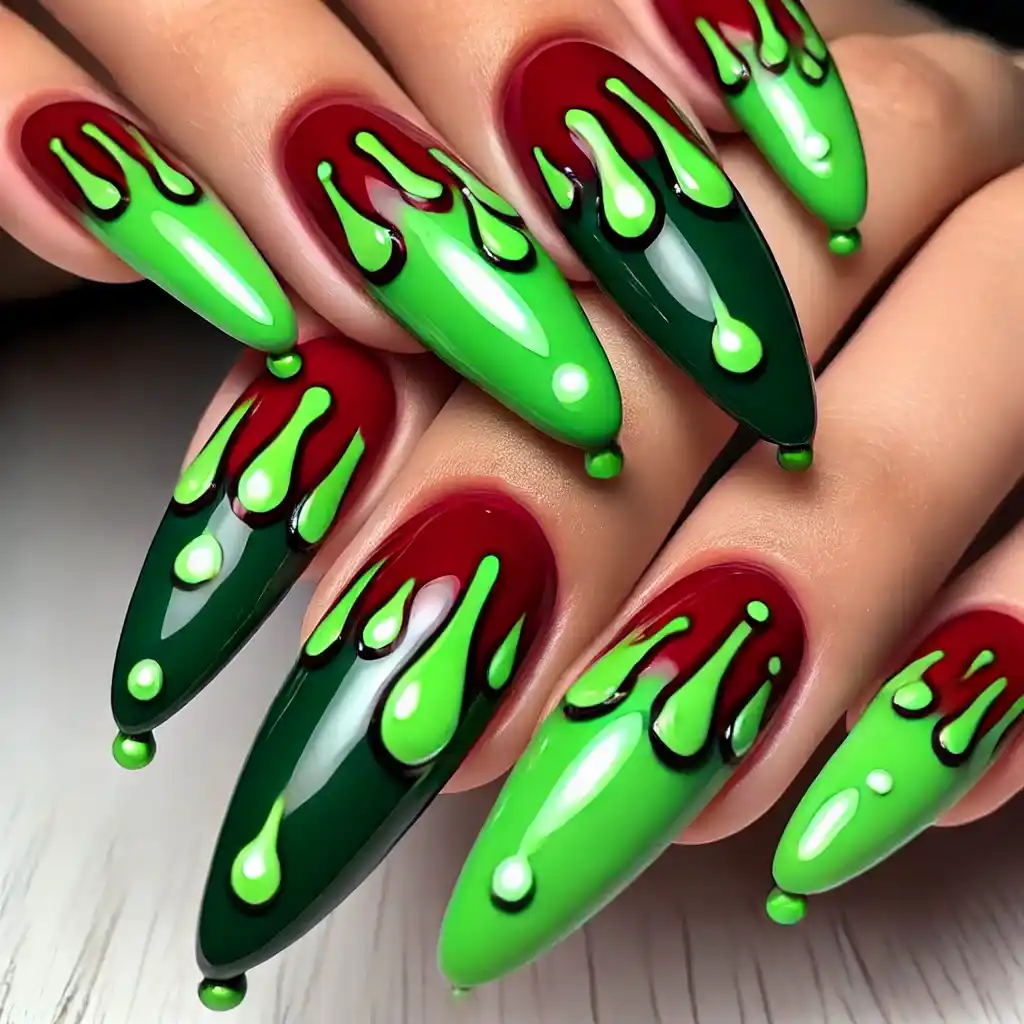
- Paint your nails with deep red polish and allow them to dry.
- Use a thin brush dipped in black polish to paint small drips near the tips.
- Drag the drips downwards to make it look like dripping blood.
- Let it dry, then apply a top coat for a glossy finish.
5. Mummy Wrap
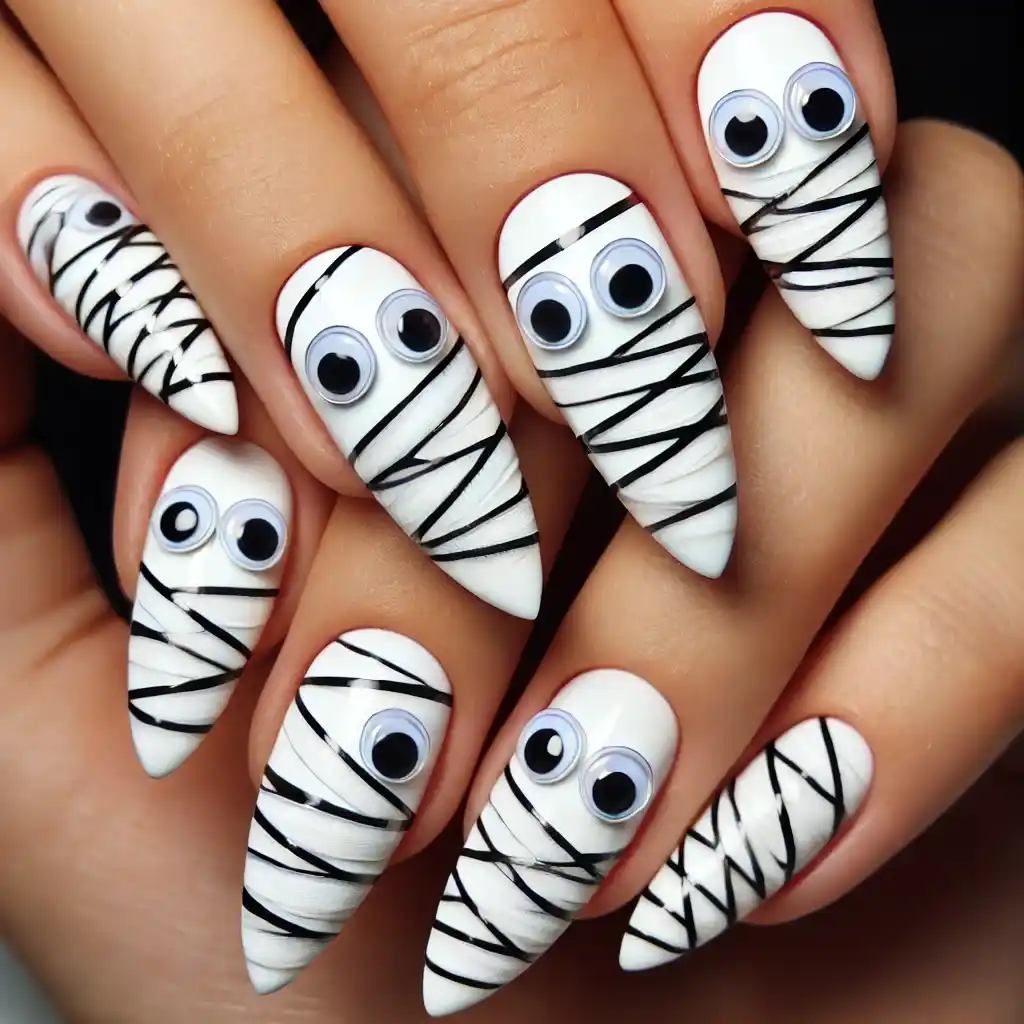
Wrap your nails in a spooky mummy design using white polish with thin black lines. Add tiny googly eyes peeking through the wraps to give it a playful twist.
Steps to create nail design:
- Paint your nails with a white or cream base and let it dry.
- With a thin brush or nail tape, create small, horizontal lines across your nails using gray or black polish.
- Use a dotting tool or toothpick to add two small black dots for eyes.
- Finish with a top coat to seal the mummy look.
6. Candy Corn Craze
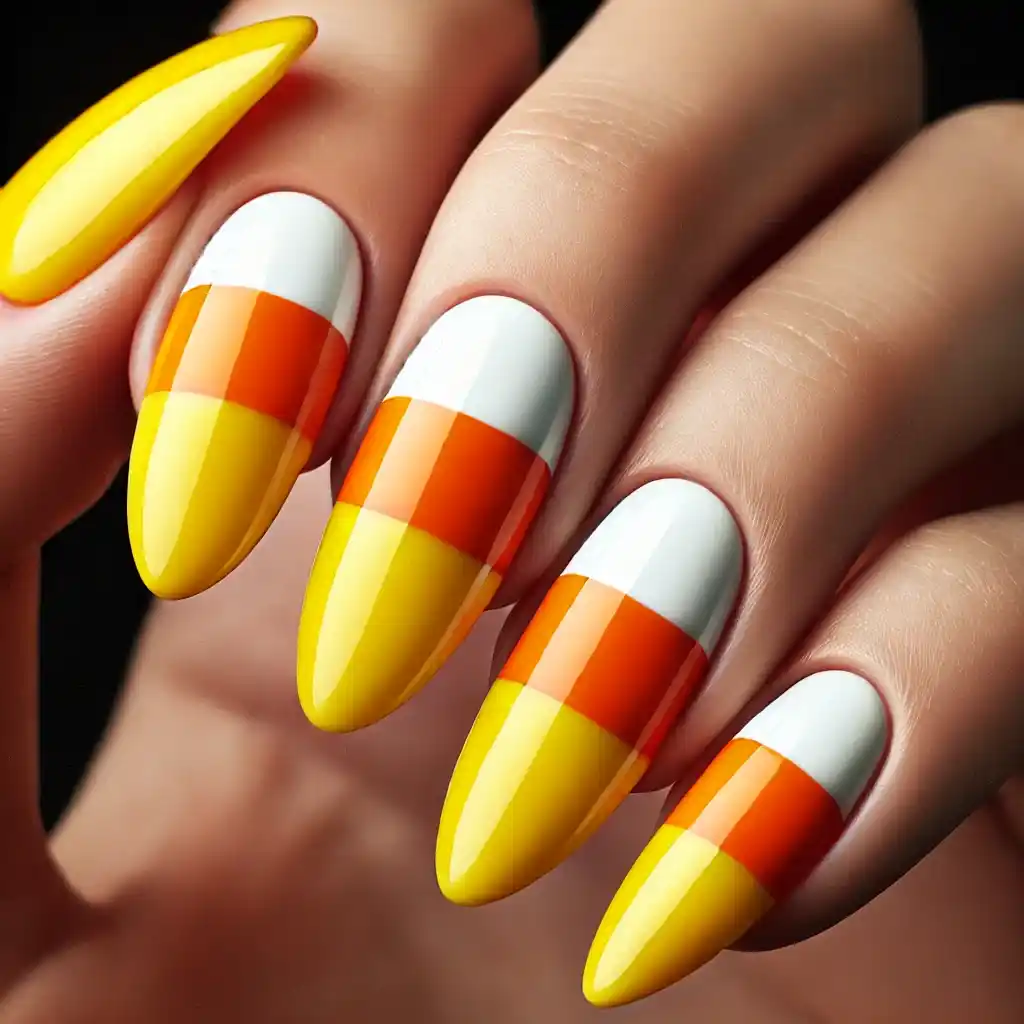
Celebrate the sweetest part of Halloween with a candy corn-inspired design. Alternate between yellow, orange, and white stripes on each nail for a look that’s as fun as it is festive.
Steps to create nail design:
- Paint the bottom third of your nails with yellow polish and let it dry.
- Paint the middle section with orange polish, leaving the top third of the nail.
- Paint the top third with white polish to complete the candy corn look.
- Once dry, apply a clear top coat.
7. Black Cat’s Charm
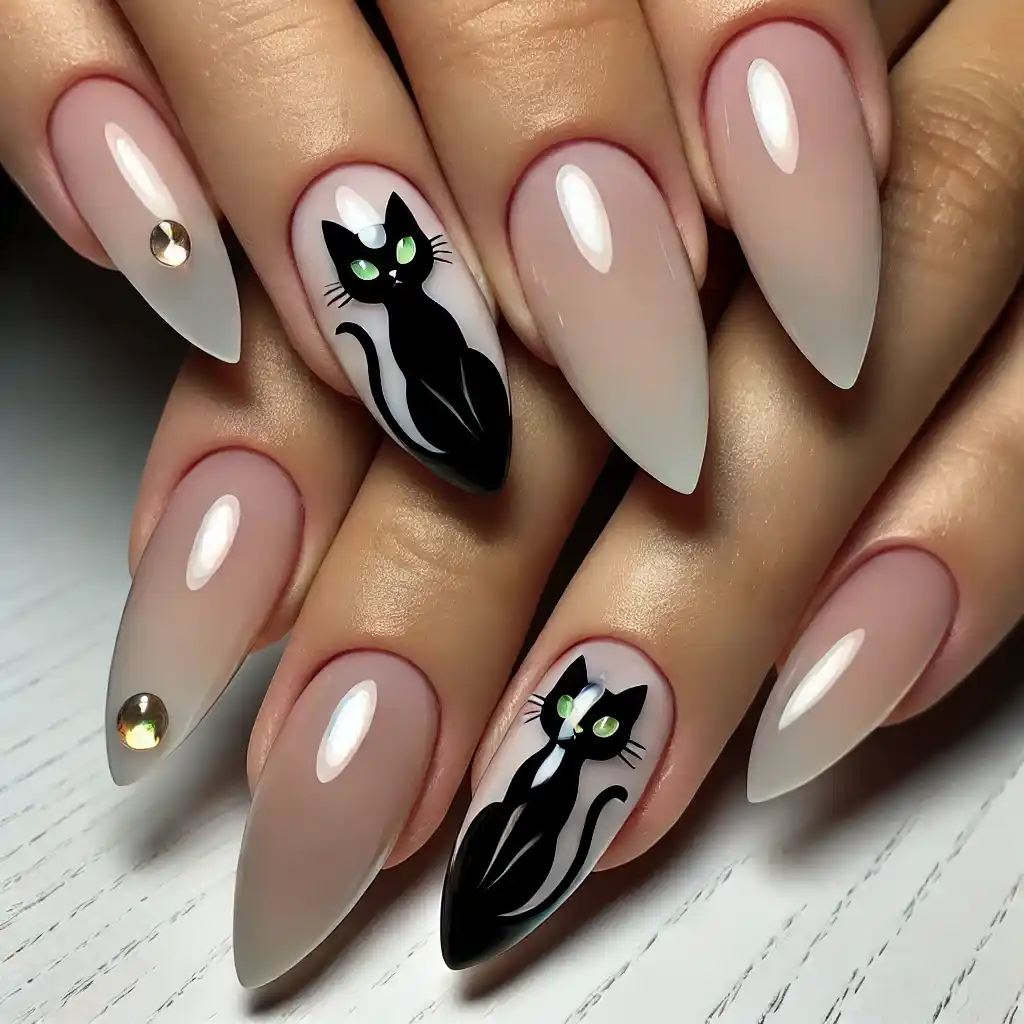
A sleek black cat silhouette on a neutral or glittery base adds a touch of mystery and magic. This design is perfect for cat lovers who want a hint of Halloween on their nails.
Steps to create nail design:
- Paint your nails with a clear or neutral base coat and let it dry.
- Use black polish to draw a cat silhouette at the tip of each nail.
- Add tiny green or yellow dots for the eyes using a dotting tool.
- Finish with a top coat to make the design shine.
8. Ghostly Glam
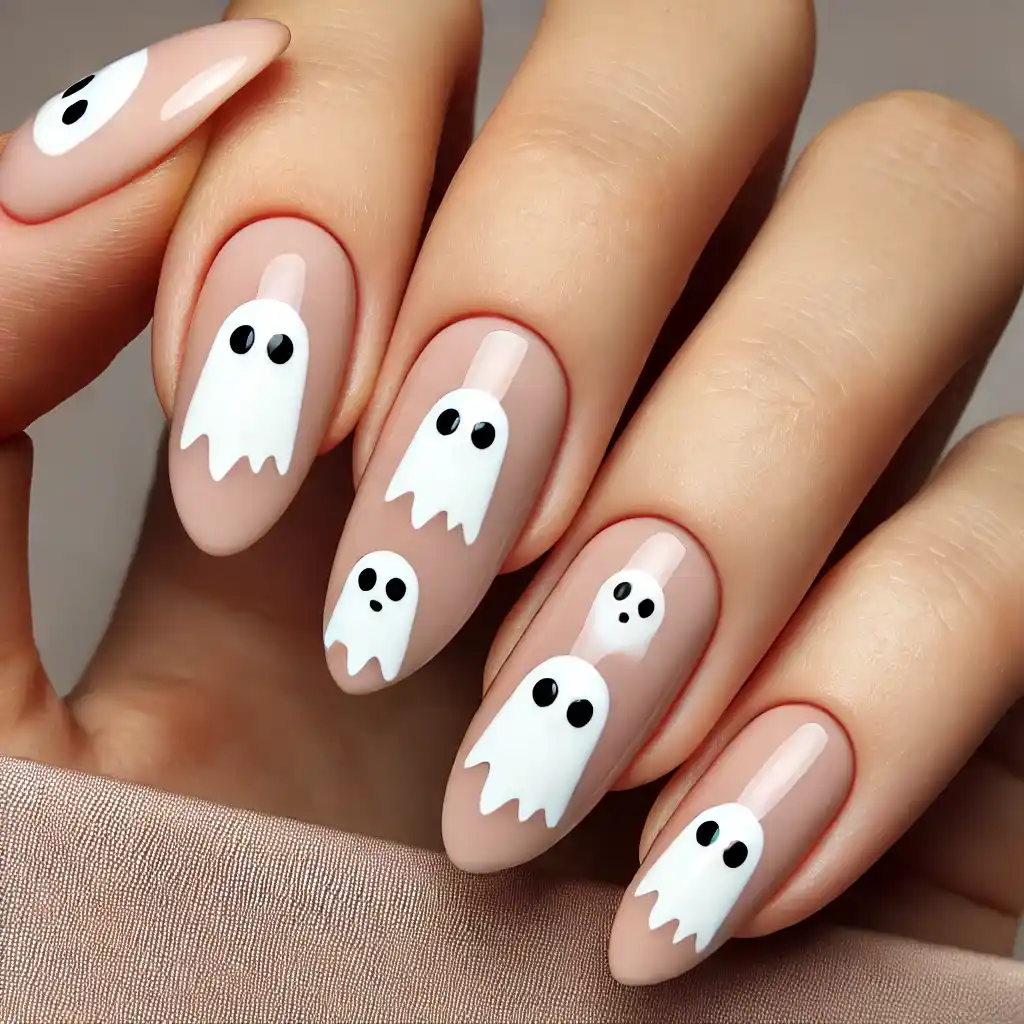
Keep it chic with minimalist ghost designs on a nude or soft pink base. These little white specters add a playful yet elegant touch to your Halloween manicure.
Steps to create nail design:
- Start with a nude or soft pink polish and let it dry.
- Use white polish to paint small ghost shapes on each nail, leaving space at the bottom for the tail.
- Add tiny black dots for eyes and a mouth.
- Seal the design with a shiny top coat.
9. Haunted House
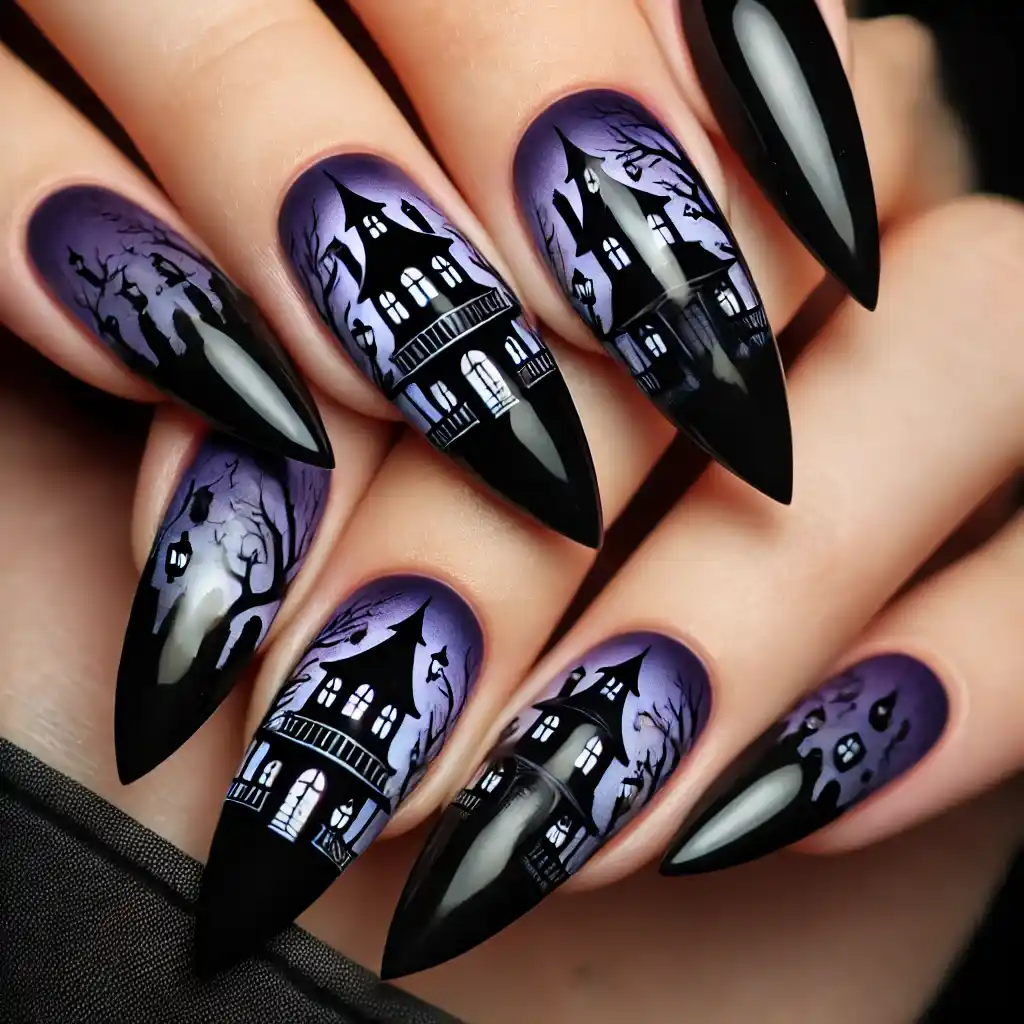
Capture the essence of a haunted house with dark, moody colors like deep purple or midnight blue. Add silhouettes of eerie trees, bats, or even a haunted mansion for a dramatic effect.
Steps to create nail design:
- Paint your nails with a dark purple or midnight blue base and let it dry.
- Use a thin brush to draw small house shapes with black polish.
- Add details like windows, doors, and trees with a lighter polish.
- Let it dry, then apply a clear top coat.
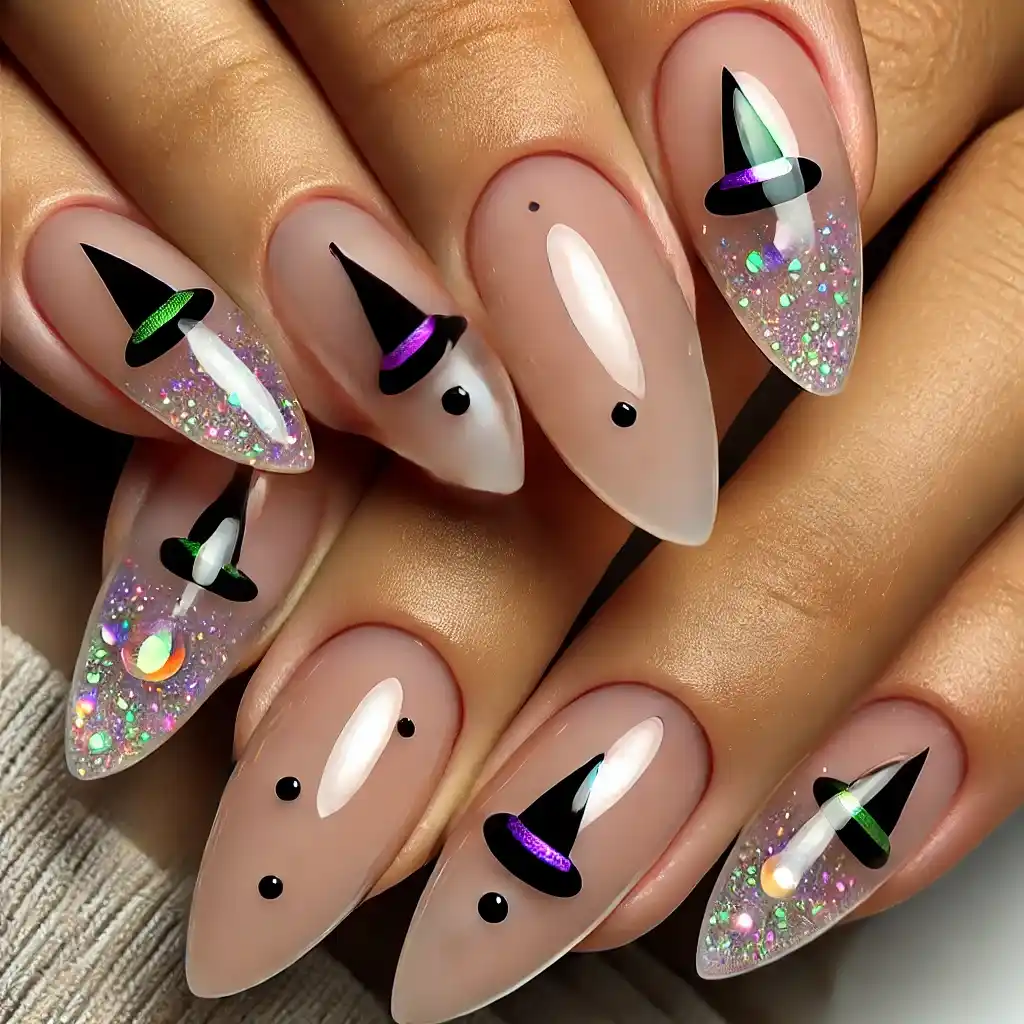
10. Bewitched
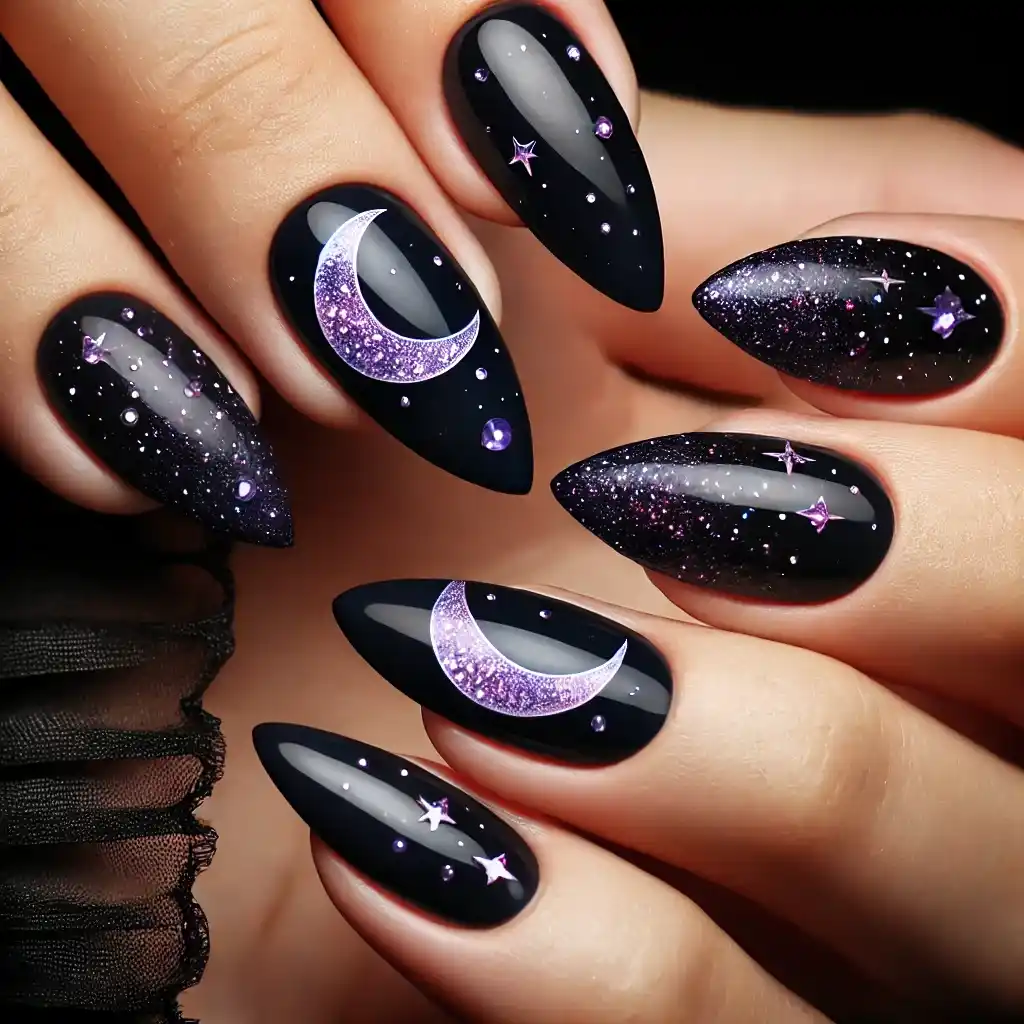
Channel your inner witch with a mix of black and purple polish, adorned with tiny silver stars or moons. This design is mystical, magical, and utterly enchanting.
Steps to create nail design:
- Paint your nails with a black base coat and let it dry.
- Use purple polish to paint a crescent moon on each nail.
- Add tiny silver stars around the moon using a dotting tool.
- Finish with a shiny top coat.
11. Skeleton Chic
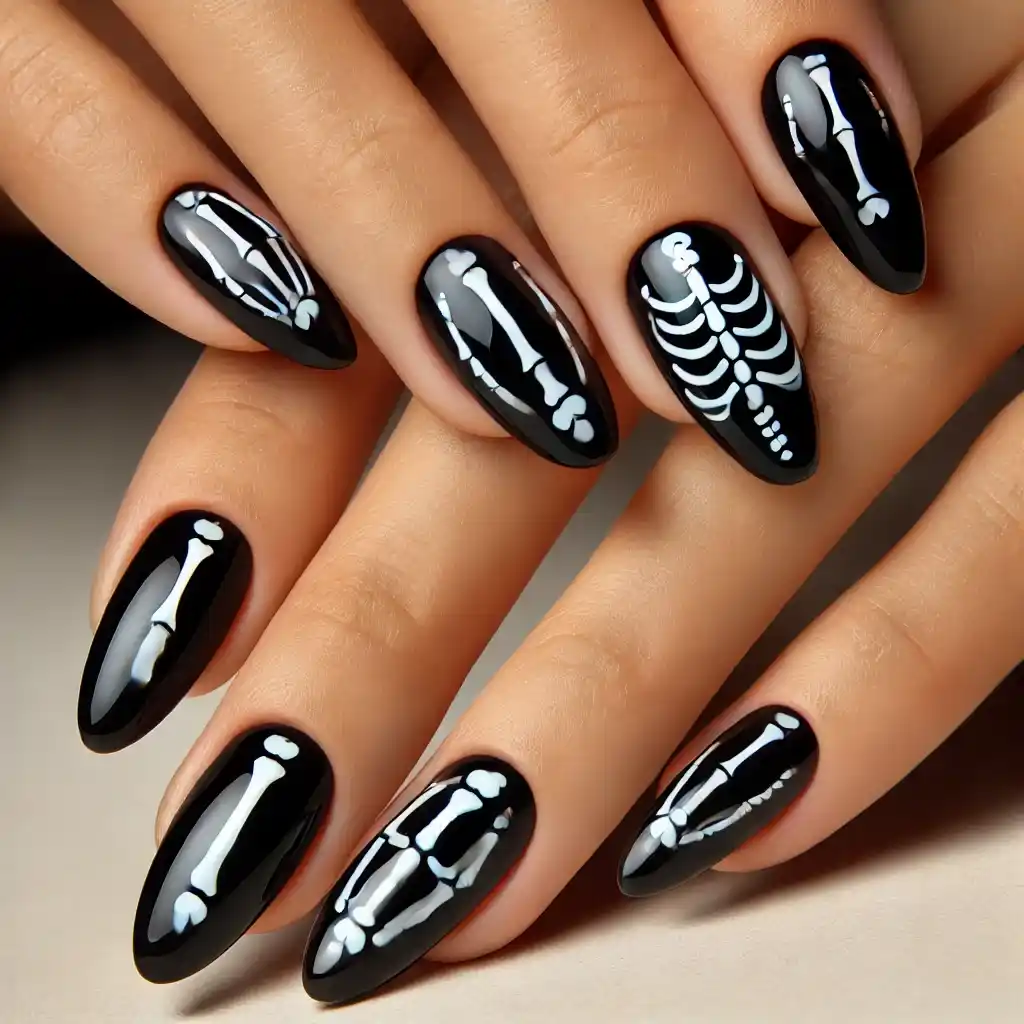
Opt for a minimalist skeleton design with thin white bones painted over a black base. It’s a subtle nod to Halloween that’s both stylish and sophisticated.
Steps to create nail design:
- Paint your nails with a black base and let it dry.
- Use a thin brush to draw simple white bone shapes on each nail.
- Add small details like joints or ribs to complete the skeleton look.
- Seal with a clear top coat.
12. Zombie Apocalypse
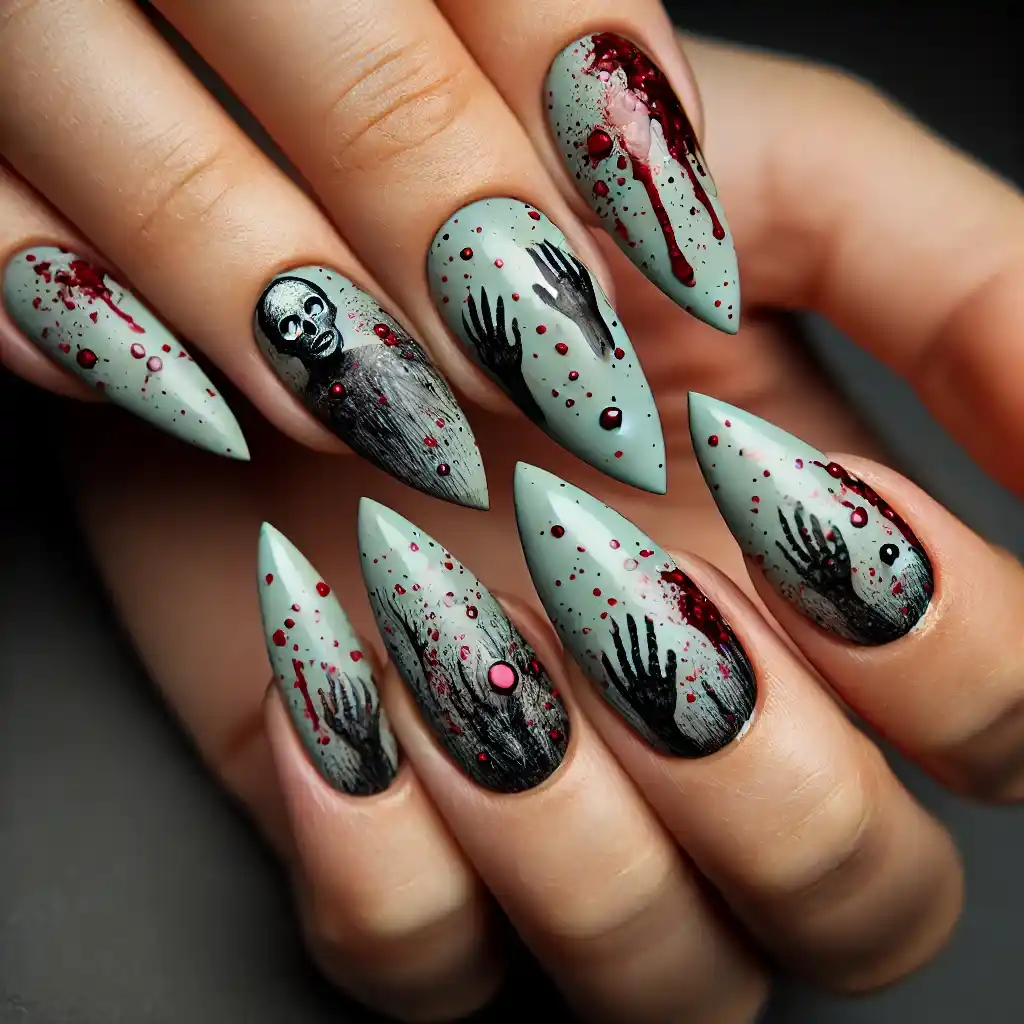
Create a gruesome look with splatters of red “blood” on a pale green or gray background. This design is perfect for fans of horror who want a truly terrifying nail look.
Steps to create nail design:
- Paint your nails with a pale green or gray base and let it dry.
- Use a thin brush dipped in red polish to create blood splatters by flicking the brush near your nails.
- Add tiny black details to mimic dirt or grime for a realistic zombie look.
- Finish with a top coat.
13. Witch’s Brew
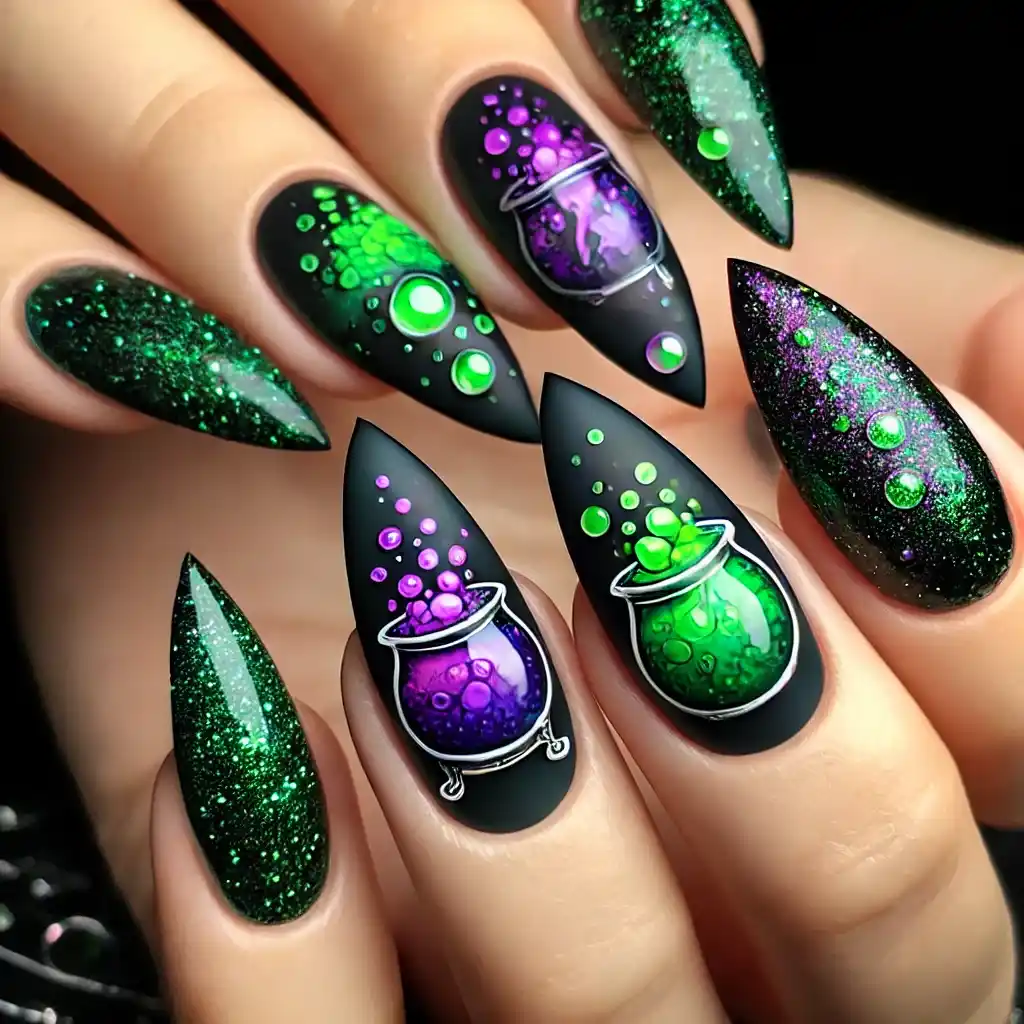
Brew up some fun with a cauldron-inspired design, featuring bubbling green and purple potion effects. Add some glitter to mimic the sparkle of a magical concoction.
Steps to create nail design:
- Paint your nails with a black or dark green base and let it dry.
- Use a thin brush to create bubbling potion effects with bright green or purple polish.
- Add some glitter to the bubbles for a magical touch.
- Seal the design with a top coat.
14. Hocus Pocus
Pay homage to the beloved Halloween classic with nails inspired by the Sanderson sisters. Use rich purples, greens, and oranges, with details like witch hats or broomsticks.
Steps to create nail design:
- Start with a rich purple or green base on each nail and let it dry.
- Use orange or black polish to paint tiny witch hats or broomsticks on your nails.
- Add small details like a belt buckle on the hat with silver polish.
- Finish with a top coat.
15. Bloody Moon
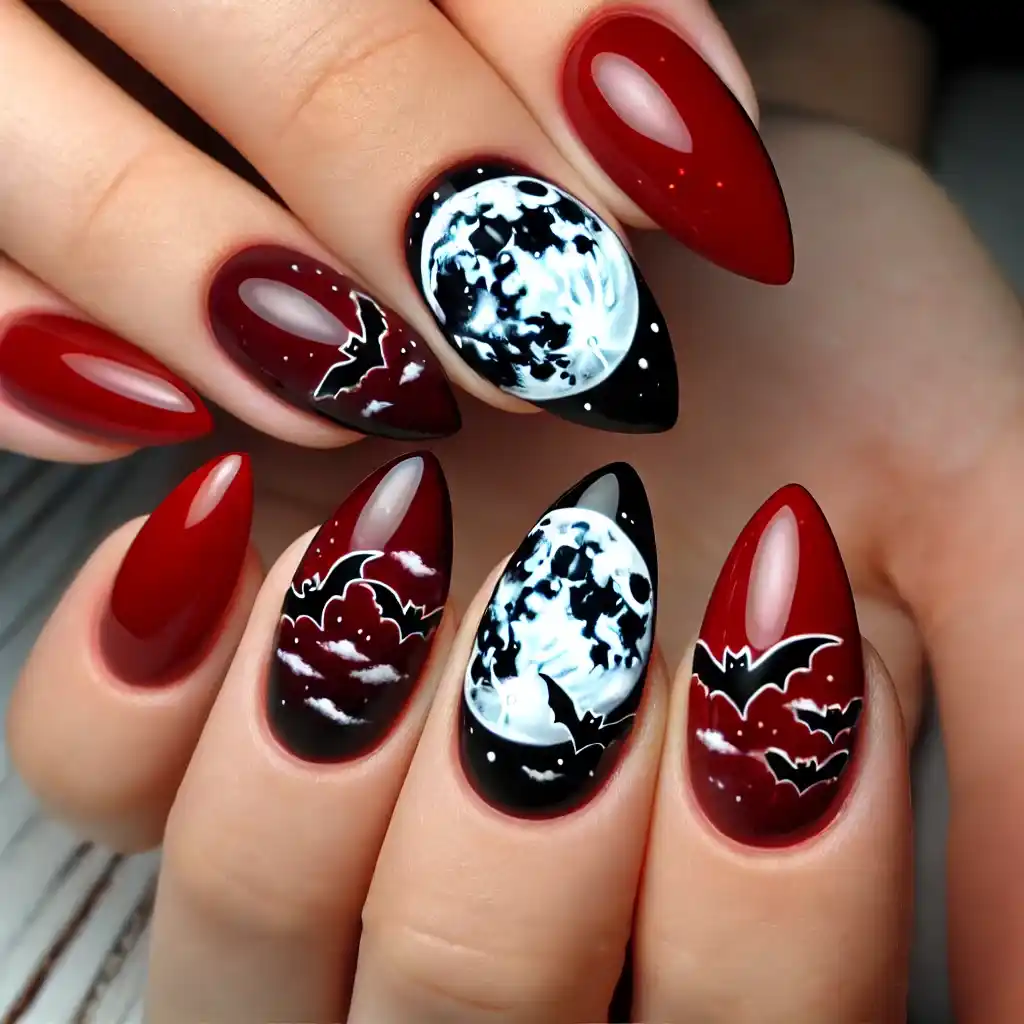
Capture the spooky beauty of a blood moon with a deep red base and a glowing, eerie moon painted in white. Add some clouds or bats to enhance the haunted vibe.
Steps to create nail design:
- Paint your nails with deep red polish and let it dry.
- Use white polish to paint a glowing moon shape on each nail.
- Add tiny bats or clouds around the moon using black polish.
- Seal the design with a shiny top coat.
16. Spider Frenzy
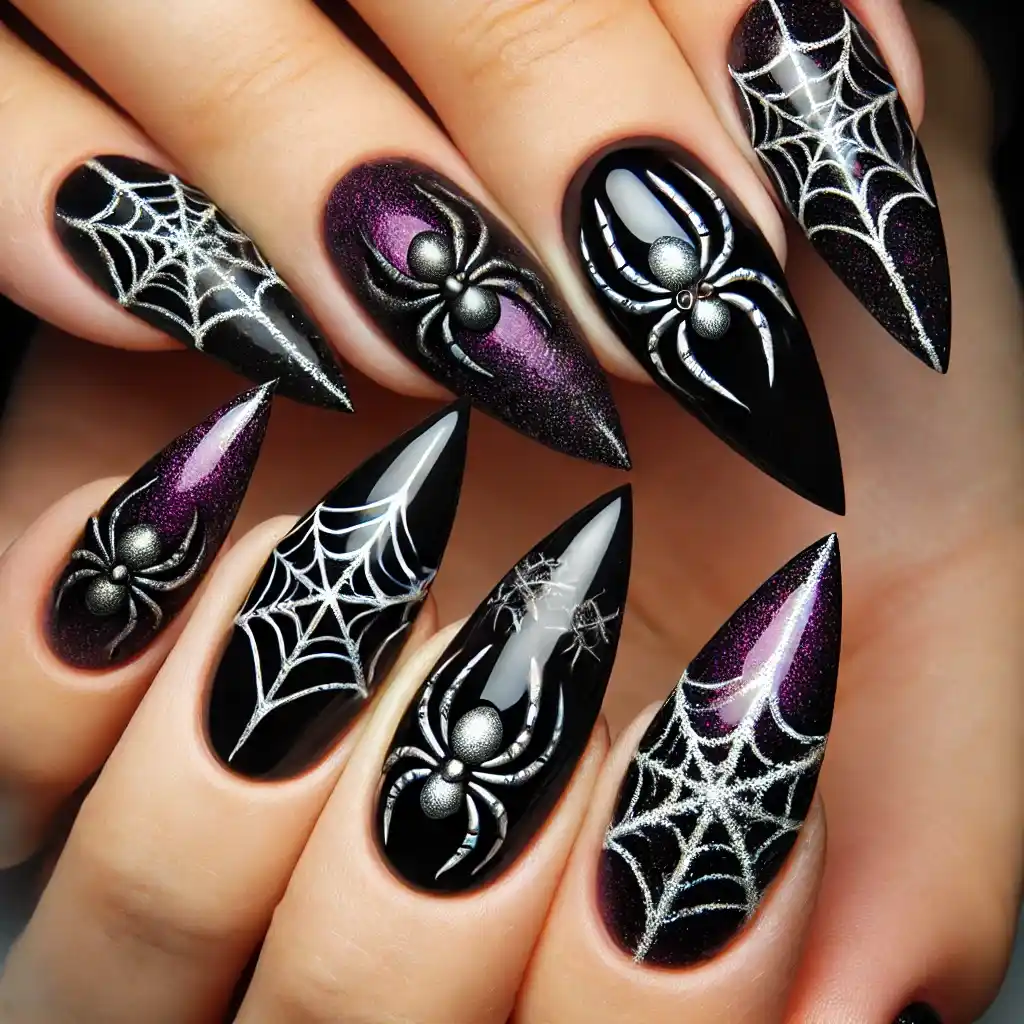
Cover your nails in tiny, detailed spiders crawling over a dark background. For an extra touch, add some 3D spider decals to really bring the design to life.
Steps to create nail design:
- Paint your nails with a dark base color like black or deep purple and let it dry.
- Use a thin brush to paint tiny spiders with black polish.
- Add small white dots for the eyes and a silver thread for the web.
- Finish with a top coat to protect the design.
17. Potion Bottles
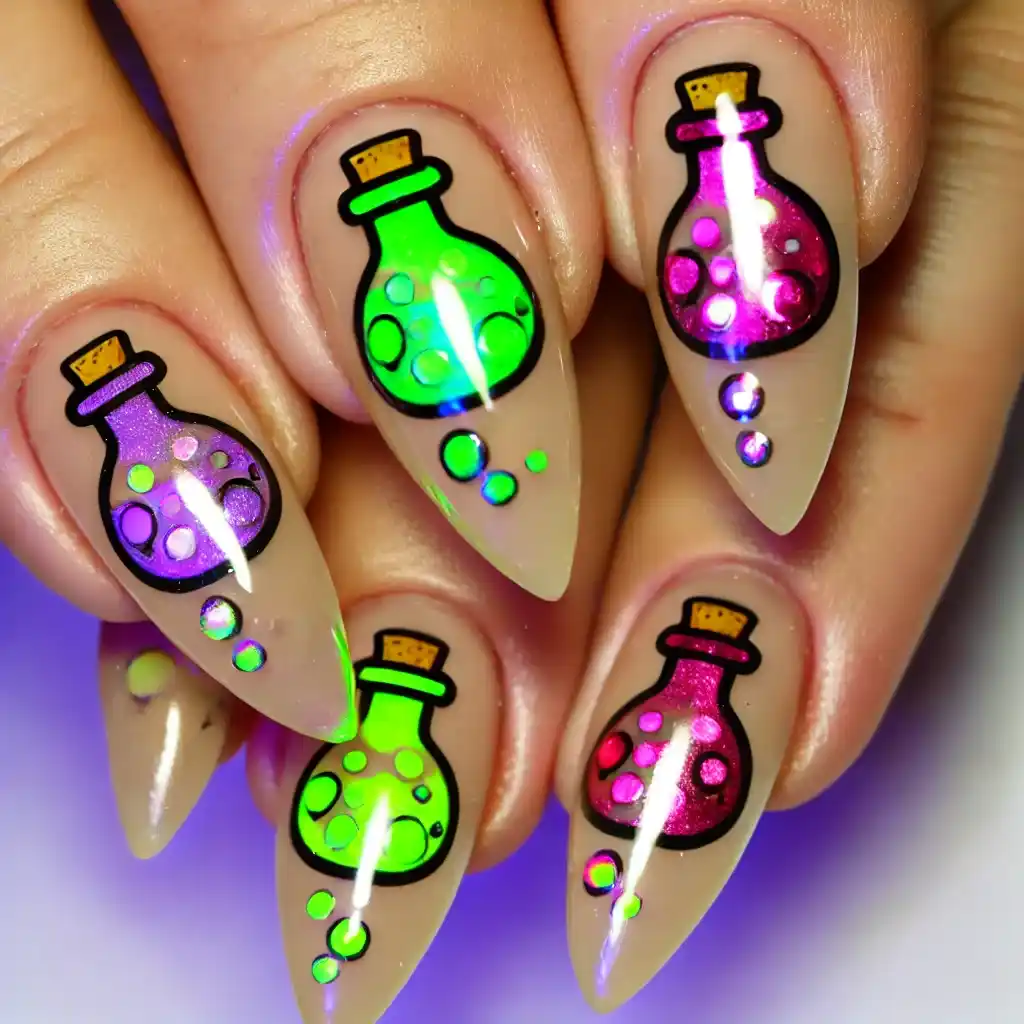
Decorate your nails with tiny potion bottles filled with “magic” ingredients. Use vibrant colors like neon green, bright purple, and deep red for a fun and whimsical look.
Steps to create nail design:
- Start with a clear or nude base on your nails and let it dry.
- Use bright colors like neon green, purple, and red to paint tiny potion bottle shapes.
- Add small details like bubbles or labels with a thin brush.
- Seal with a top coat.
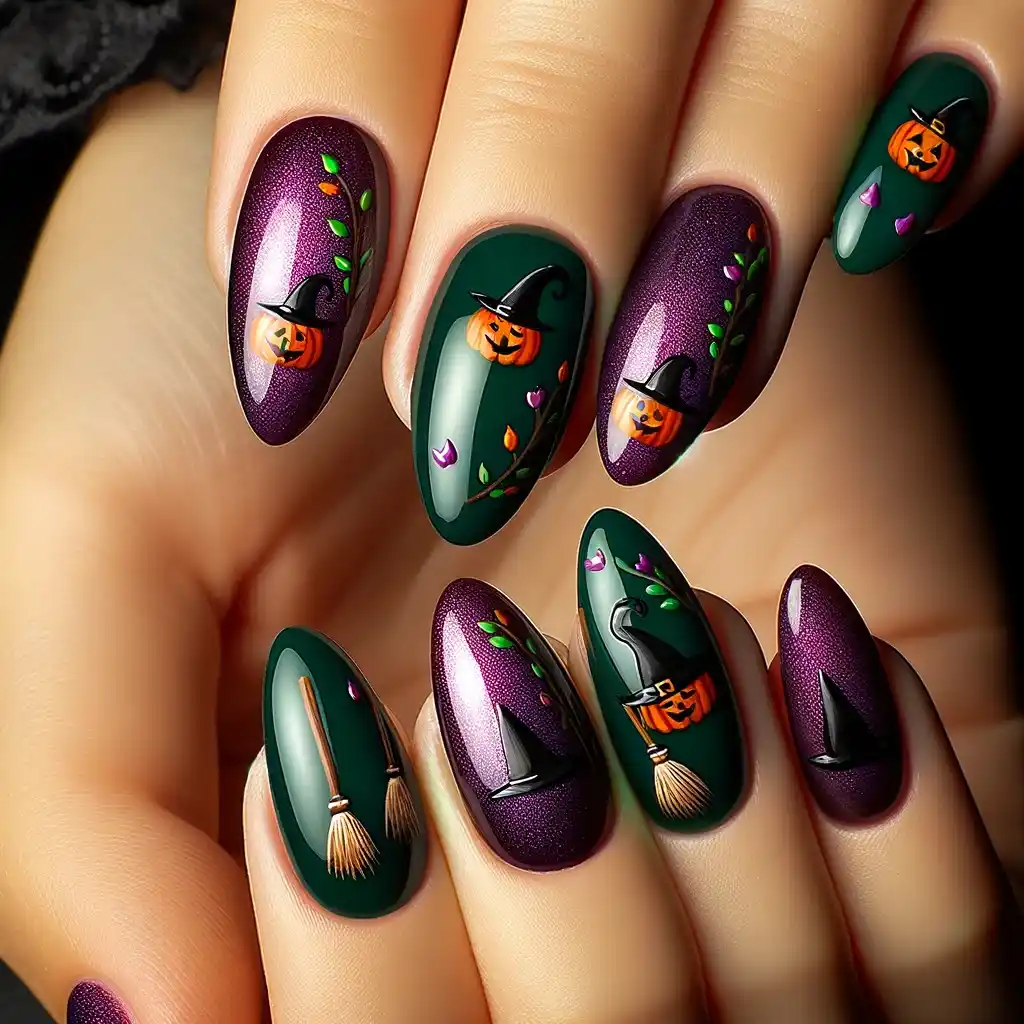
18. Jack-o’-Lantern
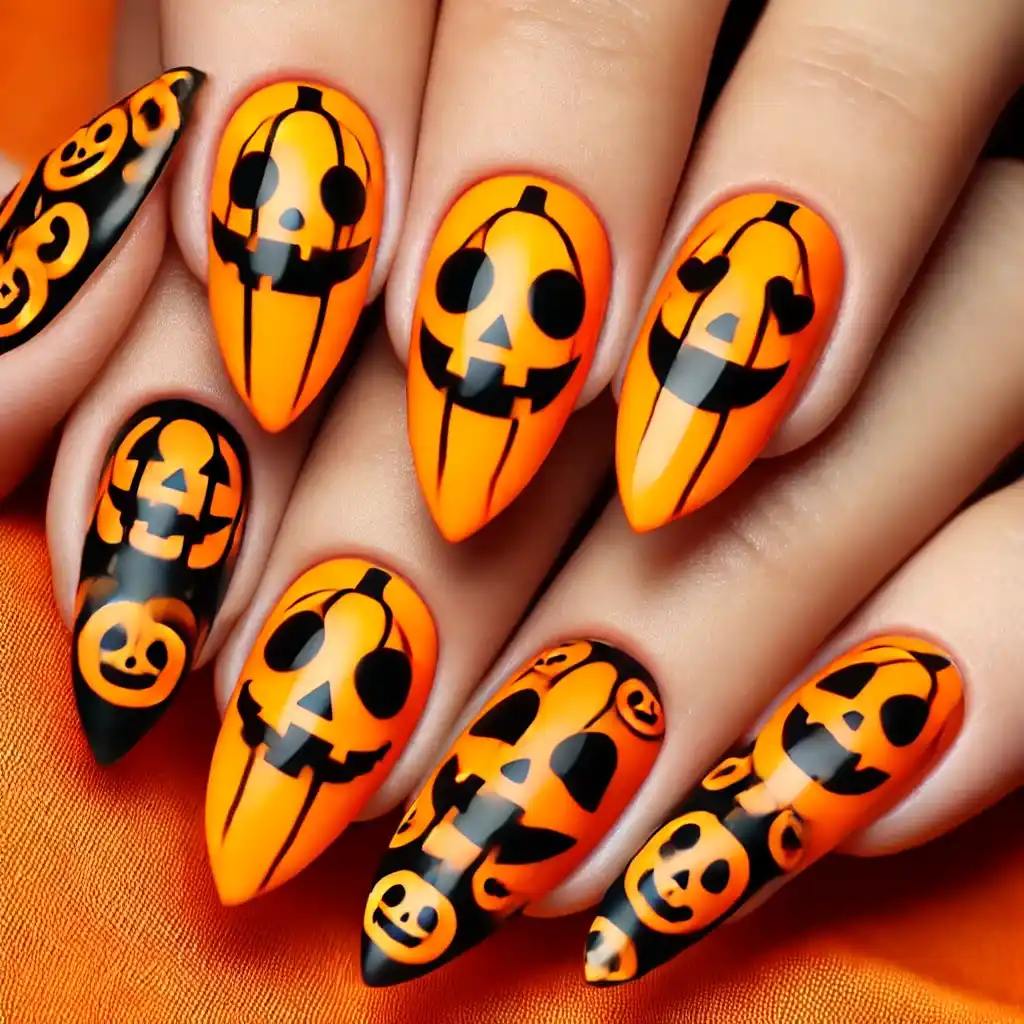
Carve out some fun with jack-o’-lantern faces painted in black over an orange base. Each nail can have a different face, ranging from spooky to silly.
Steps to create nail design:
- Paint your nails with a bright orange base and let it dry.
- Use black polish to draw different jack-o’-lantern faces on each nail.
- Add small green stems at the top with green polish.
- Finish with a clear top coat.
19. Gothic Glam
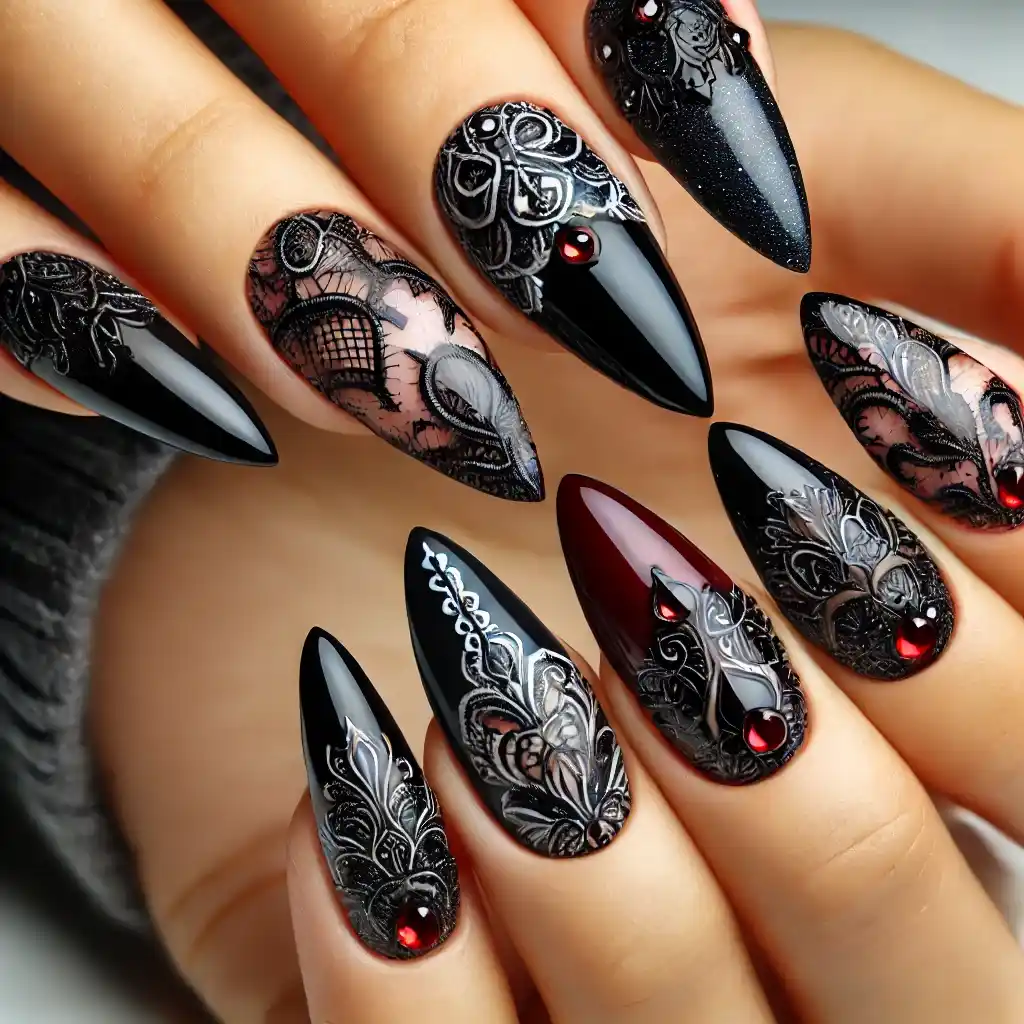
Combine elegance and eeriness with black lace designs over a dark, glossy base. This look is perfect for those who want a more sophisticated take on Halloween nails.
Steps to create nail design:
- Paint your nails with a dark, glossy polish like black or deep red and let it dry.
- Use a thin brush to draw lace patterns with black or white polish.
- Add small rhinestones for extra glam if desired.
- Seal the design with a top coat.
20. Frankenstein’s Monster
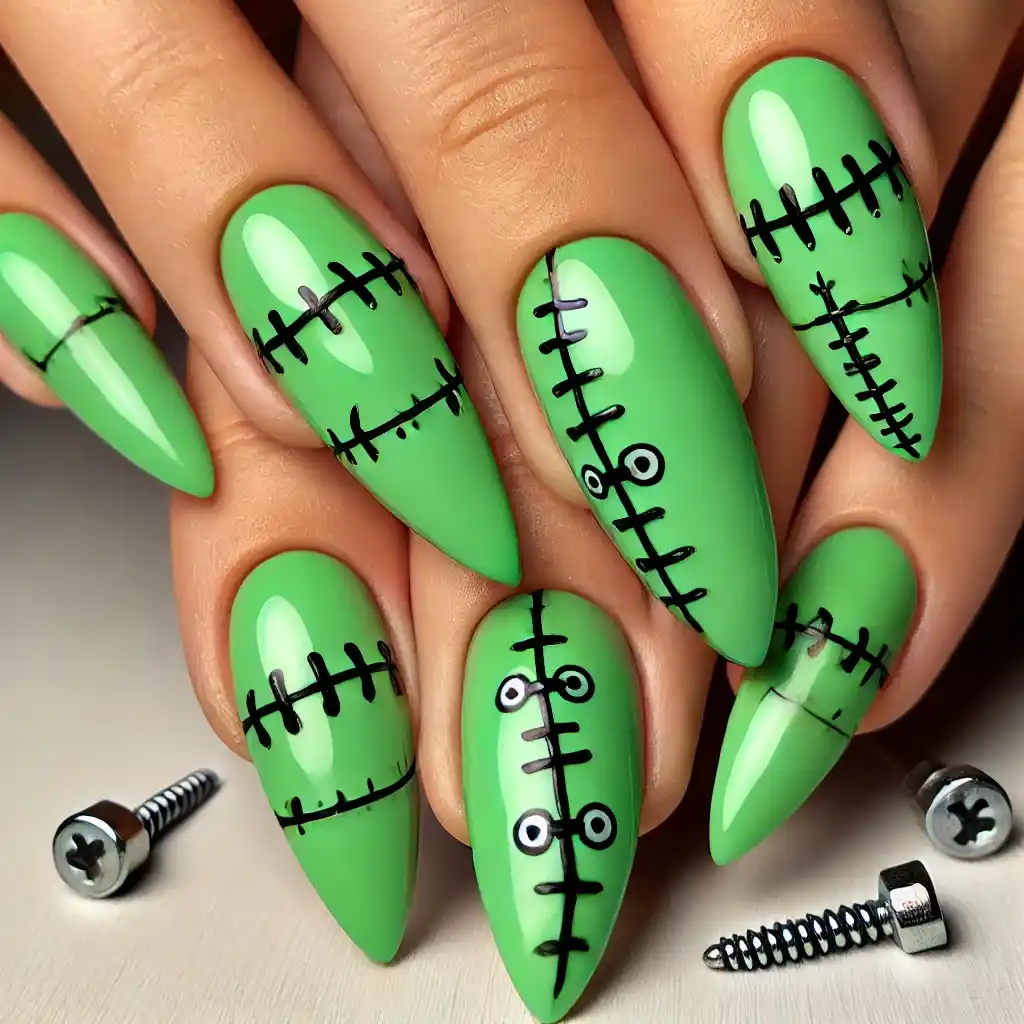
Bring Frankenstein’s monster to life with green nails adorned with black “stitches.” This design is bold, eye-catching, and perfect for Halloween.
Steps to create nail design:
- Paint your nails with green polish and let it dry.
- Use black polish to draw stitches across each nail using a thin brush.
- Add small bolts or screws near the cuticle for a Frankenstein look.
- Finish with a top coat.
21. Mystic Eyes
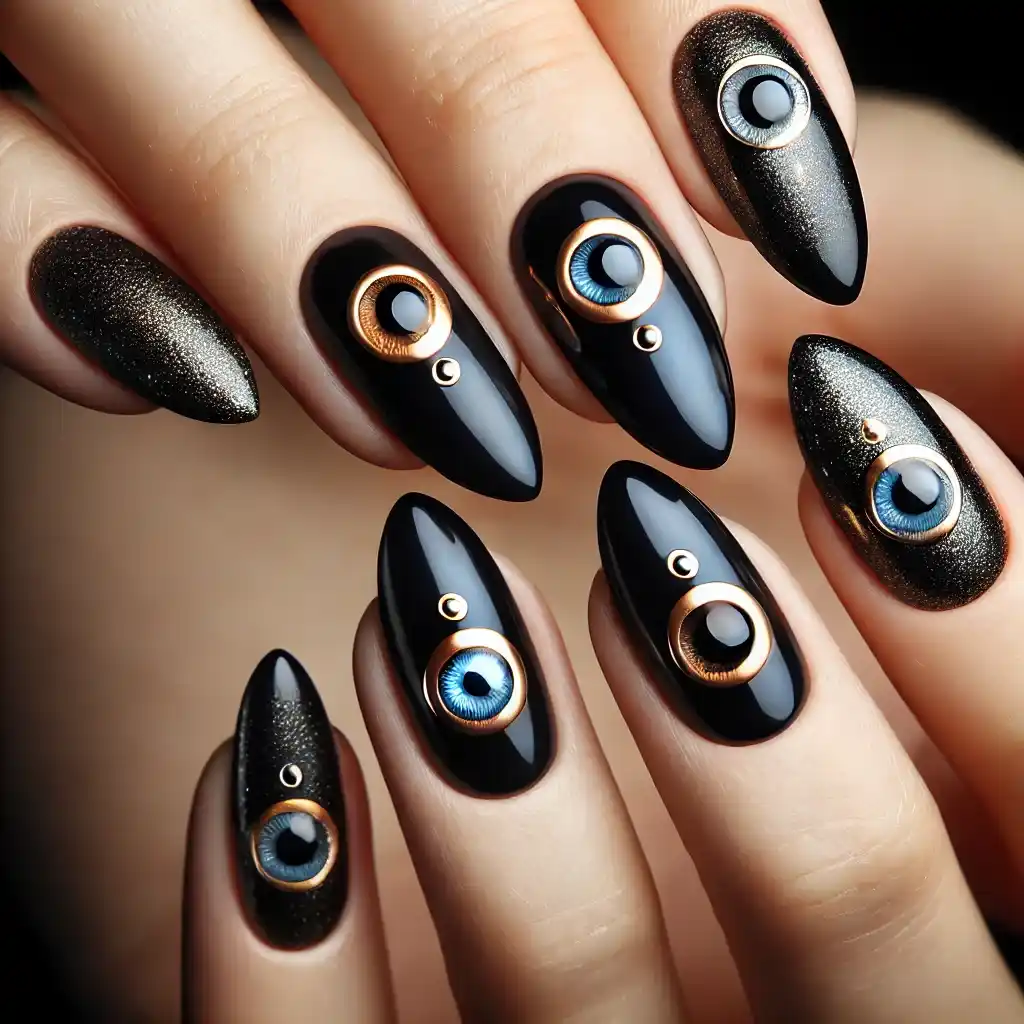
Create an air of mystery with all-seeing eyes painted on a dark background. Use metallic gold or silver for the irises to add a magical, otherworldly feel.
Steps to create nail design:
- Start with a dark base color like black or deep blue and let it dry.
- Use metallic gold or silver polish to paint eye shapes on each nail.
- Add small black dots in the center for the pupil.
- Seal the design with a shiny top coat.
22. Creepy Crawlers
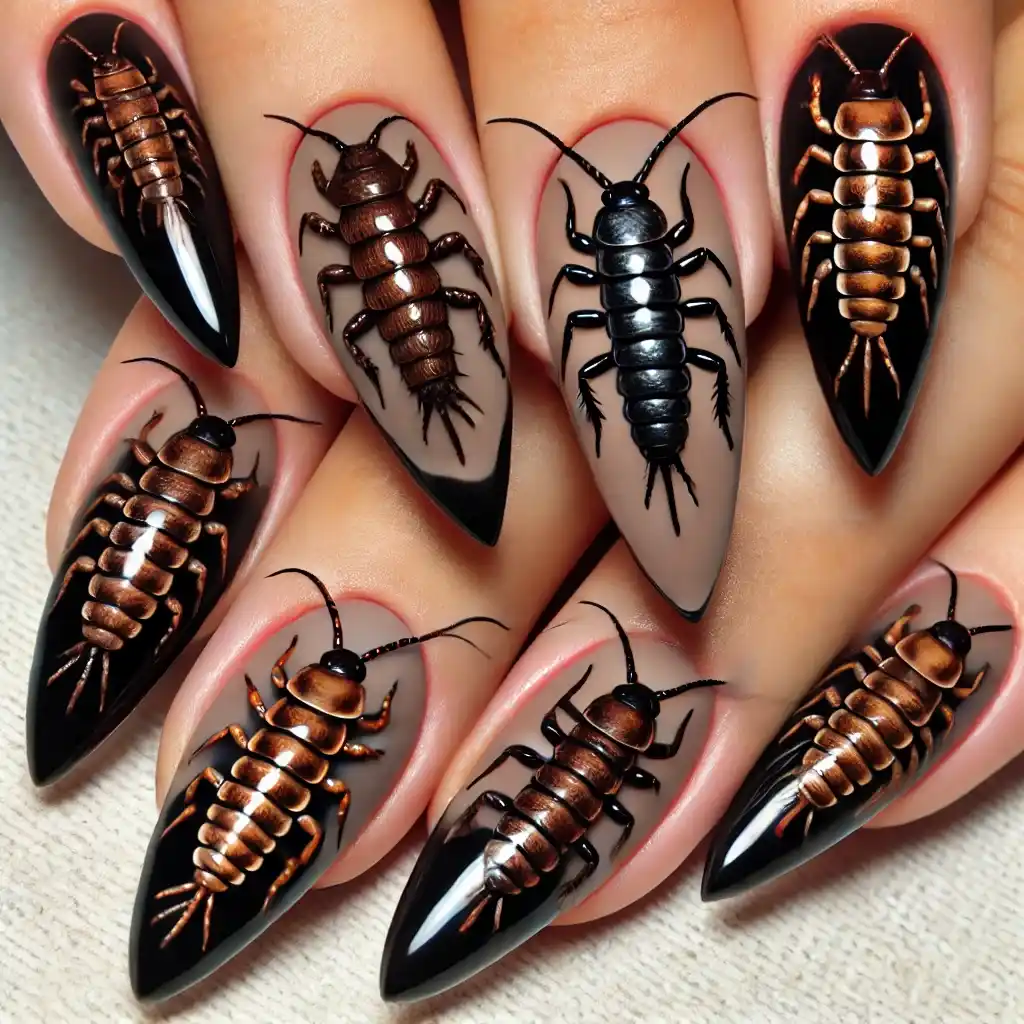
Turn up the creepy factor with tiny centipedes or cockroaches crawling across your nails. This design is not for the faint of heart but is sure to make a statement!
Steps to create nail design:
- Paint your nails with a dark brown or black base and let it dry.
- Use a thin brush to paint tiny centipedes or roaches with black or brown polish.
- Add small details like legs or antennae with a lighter polish.
- Finish with a top coat.
23. Moonlit Bats
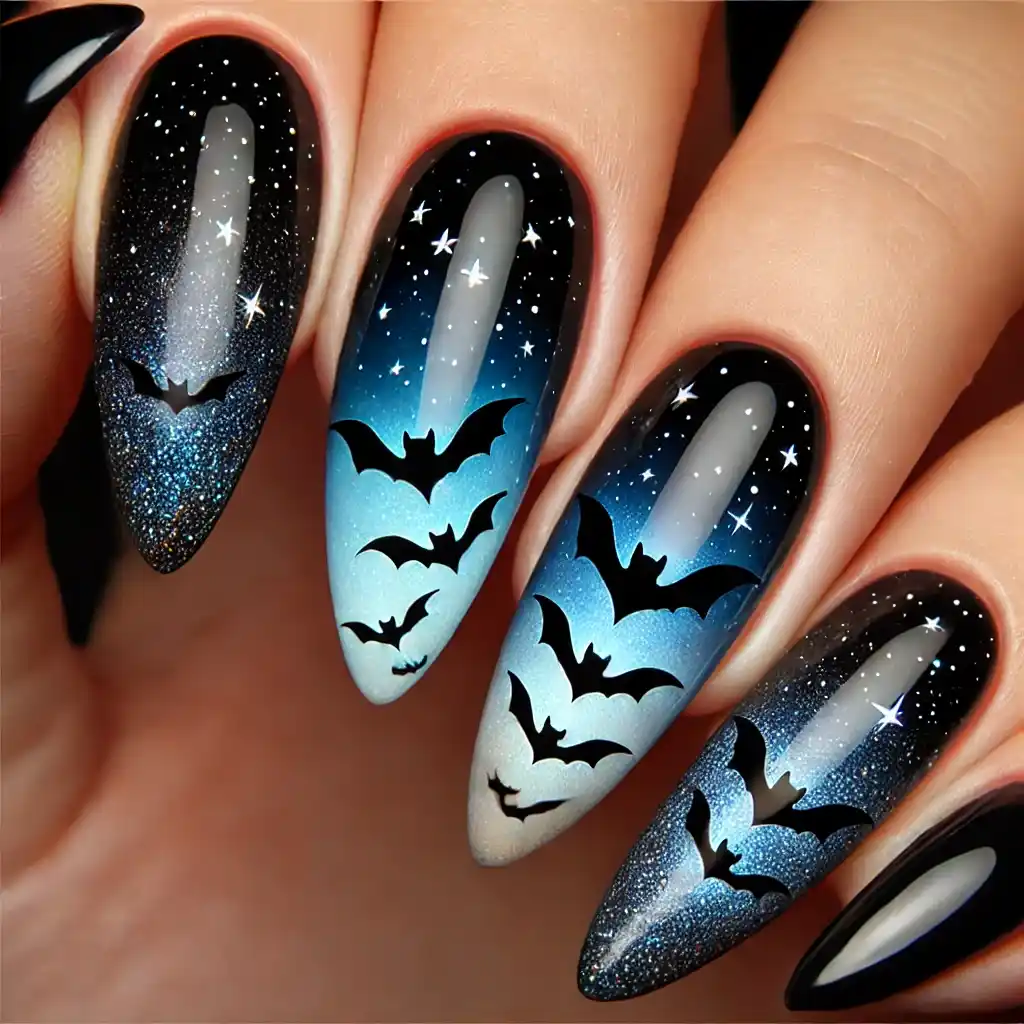
Fly into the night with silhouettes of bats against a moonlit sky. A gradient from deep blue to black creates the perfect backdrop for these nocturnal creatures.
Steps to create nail design:
- Start with a gradient base from deep blue to black, using a makeup sponge.
- Use black polish to paint tiny bat silhouettes flying across the nails.
- Add small white dots for stars in the background.
- Seal the design with a clear top coat.
24. Witch Hat Tips
Give a nod to the iconic witch’s hat with tiny hat designs at the tips of your nails. Use black polish with a pop of purple or green for the band.
Steps to create nail design:
- Paint your nails with a clear or neutral base and let it dry.
- Use black polish to draw small witch hats at the tips of your nails.
- Add a purple or green band around the hat for extra color.
- Finish with a shiny top coat.
25. Cursed Chains
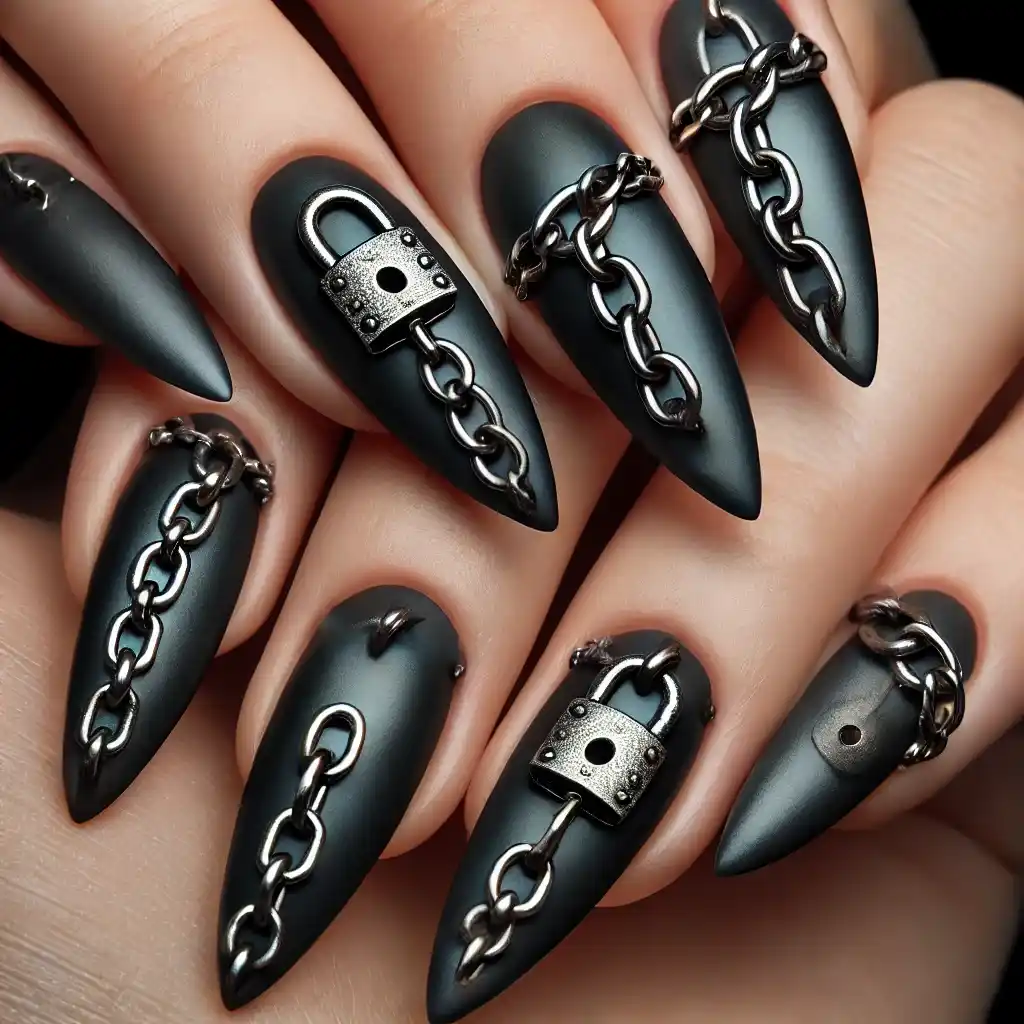
Wrap your nails in chains using metallic silver polish over a dark base. Add tiny padlocks or broken links to enhance the cursed, haunted look.
Steps to create nail design:
- Start with a dark base color like black or deep gray and let it dry.
- Use metallic silver polish to draw chain links across your nails.
- Add small details like broken links or padlocks with a thin brush.
- Seal the design with a top coat.
26. Spooky Smiles
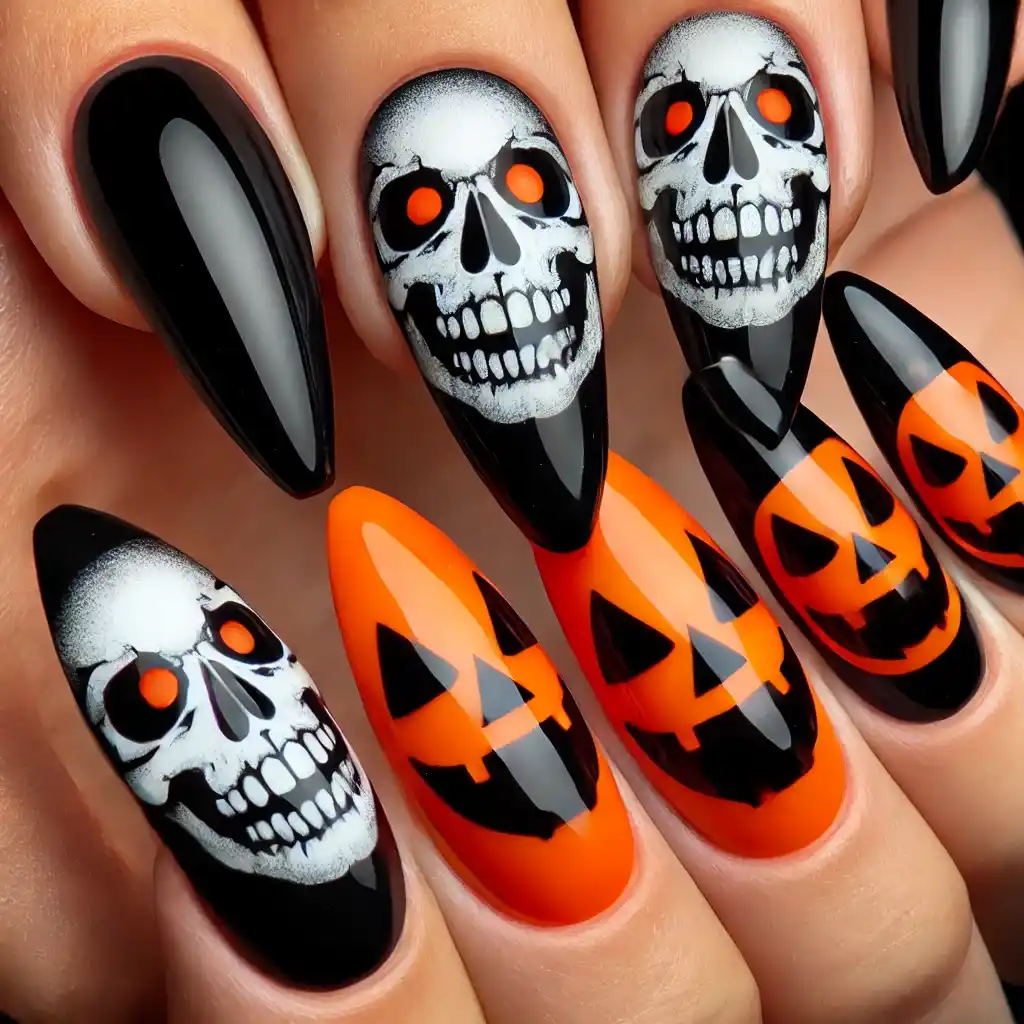
Keep it playful with wide, grinning skulls or jack-o’-lantern faces on a black or orange base. This design is fun, bold, and perfect for a Halloween party.
Steps to create nail design:
- Paint your nails with a black or orange base and let it dry.
- Use white polish to draw wide, grinning skull or jack-o’-lantern faces on each nail.
- Add small details like teeth or eyes with black polish.
- Finish with a clear top coat.
27. Voodoo Dolls
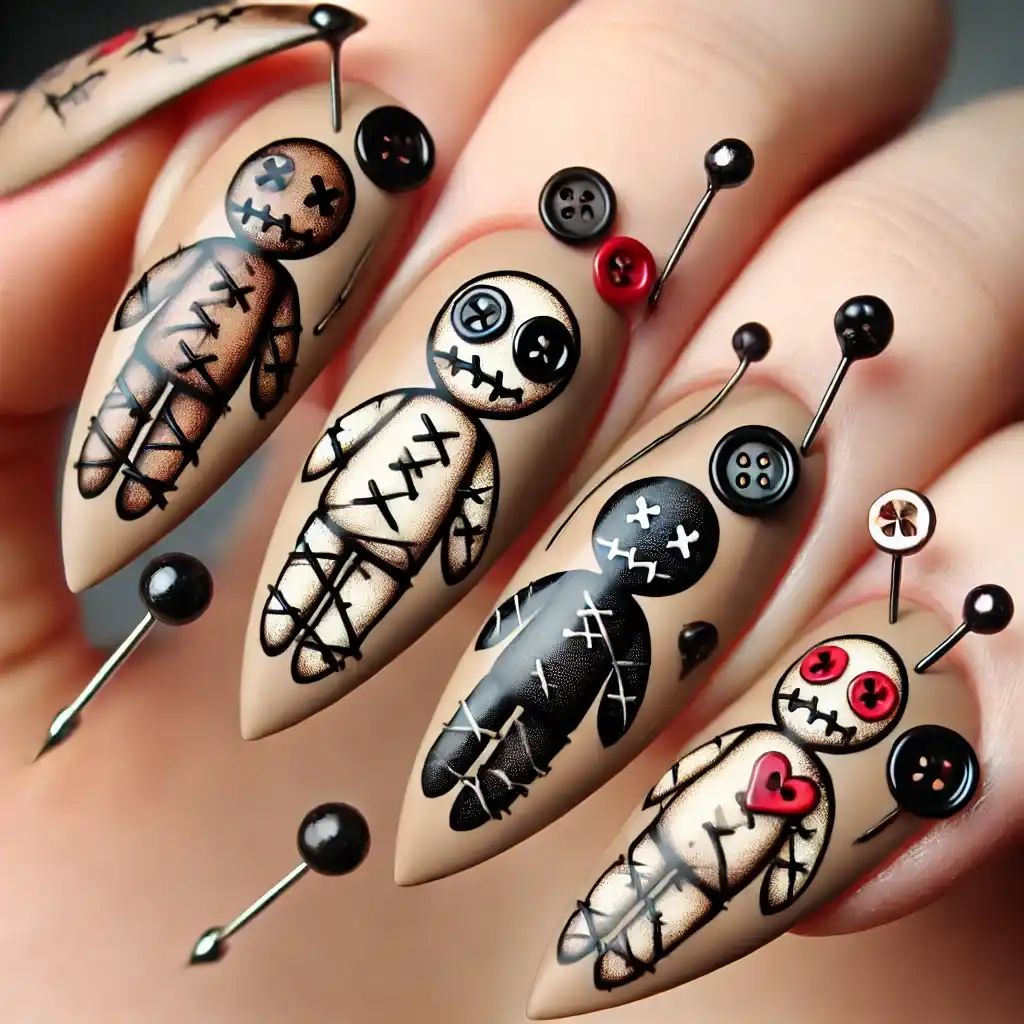
Embrace the eerie with nails inspired by voodoo dolls. Use beige or brown as your base, adding stitches, buttons, and pins for a creepy, handmade look.
Steps to create nail design:
- Start with a beige or brown base and let it dry.
- Use a thin brush to draw stitches, buttons, and pins on each nail using black or red polish.
- Add small details like eyes or patches for a creepy doll effect.
- Seal with a top coat.
28. Poison Apple
Channel the wicked queen with nails inspired by the poisoned apple from Snow White. A shiny red base with a dripping, green “poison” overlay is both beautiful and sinister.
Steps to create nail design:
- Paint your nails with a shiny red base and let it dry.
- Use green polish to create a dripping poison effect at the top of each nail.
- Add small white highlights to the drips for a 3D look.
- Finish with a shiny top coat.
29. Graveyard Shift
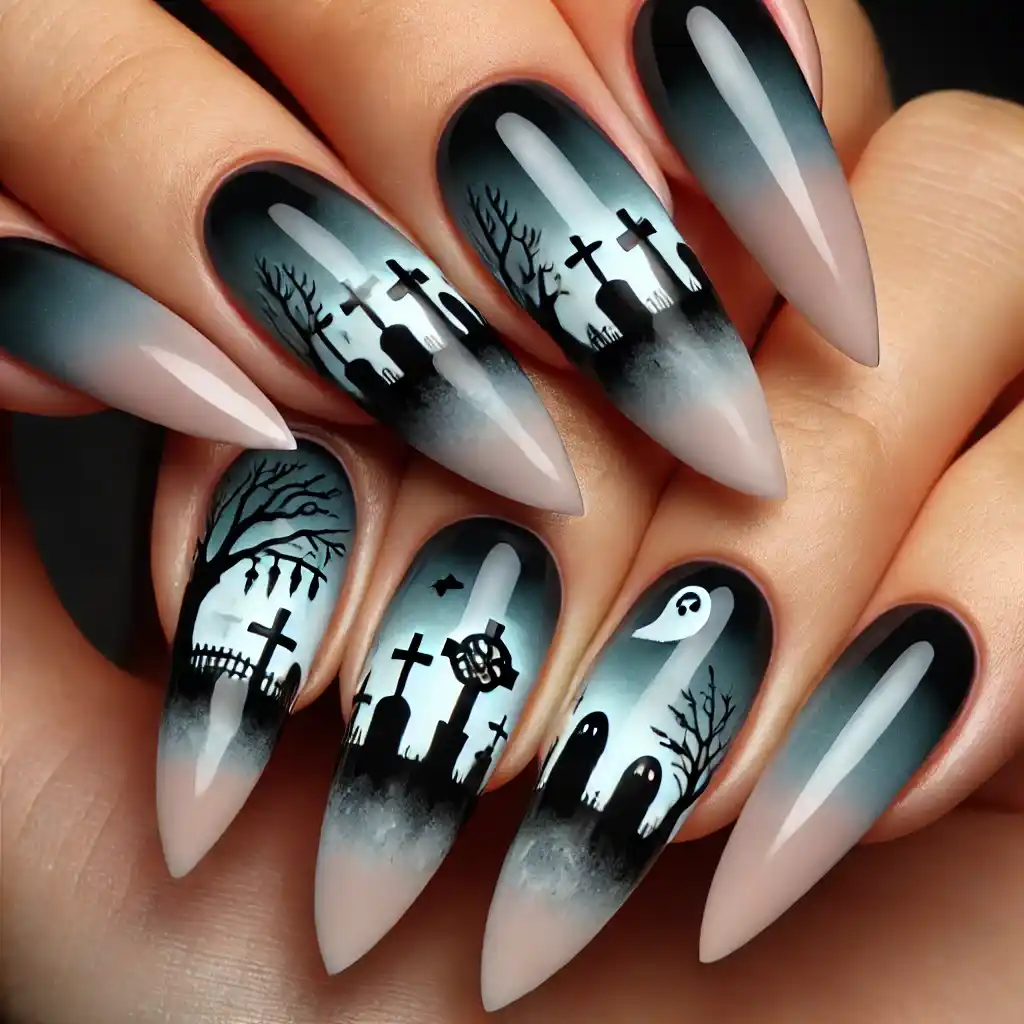
Set a spooky scene with tiny gravestones, crosses, and ghosts in a misty graveyard. A gradient background from gray to black adds depth to this haunting design.
Steps to create nail design:
- Start with a gradient background from gray to black, using a makeup sponge.
- Use black polish to draw tiny gravestones, crosses, and ghosts on your nails.
- Add small white highlights to create a misty effect.
- Seal the design with a clear top coat.
30. Witching Hour
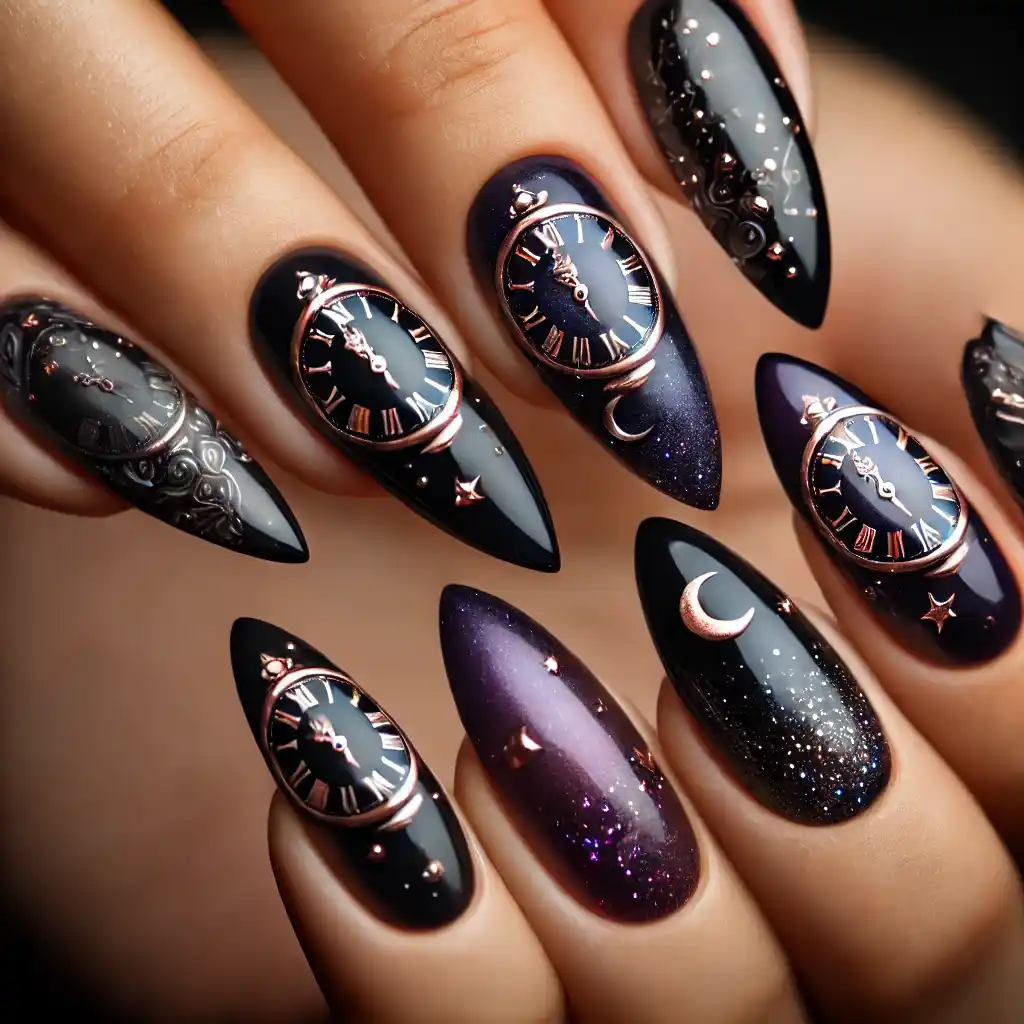
Mark the witching hour with clock faces pointing to midnight on a dark base. Add some stars or moons for an extra touch of magic and mystery.
Steps to create nail design:
- Paint your nails with a dark base like black or deep purple and let it dry.
- Use silver or gold polish to paint small clock faces pointing to midnight on each nail.
- Add small stars or moons around the clock for extra magic.
- Finish with a shiny top coat.
Conclusion
Creating Halloween nail designs is a fun and creative way to get into the spooky spirit of the season. With these 30 unique designs, you have plenty of options to express your Halloween style, whether you prefer something subtle and chic or bold and eerie. Each design offers its own blend of spooky charm and stylish flair, perfect for almond-shaped nails. By following these simple, step-by-step instructions, you can achieve a stunning Halloween look right at home. So grab your nail polish, let your imagination run wild, and enjoy bringing these hauntingly beautiful designs to life. Your nails will be ready to cast a spell this Halloween!


One thought on “Chic and Spooky Halloween Nails Ideas for a Stylish Holiday”