Introduction
Do your toes feel left out during the winter months? With the chilly season rolling in, it’s easy to neglect our feet, keeping them hidden in socks and boots. But what if you could make your toes a winter fashion statement, even when they’re peeking out of cozy slippers or at a holiday gathering? Winter is the perfect time to try new, trendy nail designs that bring warmth, joy, and elegance to your look. From sparkling snowflakes to rich, cozy hues, these winter toe nails ideas will keep your feet looking fabulous all season long.
Let’s dive into 20 trendy winter toe nail designs that will make your feet as stylish as your holiday outfit!
Table of Contents
20 Cute Winter Toe Nails Designs
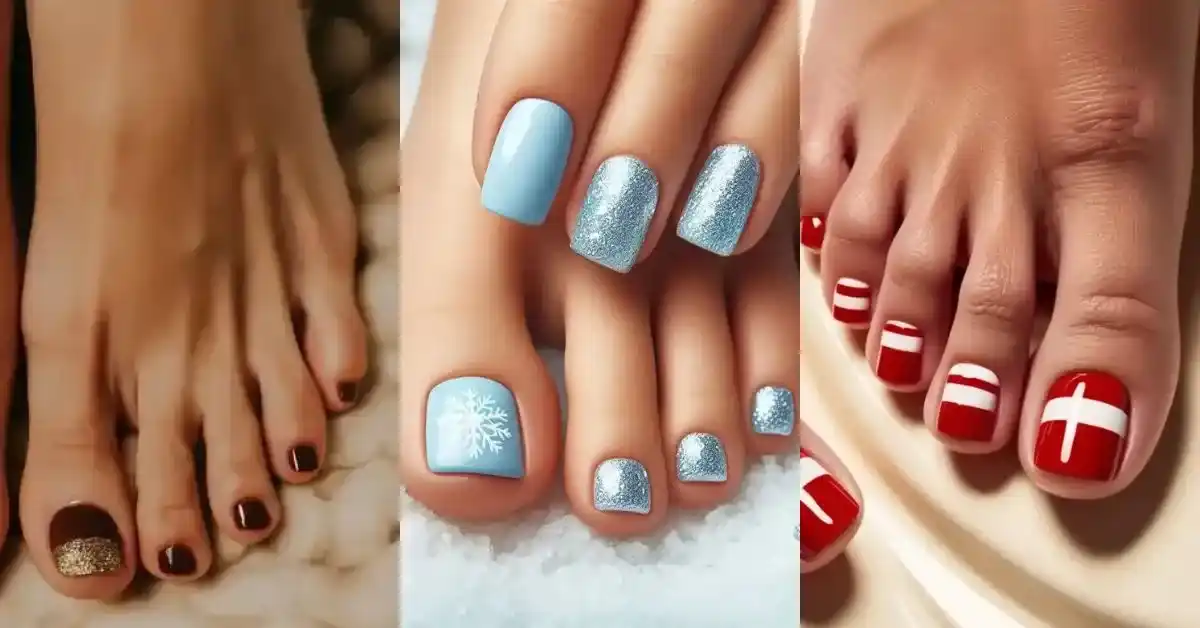
1. Icy Blue Sparkle

This frosty blue shade with a hint of sparkle captures the essence of a cold winter day. Add a touch of glitter on the big toe to create a shimmering snowflake effect that’s perfect for any winter occasion.
To make design:
- Apply a light blue nail polish as the base color on all your toes.
- Wait for the polish to dry completely.
- Once dry, take a silver glitter polish and gently dab it onto the big toenail to create a sparkling effect, like frost.
- Let everything dry and finish with a clear top coat to seal the design.
2. Matte Cranberry Delight

Deep, matte cranberry is the ultimate winter hue. This sophisticated shade gives a warm, inviting look to your toes, perfect for cozy nights by the fire or a holiday gathering with friends.
To make design:
- Start by painting your toes with a deep cranberry polish.
- Let it dry, then apply a matte top coat to remove the shine and give it a velvety texture.
- Make sure each toe is fully dry before wearing any shoes to avoid smudges.
3. Snowflake Silver
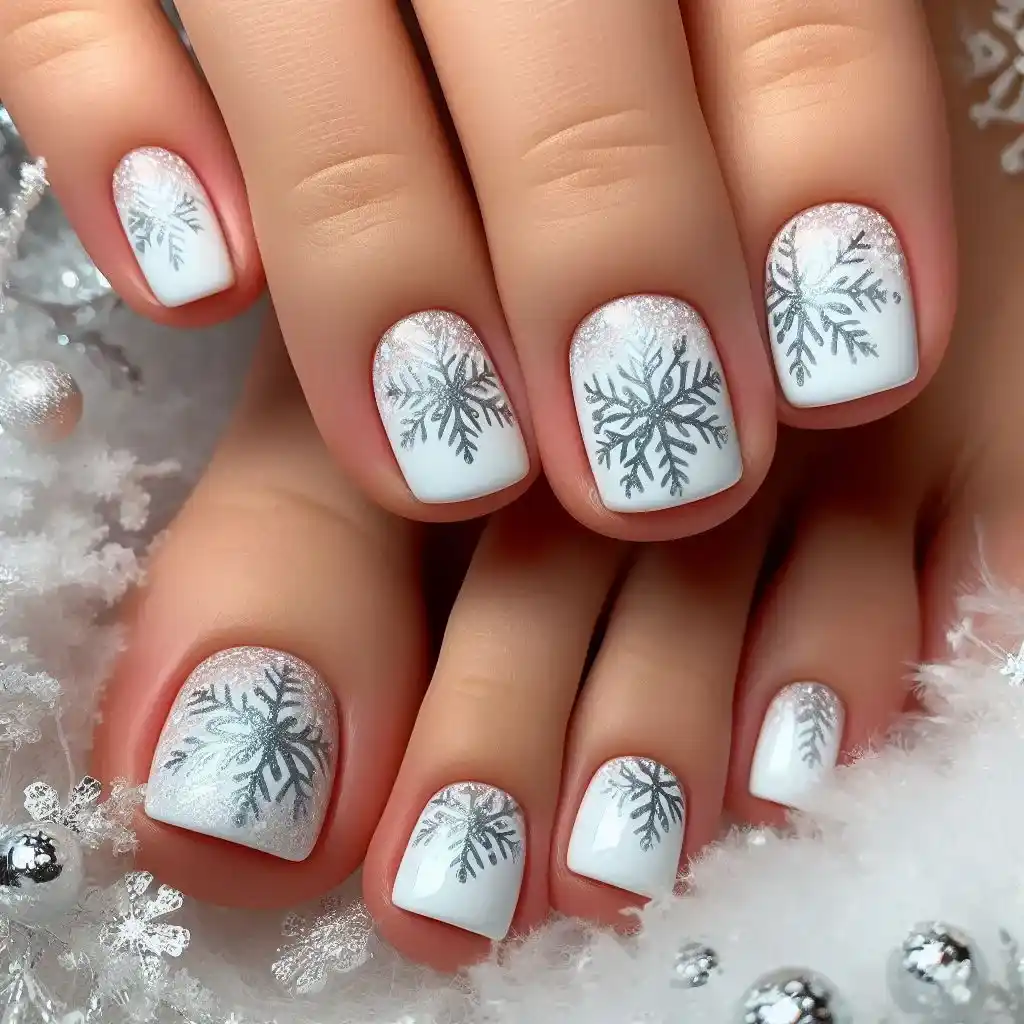
Nothing says winter like silver snowflakes against a cool white background. This design uses delicate snowflakes on a soft white base, perfect for embracing the winter chill while keeping it classy.
To make design:
- Paint all of your toes with a white base color.
- After the polish dries, use a thin brush or nail stamping tool to draw delicate silver snowflakes on your big toenail.
- Let it dry and cover with a clear top coat to protect the snowflake design.
4. Frosted Forest Green
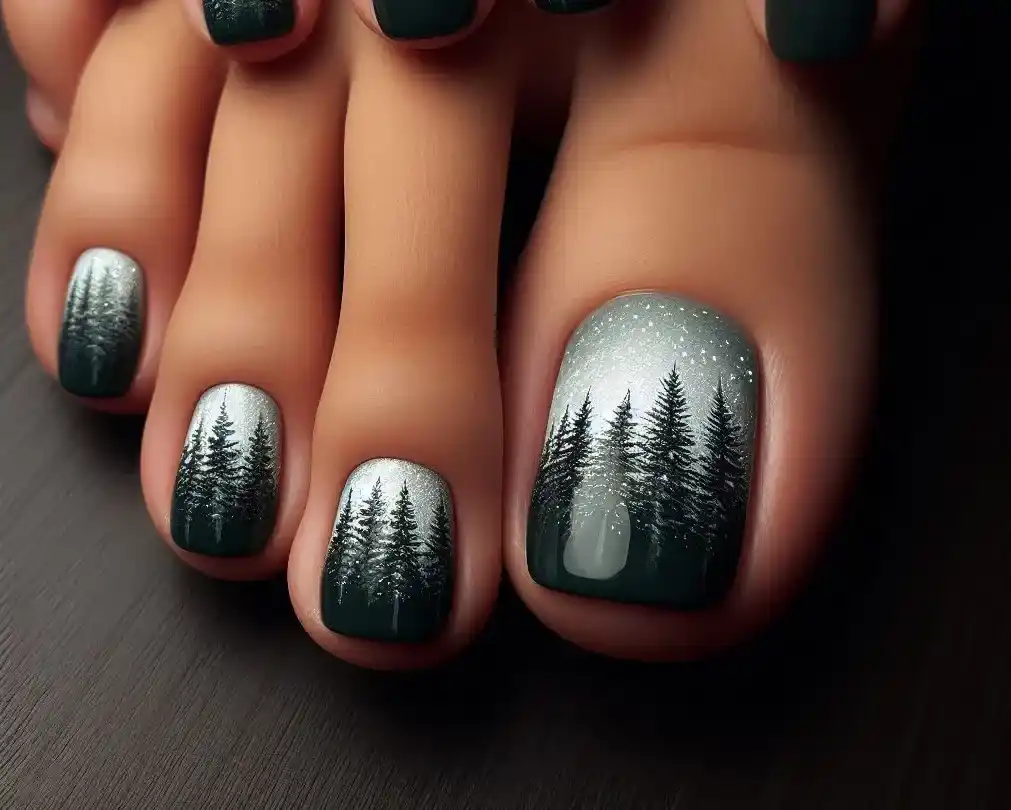
A rich, deep green reminiscent of pine trees adds a festive touch to your toes. Pair it with a frosty shimmer topcoat for a look that’s as elegant as it is wintery.
To make design:
- Apply a dark green polish to your toes, making sure to cover the whole nail evenly.
- Once the base is dry, add a light layer of silver shimmer to create a frosty effect.
- Seal with a top coat for a shiny finish.
5. Candy Cane Stripes
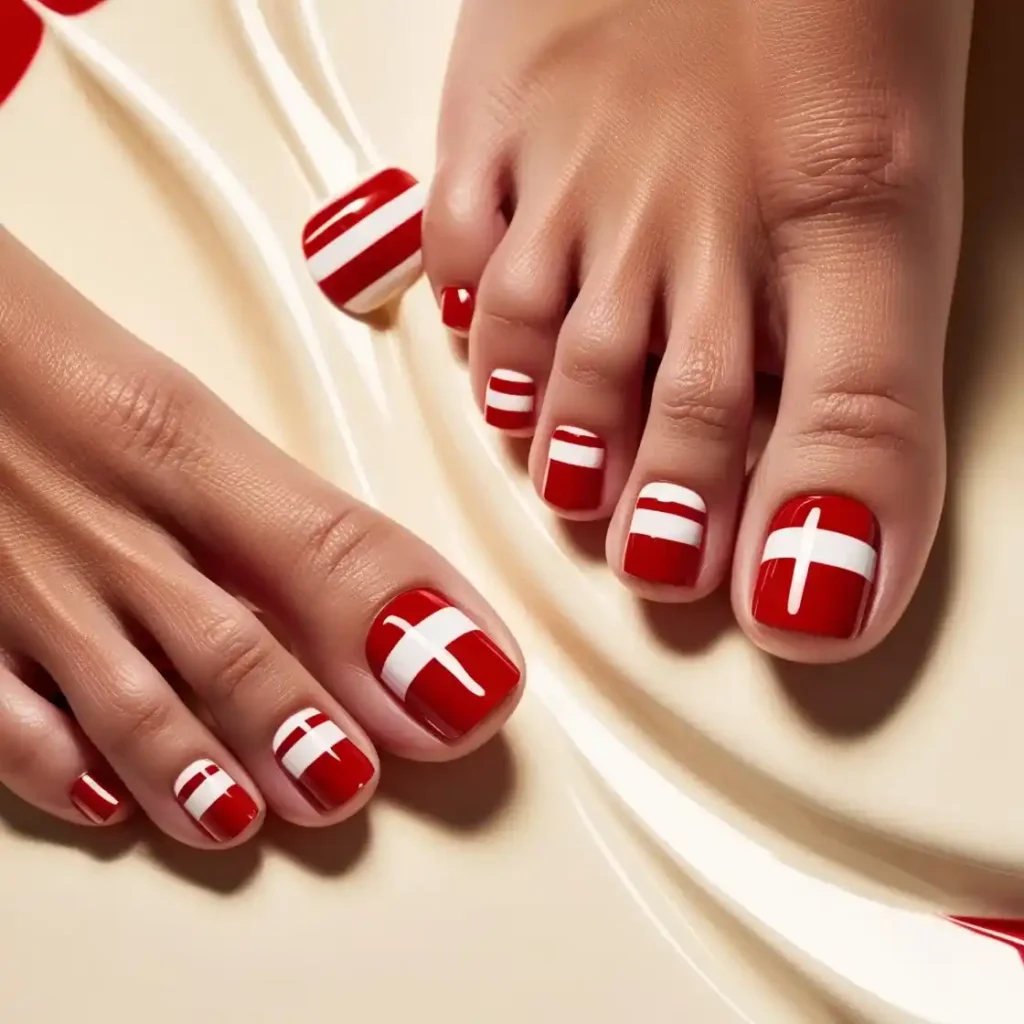
Get into the holiday spirit with candy cane-inspired red and white stripes. This playful, cheerful design is a classic and adds a fun twist to your winter toe nail game.
To make design:
- Start with a white polish as your base and let it dry.
- Using a thin brush or tape for clean lines, paint red diagonal stripes on each toenail to mimic a candy cane.
- Wait for the polish to dry and finish with a clear top coat.
6. Plush Plum

A deep plum shade is ideal for those who prefer a more understated, yet stylish look. This versatile color can be worn all season long, complementing any winter wardrobe.
To make design:
- Apply a rich plum-colored polish to each toenail.
- Let the color dry completely to avoid any smudging.
- Apply a top coat for extra shine and protection.
7. Shimmering Snow

Let your toes glisten like freshly fallen snow with a glittery white polish. This sparkling, icy look will catch the light, adding a little magic to every step you take this winter.
To make design:
- Use a white polish as the base color for your toes.
- While the polish is still a little wet, sprinkle fine silver glitter on the big toenail for a sparkling snowy effect.
- After drying, finish with a top coat to keep the glitter in place.
8. Midnight Navy Elegance

For a bold, chic winter look, navy blue is the way to go. This deep shade is sleek and stylish, offering an elegant vibe that’s perfect for winter nights out.
To make design:
- Apply a navy blue polish to your toenails.
- Allow the polish to dry completely, then apply a clear, shiny top coat to give it a sleek look.
- Optional: Add tiny silver dots using a thin brush to represent stars on your big toenail.
9. Frozen Lavender

Lavender may be a spring color, but with a frosty topcoat, it transforms into a winter favorite. The soft purple hue with a cool shimmer will have your toes looking like they just stepped out of a winter wonderland.
To make design:
- Start with a soft lavender polish on your toes.
- After it dries, add a layer of iridescent shimmer polish on top to give it a frozen look.
- Finish with a clear top coat to keep everything in place.
10. Glittering Gold

Gold polish adds a touch of glam to your winter toes. Perfect for holiday parties or New Year’s Eve, this design will make your feet the center of attention, even if they’re tucked away in heels.
To make design:
- Apply a metallic gold polish to your toenails.
- Wait until the polish dries, then add a fine layer of gold glitter polish on the big toenail for extra sparkle.
- Seal with a top coat to keep the glitter from falling off.
11. Velvet Burgundy

Burgundy is a rich, timeless color for winter. Add a velvet finish to create a soft, luxurious texture that feels as cozy as your favorite winter blanket.
To make design:
- Apply a dark burgundy polish to all your toes.
- Let it dry, then finish with a matte top coat to give it a soft, velvet-like texture.
- Ensure the polish is fully dry before moving around.
12. Arctic White

A crisp, clean white polish symbolizes the purity of snow. Simple yet striking, this design gives your toes a fresh look that matches any winter outfit.
To make design:
- Paint your toenails with a bright white polish.
- Let the base dry completely, then apply a second coat for an extra crisp look.
- Finish with a clear top coat for a glossy shine.
13. Nordic Knit Patterns
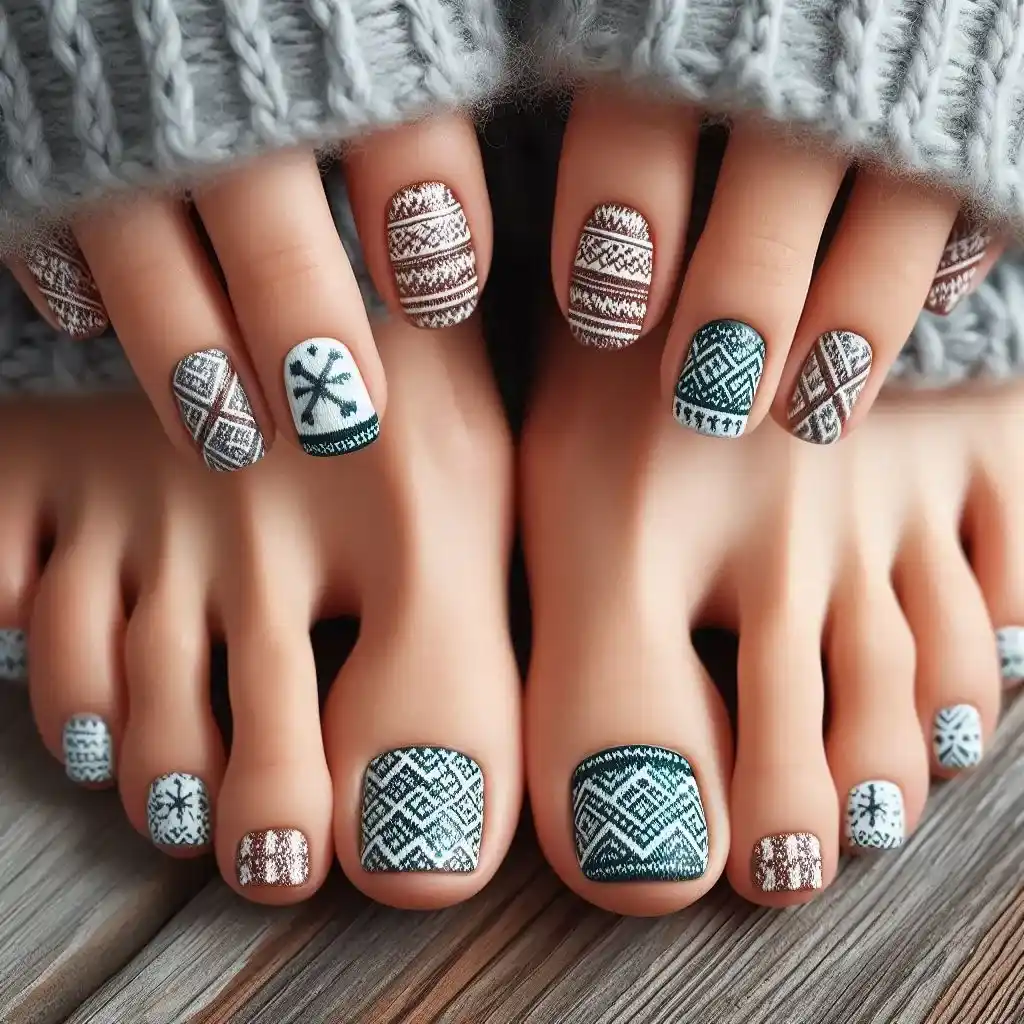
Inspired by cozy winter sweaters, this design mimics traditional Nordic patterns in shades of red, white, and gray. Perfect for bringing warmth to your toes, even on the coldest days.
To make design:
- Start by applying a neutral base, like gray, to all your toenails.
- Use a thin brush or nail sticker to create white and red knit-like patterns on your big toenail.
- Let everything dry, then apply a top coat to protect the design.
14. Cinnamon Spice

For a warm and inviting look, try a cinnamon-inspired shade. This reddish-brown hue is both unique and festive, perfect for the holiday season.
To make design:
- Apply a reddish-brown polish to your toenails.
- After the base dries, add a clear top coat for a glossy finish.
- For a little extra flair, apply a gold glitter accent on the big toenail.
15. Holly Berry Red
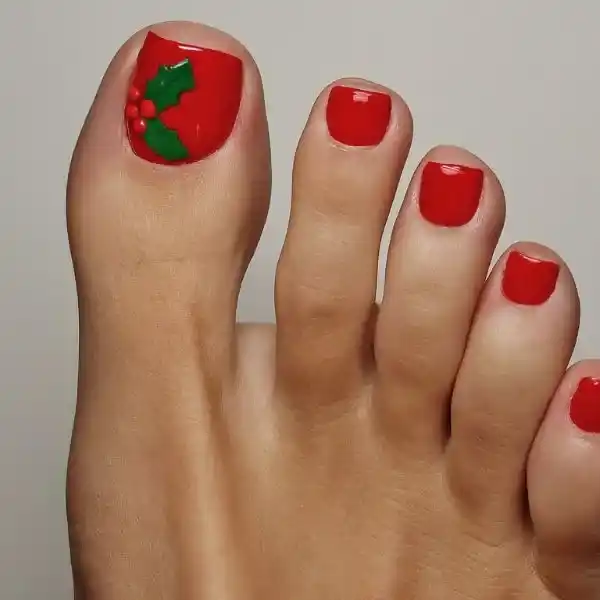
A classic red with a pop of holly green creates a festive, cheerful design. Add a tiny holly berry accent on the big toe to really embrace the holiday spirit.
To make design:
- Start by applying a rich red polish to all your toes.
- After the base dries, use a tiny dotting tool to add small green leaves and red dots on the big toenail to resemble holly berries.
- Finish with a clear top coat to seal the design.
16. Frostbite Ombre

An ombre effect from deep navy to icy blue gives the illusion of frost creeping up your toes. This sleek design is perfect for those who love bold, gradient looks.
To make design:
- Start by applying a dark navy blue polish on the base of your toenails.
- Using a makeup sponge, dab light blue polish starting from the tip to create an ombre effect.
- Finish with a clear top coat for a smooth transition between colors.
17. Metallic Champagne

Soft, metallic champagne polish adds a touch of glamour to your winter toes. The subtle sheen offers a sophisticated, festive look, ideal for both casual and formal settings.
To make design:
- Apply a metallic champagne polish to each toenail.
- Let it dry fully, then apply a second coat for extra shimmer.
- Finish with a top coat to lock in the metallic finish.
18. Twilight Glitter

A dark, twilight sky-inspired base with flecks of silver glitter mimics the night stars. This design is both mysterious and enchanting, making it a perfect match for winter evenings.
To make design:
- Paint your toes with a dark black or midnight blue polish.
- While the polish is wet, sprinkle silver glitter on the big toenail to mimic stars in the sky.
- Seal with a clear top coat to keep the glitter intact.
19. Cozy Cocoa
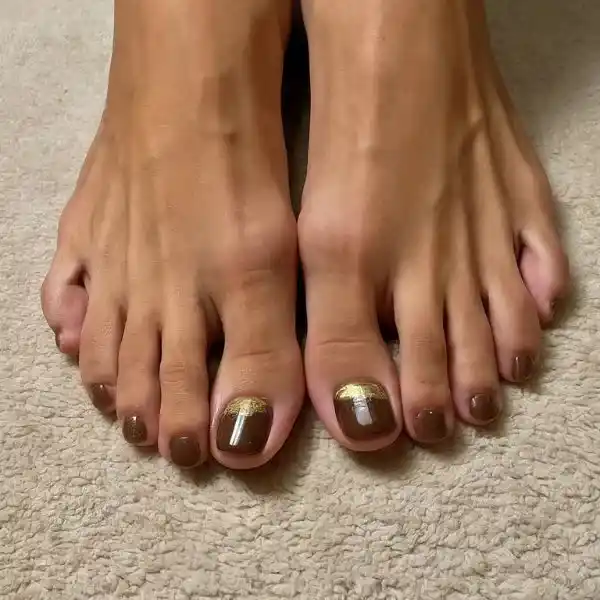
A warm brown shade brings comfort and coziness to your toes, reminiscent of sipping hot cocoa on a cold winter day. Pair it with a glitter accent to add a little sparkle.
To make design:
- Start with a warm brown polish as the base for your toes.
- Once dry, add a gold shimmer on the big toenail to give it a cozy, glowing look.
- Finish with a top coat to keep everything smooth and shiny.
20. Snowy French Tips
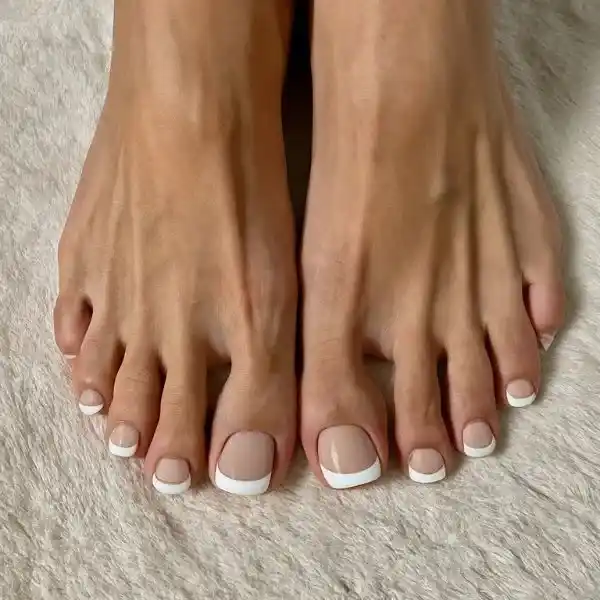
A winter twist on the classic French manicure, this design features soft white tips that look like snow resting on your toes. It’s a simple, elegant look that works for any occasion.
To make design:
- Apply a neutral base color, like beige or pale pink, to your toenails.
- Once dry, carefully paint white tips on each toenail using a thin brush or French tip stickers.
- Finish with a shiny top coat for a clean, snowy effect.
Conclusion
Incorporating these winter toe nail designs into your seasonal style will not only add a touch of festive flair but also keep your toes looking trendy and well-groomed throughout the colder months. Whether you prefer subtle, elegant looks like Velvet Burgundy or want to embrace the holiday spirit with playful designs like Candy Cane Stripes, there’s something for every taste and occasion. With these easy-to-follow steps, you can create salon-worthy nails right at home, ensuring that your toes are ready to sparkle, even when tucked inside cozy winter boots.
